|
At the beginning of
the 50's, the French Air Force asked for a multirole combat jet.
The national firm, Société Nationale de Construction Aeronautique du Sud-Ouest
proposed and won the concept with the Sud Ouest 4050 "Vautour"
program. Based on the fact that more than 80% of the components would be
common to all versions, the program was launched for the N ( N for Night
fighter, two seater), A (for Attack, single seater ),and B (for bombardment, two
seater with bomber in the glass nose).
|
Click on
images below to see larger images
|
|
|
 |

|
|
Clear parts |
Fuel
tanks |
Fuselage |
This important
versatile aircraft in French and Israeli AF history was only available for a
long time under Heller 1/50 scale poor kit. Hi tech from France put on the
market some years ago the N, and A
versions. When Hi tech stopped it's 1/48 modern jet line, molds were ready
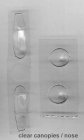
for the bomber and FM took the relay. The sturdy box contains mainly
plastic sprues for fuselage, wings, reactors parts; resin items for half engine,
interior, wheels, wells, interior airbrakes and forward/backward engines
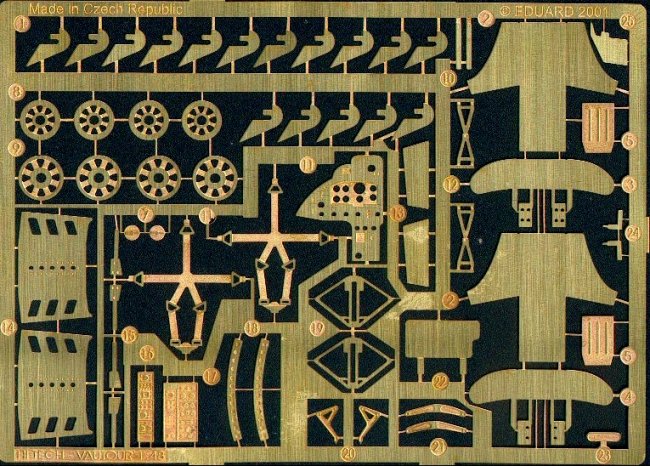
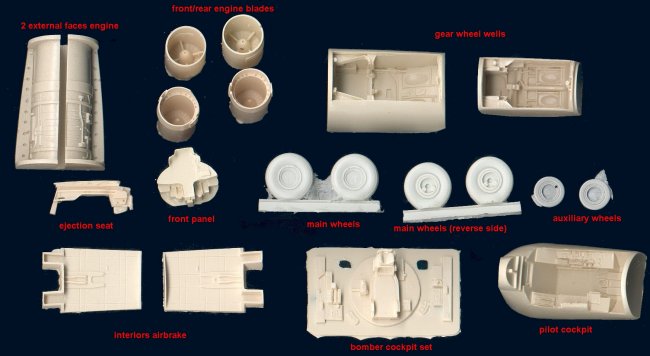
blades. The other items are vacuformed canopies (doubled), etched fret
from Eduard, instructions and decals. About the quality of the items, I send you
to my analys of the SMB2, it's almost the same; soft engraved plastic
(easy to cut), very accurate resin parts. The Eduard label speaks for
itself for the p/etched and if the clear parts need slightly sanding and Future
Floor to restore the transparency, some metal parts are always badly molded (my
front main leg was yet badly aligned, but initial metal mold from Hi-Tech had
been modified).The three major critics I formulate concern firstly the
instructions, that I qualify as "non existent" Exploded view, and some
drawings about interior lay out are not enough for a inexperienced
modeller (even for a Frenchman like me). A champion will need good
references (see the end of this article). Secondly the dry fitting
showed that without locator pins inside the fuselage and the reactors, the wheel
wells ,and the external reactor (which beared the auxiliary little wheels, like
the Harrier) will have to be perfectly aligned in the center to get right
straight gear legs. Take your time on these sequences!I personnally will
proceed as follows;
1) make
a external jig to get your fuselage perfectly vertical.
2) glue the gear (after a moment to clean the white metal and try to
make the main leg recovering the good attitude!) in the wells,
3) insert them in the half fuselages (taped, not glued), fix one side
temporally with "patafix" and after adjustment, insert cyano glue on
the other side. It will assure you a "half glued part". The
other solution is to replace cyano with Araldite 2 parts glue which will allow
you quiet adjustment.
|
|
Resin Parts |
The
instructions, even small, give you
area and dimensions to open the nacelles for good fitting of the
intakes/exhausts resin parts.
The more important area you'll have to deal with putty is located at the
junction where the wing trailing edge is in contact with the top engine
pod. Make a cut to insert it properly. (no step in this area).
You'll have to then scratchbuild a landing light on port side, nav lights
(red/green) on leading edge and "resculpt" the circular air intake at
the root of the fin. The fences on wings have good shape but
can be replace by thin card or aluminium sheet. I forgot to mention that
you can also add drains and wiring on gear legs. About the cockpit ,follow
the color instruction and engrave instrument under the Eduard panel (or adhesive
instruments if you have). The rear bulkhead will need some putty to match
the styrene contour. About the forward placed bombardier, after cutting the
entrance door (horizontal top) follow the sketch too. It's tiny as in reality,
and the Norden Bombsight can
be replace if you find the box item not enough detailed. For clear parts, I
obviously
recommend white glue. I could consider to take a interior print of them
and make my own clear vac over. But you have a double clear in the box.
|
Click on
images below to see larger images
|
|

|

|
|
|
Nacelle |
lower wings |
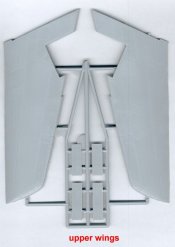
upper
wings
|
For the decals,
you'll have the choice between an Israeli and a
French aircraft. I am not used with the first decoration (Vietnam camo type) and
will turn to the second. If you follow me ,you'll have to prepare the
entire skin for an "metal" bird. FM molds were always the same at that
moment and sanding the plastic parts is the first task you'll
deal with. In the contrary, an "orange skin" effect will ruin your
job, but what a challenge!
For the French choice, you'll keep the stencils which are unique and replace at
least the roundels with Carpena/Colorado items. (my sheet has separate
blue center circles, but exterior yellow ring is not centered). If you are
not afraid with this challenge, you'll get a unique big French aircraft in your
collection. Not really recommended for a beginner, it's really not a
TAMIYA kit, but it's the only game in town for a long time! And after all,
how do we do 20 years ago? The basic and highly documentation on Vautour
are French mag REPLIC n°118( N version with color helpful photoscope), Wingmaster n°25 (A version) and the fabulous
monography from LELA PRESS http://www.avionsbateaux.com/
or http://www.greatmodels.com/ in USA
distributor
Jean-Paul
|
Click on
images below to see larger images
|
|

|

|

|
| Cast
Metal Parts |
Photo Etched Parts
|
Decals |
|
|