|
Me
again. Strange really, that after all these years, I’ve never made a model of
one of the most aircraft-like aircraft in the world, namely the F-104
Starfighter. I thought it was time to rectify that, and with my new found
enthusiasm as a website contributor I decided to try out the Hasegawa F-104C to
compare the Hasegawa brand with the Airfix and Tamiya models I’ve been making
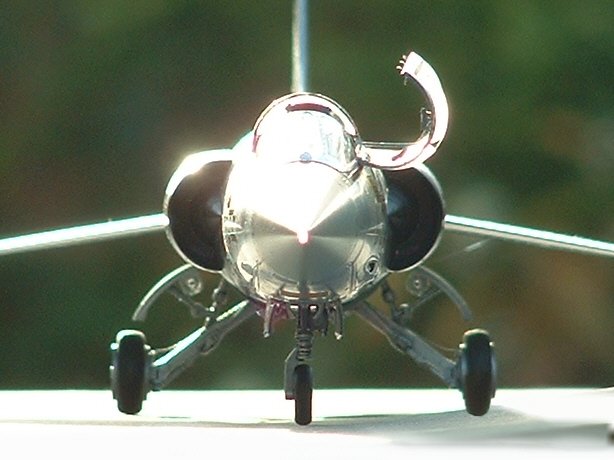
recently. I wanted to try a natural metal finish that was even shinier than the
Mustang I did recently, and settled on Alclad II Polished Aluminium as an
overall finish.
As
I started the model, I wasn’t too keen on the gaudy squadron markings supplied
with the kit, so I decided to finish it as a reasonable likeness of the plane
used in the film “The Right Stuff”, one of my all time favourite films. You
know the one – the plane that Chuck Yeager takes up to 104,000ft apparently on
a whim, and then promptly spins. As I’d already installed the cockpit, I
didn’t fancy changing the ejection seat for the type seen in the film, and it
was only after careful studying of the video freeze frame that I came to the
conclusion that the film didn’t use an F-104C at all, but from the looks of
the broader tail fin, spine anti collision light and ejection seat, it was
probably a G or a S with a new suit. Anybody out there who knows, feel free to
get in touch.
|
Click on
images below to see larger images
|
|

|
 |

|
I
used the Eduard PE set to liven up the cockpit, and must say that the instrument
panel really does look the part, and the seat harnesses look suitably chaotic. I
took some pictures of the cockpit before I installed it, but my computer crashed
and I lost them when it was too late to take any others. I installed brake lines
on the main undercarriage legs as per my references, and made a new HUD but that
was the extent of the extra detailing on this kit. I left off the wingtip tanks
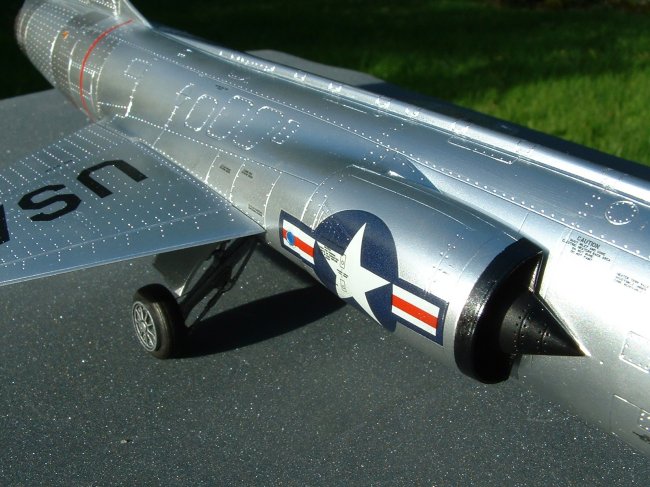
as per the film, and tried making my own decals for the first time. I did this
by scanning in the buzz codes from the decal sheet to get the numeral style,
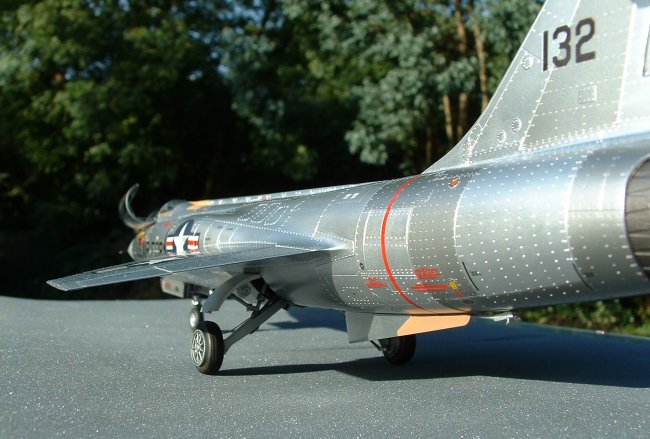
altering them to give the fictitious ‘132’ tail code used in the film,
printing them on decal film in my inkjet printer, and coating them with
Microscale liquid decal film as per the instructions. I used the kit stencils,
and I think it all worked out reasonably well.
One
thing that I did find awkward was the Alclad. When I made my Mustang, I
commented on how easy to use and hardwearing the Natural Aluminium finish was
– if only the same were true of the Polished
Aluminium! I did all the right things – I primed the surface, and rubbed it
all over with a paper towel to get it glass smooth before applying the Alclad.
Being a VERY shiny finish, the Alclad acted like gloss paint and had to be
sprayed at exactly the right pressure. (The ordinary Natural Aluminium was more
like a matt paint in use, and was very forgiving.) Once the paint was on, it
couldn’t be coated with Johnson’s to seal it, as I’d already tried that in
the wheel bays and it made the finish go grey and dull. In its naked state, it
wasn’t half as hardwearing as the Natural Aluminium, rubbing off easily during
the normal handling necessary to complete the model. The spine of this 104 has
been resprayed several times. (I think I’ll need a pretty good excuse before I
use Polished Aluminium again.) I also used Alclad Magnesium on the engine panels
and the tail, Pale Burnt Metal on the inside of the tailpipe, and Alclad Jet
Exhaust on the afterburner ring. These were just as hardwearing as I’d come to
expect.
As
a kit, I’d have to say I was pleased with my first Hasegawa, despite the
warped horizontal stabiliser. The only notably bad fit on the whole thing was
the intakes where they blend in with the rest of the fuselage, but it wasn’t
difficult to sort out. (The underside rear fuselage seam was a nightmare, though
– I had to sand it down to get it flush as the Polished Aluminium shows off
every flaw. In doing so, I removed most of the rivet detail, and spent a long
time with a micro drill putting them all back on again. Then I sprayed the
Aluminium, masked off, and sprayed the Magnesium. Then when I pushed the
afterburner ring into position, the damn seam cracked open again! Many
expletives, much filling, sanding, rescribing, masking and repainting.) The
undercarriage was beautifully detailed though, the cockpit wouldn’t have been
that bad without the PE set, and the overall stance of the model looks right.
I’d recommend it to anyone.
|
Click on
images below to see larger images
|
|

|
 |

|
Just
to call your attention to the glaring errors against the plane in the film, to
save e-mails – the ejection seat is the wrong type, some of the stenciling on
the nose is different, and the wings are the wrong colour. I was working from
the video to begin with, and had sprayed the wings aluminium and decaled them
before I studied the DVD (much clearer) and found that they should have been
gloss white as per the Hasegawa painting chart. D’Oh! Also, the eagle eyed
will have spotted a strange black triangle on the cockpit canopy. I’ve got to
be honest, I cracked it a bit while masking it and I had to use something to
cover it up! Only the true cogniscenti will know.
Just
for fun, I also played about with the picture publishing programme on my
computer, and put my Starfighter onto a background shot of RAF Fairford on an
untypically sunny day. Convinced?
Dean
|
Click on
images below to see larger images
|
|

|

|
 |
 |
|
|