|
Vac
kits are not very common and unfortunately not very loved by modelers. Maybe
some of them are afraid about the work they have to do to get a good result. I
learned that building vacuum kits is not as difficult, as everybody telling
about. Being creative in modeling and the satisfaction when it´s finished
may be only some good reason to try it out by yourself. And .... how much
Cornelius XFG-1 have you seen at your last modeling exhibition? 
History:
The Cornelius XFG-1 was a construction of the Cornelius Aircradt
Corporation in Daton, Ohio in 1943. It had been designed as a fuel-glider,
which should be towed behind bombers to increase their range. Two prototypes had
been build and tested. Its maiden flight was 11.Oct.1944. The first one
crashed during test flight and the end of the war stopped further developments
of this really unique aircraft.
The
kit:
As usual the kit parts are molded in female molds. The most important parts are
included (fuselage, wings, wheels and of course the canopy, but also the pilots
seat, bulkheads and landing gear).
Building:
I always start building vac kits by marking outlines of the kit parts with a
permanent marker. Using a NON sharpe knife I outline the parts two times and
just break them apart. After that I sand the parts down to their correct shape
(using sanding paper clued on a flat polystyrene card) . Now most of the work to
prepare the kitparts had been done. I just need several minutes for that work.
At this stage you nearly can compare it with every other injection molded kit.
|
Click on
images below to see larger images
|
|

|

|
|
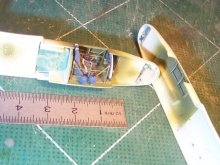
Detailing:
Detailing is the major difference between vacuumformed and injection molded
kits. Mostly you have to scratch build all the details you want to add. Some
modelers using small parts out of their "spareparts-box". My cockpit
had been fully scratchbuilt accept the pilots seat, which I took from another
kit. Unfortunately I only found 3 reference images of the Cornelius XFG-1 and
non of them showed details of the cockpit. I decided to build it, like it might
could have looked like. For the landing gear I used the kit wheels and
polystyrene tubes from evergreen. The original landing gears had been very
simple and so they are at my kit.
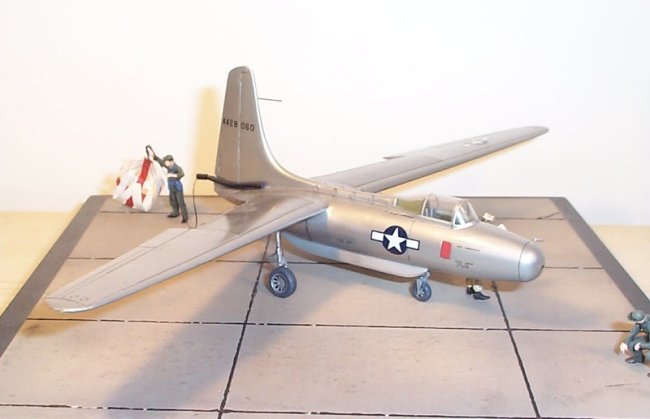
Painting:
This was my first try to use ALCLAD colours. I sprayed Aluminium overall accept
two panels on the upper side of the wings. It worked well, though I had to learn
that painting the hole plane black before, compared with a really fine surface
leads to the best result. After polishing and sealing the plane with Future, I
applied the decals which I also took from another kit.. The panel lines had been
washed with oil-paints (black and a little bit brown).
|
Click on
images below to see larger images
|
|

|

|
|
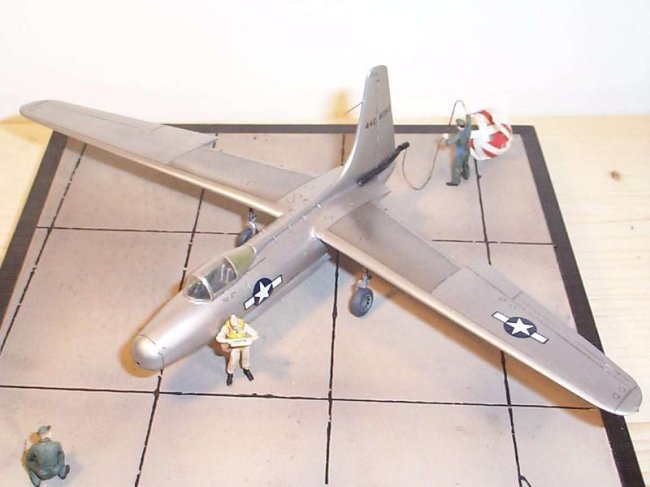
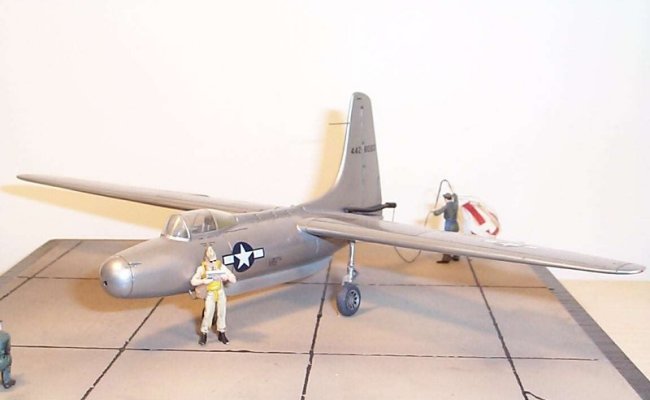
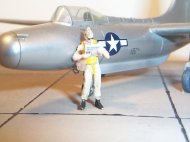
Conclusion:
I had a lot of fun building such a rare plane. I placed it together with
figures from the German company Preiser on a concrete plate which is also
available from Airmodel. The inflight picture had been made in front of a
"blue-screen". The clouds had been added using Corel Photo Paint 10. I
hope you liked it, like I liked modeling the kit 
with
best regards
Matthias
Airmodel Products
GERMANY
http://www.airmodel.de
|