|
Introduction
Last
summer, when my family and I decided to visit our relatives in Australia, I
decided to find some hobby shops in Melbourne because I could get more for my
dollar than I could in the United States. As a souvenir, I had to get a model
with Australian markings. I found a 1/200 Hasegawa QANTAS Boeing 767-200 and
this Heller F-18A Hornet kit. I have never built an F-18 before and this was a
big challenge. I came home with about 20 models that I had to buy a big bag to
carry them all on the trip back. This model is dedicated to my family in
Melbourne who helped me throughout our 3 week stay in Australia and gave us an
amazing stay in Melbourne.
History
I’m
not going to explain much about the Hornet because most people know tons about
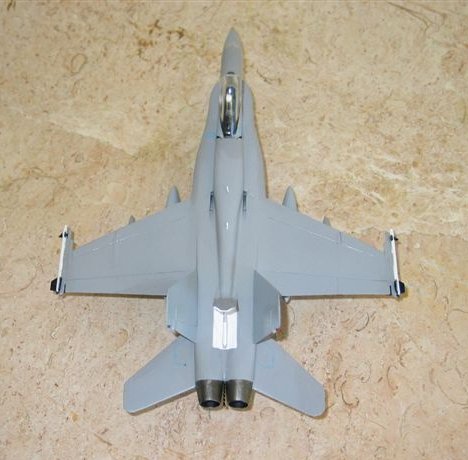
it. But I will explain about this specific bird. This is the McDonnell Douglas
F-18A Hornet of the Royal Australian Air Force. Its registration number is A21-3
and is based in beautiful Williamtown, New South Wales. Williamtown Air Force
Base is the home of the RAAF Hornet.
The
Kit
When
I bought this kit, it cost about $30.00 in Australian money, which is about
$19.50 in the United States. I have never heard of the company Heller at that
time so I decided that it would be nice to try out a new company. The box art
was amazing, so I thought that the model would be great too. I didn’t open it
until I got home. The plastic was very good, but the detail was bad. The cockpit
had some detail in it, but then exhaust and landing gear had none at all! I was
really surprised by this. The kit came with two decal versions: one for the RAAF
and one for the Spanish Air Force. The kit was fully loaded with AIM-9
Sidewinder, AIM-4 missiles and 4 other bombs which I am not familiar with. I’m
not a big missile expert so excuse me if I got the names wrong. You can see the
pictures of the missiles below. The kit came with a very detailed pilot and a
choice of an open and canopy or a closed one.
|
Click on
images below to see larger images
|
|

|

|
Construction
I began construction with the
cockpit. Not a lot of detail in there, but it was fine for me. One of my
favorite things about aircraft models is the figures. They are so much fun to
paint and turn out great at the end. I had problems painting the display
because I have never actually attempted detailing it before. In the end, it
turned out great. I had to put a lot of nose weights in the front to keep the
aircraft from tilting because of all the bombs and missiles. I assembled
the fuselage first, then the tail, and then the wings. I needed a LOT of
filler on the wings and tail because there were very wide gaps in lots of
places. This took me a lot of time and effort for sanding. Then came the
intakes, which had poor fit and needed lots of putty and sanding. When assembly
was finished, it was time for airbrushing. I had to mix Tamiya White and Tamiya
Sky Grey for the top, which was a little darker than the bottom. The paint went
on perfectly. I gave that a day or two to dry. Then came the most horrible part
of the construction. I used Tamiya White and Tamiya Light Grey to make the color
for the bottom. When airbrushing the bottom, I ran into some problems with the
airbrush and accidentally put too much paint on some parts and not enough on
others. I had to repaint with a brush to fill in the empty parts. After several
times of painting in certain places, I fixed everything. This took me a long
time to do. After this came the landing gear, which went on perfectly. Then, I
put on the missiles and bombs and made sure everything was perfect. I had to go
camping with my family for the weekend so I had to leave the project to sit
there for about 2 days. When I came back, I put on the canopy and made some
adjustments to the model so everything was perfect. Next came something I had
never used before, FUTURE!!!! I was unfamiliar with this product until my good
friend Joe Dempsey introduced me to it. I airbrushed the Future on and covered
the model in a cardboard box for 2 days so it could dry. Now my model was sealed
and looked beautiful. Then I saw some dark fingerprint marks on the nose so I
took off the Future on the nose with some Windex and painted over the
fingerprints. Then I put the Future on the nose again and let it dry in the box.
Next came the decals. The decals went on very well with no problems at all. I
put on a coat of SolvaSet on the decals to keep them from coming off.
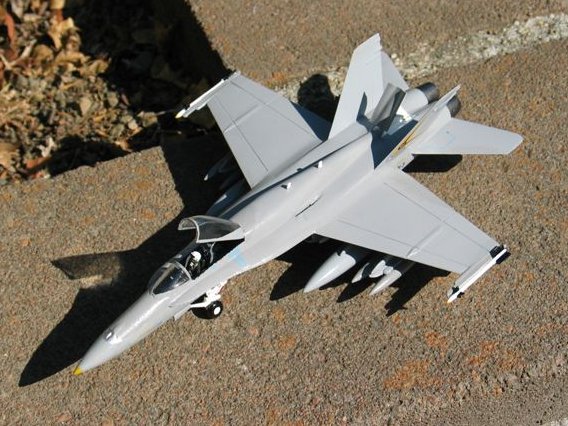
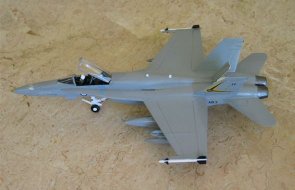
The final result looks really
good. If you guys find this kit somewhere, I recommend that you DO NOT buy it.
The fit is very bad and the detail is way below average. The first four letters
of the name of the company explains the quality of the kit. H-E-L-L. But if you
put in a lot of time and effort into it, the final result will be great. I spent
the most time on this kit than I have on any other kits. One of the
pictures was shot outside our apartment in the sun and the rest were inside on
top of a marble table in the lobby of the office of the apartment complex.
Photos taken with our new Cannon Power Shot G3 Digital Camera. Enjoy the
article!
Dmitriy
|
Click on
images below to see larger images
|
|
|

|
|
|