|
I
have wanted to do a British subject ever since visiting London in April 2002.
Daniel Butcher encouraged me to do a Tornado and sweetened the pot a bit by
sending me the Xtradecal sheet from the UK for free, and I finally tackled one
choosing 31 Squadron. Thanks Daniel!
This
was built for the RAF/RN group build and the first model I have built for myself
in over 5 years. I needed to do a lot of research, as I was not overly familiar
with the details of a RAF Tornado. It certainly was a team effort, as you will
see as you read.
|
The
kit is outstanding, and has many parts for a 72nd scale
subject. A large collection of weapons (bombs and missiles), pods and
tanks are included. The wings are moveable as well. The refuelling probe,
canopy and speed brakes can be posed open or closed. Many tiny antennae
are included, and I lost a couple in the process. Two decal subjects are
provided – one in the two-tone gray scheme, and the other in the
green/gray camo. Decals are also provided for stencilling for both camo
patterns (most I did not use) and all weapons, tanks and pods. The
under-wing-things decals are a nice feature. |
Click on
image below to see larger image
|

|
|
I
wanted to do the gray camo, and Bill Clark helped out with the colors. An
interesting thing happened when flat coating the model. I used Testors Dullcoat
and with the very high humidity we had been experiencing, it frosted slightly,
giving a whitish weathered look, actually doing 2 steps in one.
|
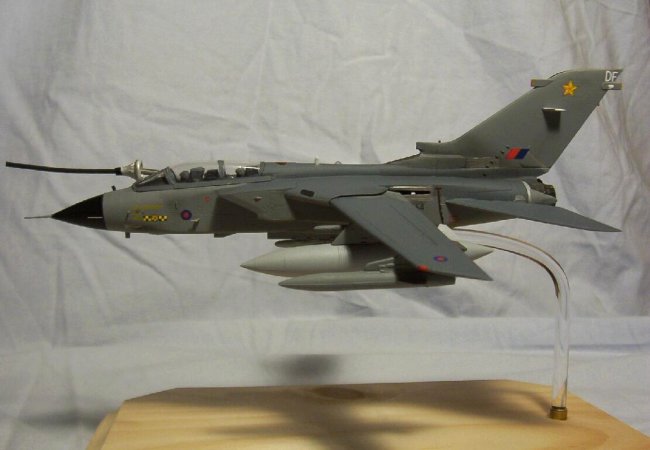
I
have no complaints in the assembly process. I decided to outfit my Tornado
for the SEAD (Suppression of Enemy Air Defences) mission, mounting two
ALARM (Air Launched
Anti-Radiation Missile) missiles underneath. I added two Hindenburger fuel
tanks, painted in the lighter F3 gray for variety, and the BOZ and Sky
Shadow pods. I lost the Sky Shadow pod after assembling it (still have not
found it), and Murph graciously supplied one to me.
I
added the signature Tornado dirty tail by lightly rubbing on charcoal
pencil dust with an old paintbrush. I ground down a bit by rubbing a
pencil on some sandpaper. I didn’t want to over do the weathering, and
added just a little on the left front fuselage, the cannon ports and wing
sweep areas as well. |
Click on
image below to see larger image
|

|
|
The
white antennae on the side of the tail were a bit tricky to get aligned with
each other. There are no locator markings, and I had to “eyeball it”. The
black leading edge was accomplished using a large black Sharpie marker. I simply
ran the marker along the edge of the antennae a few times to make the black
edge. Using the fatter type marker was much easier than trying it with the thin
type. I got the idea after reading that some people will use a red marker for
outlining landing gear doors on certain aircraft
I
added 2 crew members from the Airfix F-14 kit, and had to cut their bodies from
the waist down to get them to sit properly in the seats.
| I
wanted to build it in flying mode, and added a bit of variety by posing
the refuelling probe open (another nice option) and attached a drogue
basket to it. Sean Bratton provided the basket and I supplied the bent
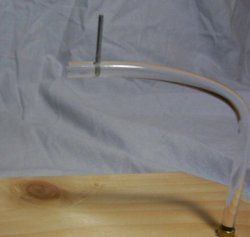
tooth pick hose. The landing
gear doors fit pretty well in to the openings. The curved acrylic rod was
the first attempt at it, as I normally use straight. It is heated with a
heat gun for a minute and then slowly bent around a cardboard jig I made.
This was modeled after Pat Hawkey’s technique in a past Fine Scale
Modeler article. The heat gun technique is from Lyle “Tilt” Katcher. A
pop rivet (also from Pat’s article) is separated and the large part is
inserted into the plane and rod is inserted into the rod as a stem. |
Click on
image below to see larger image
|
|
|
Special
thanks to:
-
Daniel
Butcher for the encouragement and decal sheet
-
Bill
Clark for the color information
-
Sean
Bratton for the refuelling drogue basket
-
Murph
for the Sky Shadow pod and pod configuration info
-
Lyle
“Tilt” Katchur for acrylic rod technique
-
Pat
Hawkey for his Fine Scale Modeler article on display stands
-
Steve
Bamford for publishing
Ken
|
|