|
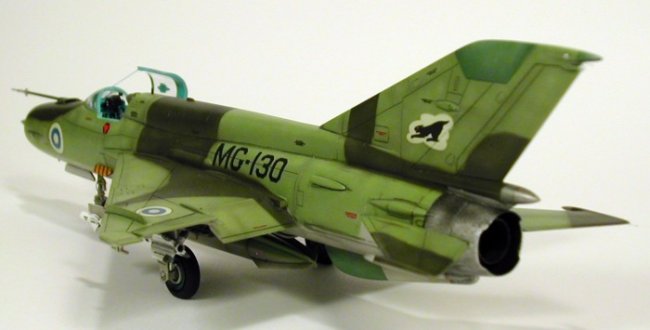
Migs at
Suomen Ilmavoimien (Finnish Air Force)
The first two MiG-21BIS were delivered on
September 21, 1978 (they were numbered MG-111 and MG-114). Total of 26 MiG-21BIS
has been delivered to the Finnish Air Force. Most of the MiG-21BIS were flown by
HavLLv 31 (Fighter Squadron 31) and some were in use with the TiedLLv (Recce
Squadron). The MiG-21BIS were numbered MG-111, MG-114 to MG-125, MG-127 to
MG-136, MG-138, MG-139 and MG-140. This model was replaced by the much more
capable F/A-18 Hornet.
The
kit
The kit comes in a big (for the scale) box with a
beautiful artwork, with individual bags for each sprue tree as well as for
decals and clear parts. As other kits from this brand, this is sharp, no flash
at all. With nice engraved details and as typical for japanese kits, only little
filler amounts were needed at the wing root and at the spine. The kit includes
separate pieces for the surface controls, allowing positioning the flaps and
ailerons up or down. Two clear parts are included to represent landing lights
(but i lost mine, ops!). The undercarriage is well detailed and only needs some
copper wire to looks good. A good kit for everyone at an affordable price.
|
Click on
images below to see larger images
|
|

|
 |

|
Building
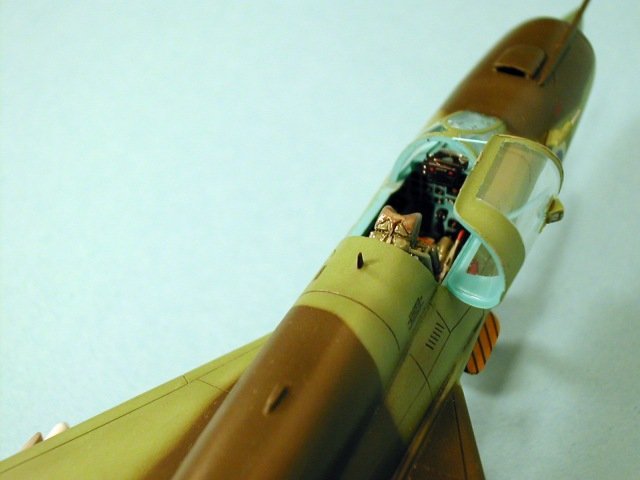
The construction follows the usual sequence by
building the cockpit in first place. This part of the kit is very well done,
raised details everywhere. The front instrument panel comes in clear plastic.
There is also representation for the lateral consoles. The kit includes three
decals for use instead painting the raised cockpit. The typical interior
blue-green was mixed using an unknown ratio of medium blue, emerald blue and
white from Gunze acrilycs until it looks good to my eye. Detail painting inside
the cockpit was done with Vallejo acrylics.
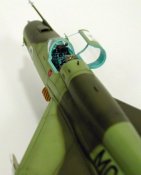
I added a KM1-M seat from True Details. This was
painted using also Vallejo acrylics and figure painting techniques with
progressive highlightings and finishing with a dark wash. An unreadable
lettering was added to the headrest sides from spares.
Some little details at the back of the seat were
scratchbuilt and a couple of tiny decals were added in this zone. The sidewall
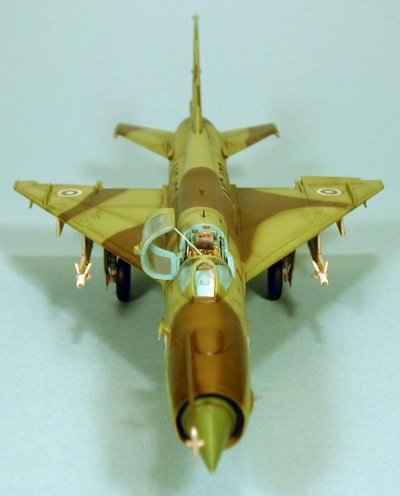
consoles were scratchbuilt using thin plastic. Also, the HUD area was
scratchbuilt because the naked appearance if built OOB.
The GSH-23 gun was detailed using hypo tubing and
replacing the ejectors with a thin shaped stripe of plastic, twisted to achieve
the holes at the front and at the back of them.
The ventral airbrake was only partially open
mostly due to its incorrect interior.
You need to thin the air intake as well as the
exhaust pipe to put them in scale.
All the air intakes were drilled out.
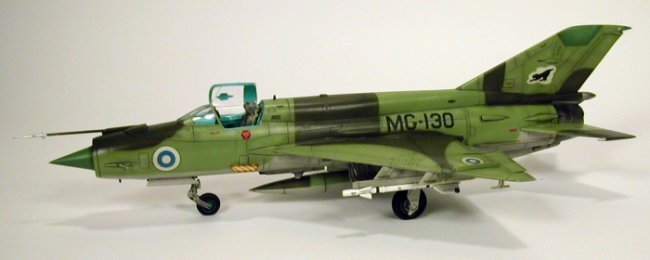
Painting
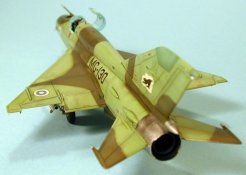
I used Gunze acrylics with the color references
indicated by Fujimi. The model was “primed” using the undersides grey. After
retouching the flaws sanding the model, undersides went again with grey. Then
the upper surfaces was covered with the camo using paper masks fixed with folded
stripes of masking tape. I tried to get some volume effect by spraying the base
color, then a lighter shade of the base color was sprayed inside all panels.
Once dry, a blend coat of the base color (very thinned with Mr Color laquer
thinner, which gives a translucent appearance to the coat) was sprayed to reduce
the contrast until the required effect was achieved. This process was repeated
for the two colors of the camo (this was also previously done with the
undersides grey with less contrast to avoid undersides faded appearance). The
entire model received two coats of Gunze gloss clear in preparation for the next
step.
Panel
lines
Allowed two days to cure the gloss coat, I
darkened the panel lines and recessed detail using an extradark sea grey + black
enamel wash. Once dry, clear coat again the whole model. Then I went into the
decaling process.
Decaling
& weathering
This process was accomplished using the usual
micro set/sol liquids. Allowed one more day for the decals to dry. I used a
sharp blade to “cut” the panel lines on the decals and then more micro sol
was used. Clear coat again the whole model (thanks Swanny!). Two days for the
coat to cure. I used again the wash over the new marked panel lines on the
decals, finishing with Gunze flat.
Some more weathering effect was achieved with
pastel chalks, not too hard because in photos, Finnish Migs seem to be well
maintained.
Finishing up
Tail navigation lights were made by drilling holes
in the correct places, painting them inside with Humbrol silver and then putting
a drop of clear epoxy coloured with food colouring, also the landing lights
under the wings were build with this method (with no colouring). The canopy was
added and the support for this was done with stretched sprue.
The AA-2s were painted flat white, clear coated,
dark washed, applied decals from spares. Surface controls were painted with a
graphite pencil. I finished AA-2s with satin clear coat from Vallejo AIR colour
series. AA-2s lenses were made by drilling a hole at the nose, painting inside
flat aluminum and adding a little drop of clear epoxy, as with the
navigation/landing lights, is important to be sure that we use an epoxy that
doesn't tends to yellowing and remains clear. Look at the product label.
The antennas you can see in the FAF Migs (below
the nose and at the back of the cockpit) were painted flat black and added. Also
the pitot tube and AOA sensor were added (the last from spares box).
Static discharges were made with fishing lines as
i learned here in Tools 'n' Tips section.
|
Click on
images below to see larger images
|
|
|

|
|
Since this is not only my first
airbrushed model but, in fact the first one in about ten years, I'm very proud
with the results.
Thanks
Special thanks goes to my friends Rafa and Alberto
for the photographic work (it really looks great, thanks guys!). Thanks goes
also to Tom Brunila for his photos about the subject. To all the people in the
ARC for your help, thanks guys you've always been there when I needed help. And
many many many thanks to Steve Bamford for making possible this great site,
which has made a huge contribution in my return to the “plastic business”.
|
Click on
image below
on left to
see larger image
|
|

|

|
Cheers and happy modelling...and flights!!
Juanjo
|