|
|||||||||||||||||||||
|
|
|
|||||||||||||||||||||
|
|
|
|
|||||||||||||||||||
|
Most modellers airbrush. It's a given, because it results in fantastic finishes not possible with brushing or spray cans. However, setting up to properly airbrush in your home can be difficult and expensive. Hopefully with some skill and scrounging it doesn't have to be. Here's how I built my booth for around 40 loonies. That's Canadian dollars for anyone not from the Great White North, eh. It may not be pretty but it works pretty well...
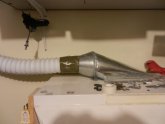
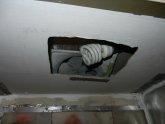
OK, let's start off. First, I picked up a used stove hood for $5 at a yard sale. Check. People are always tossing scrap wood panelling and short cuts of lumber out. Free. Best price there is... Purchased the adaptor for the hood vent $3.99+tax, say 5 bucks. Check. Length of bathroom vent hose, 6 bucks. Duct tape- ah, yes, the handyman's secret weapon- 6 bucks. Total so far, $22... Add some scrounged aluminum sheet, scrap plexiglass, and a cord and plug for $8, it ended up costing me $30.
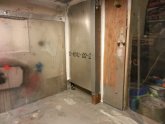
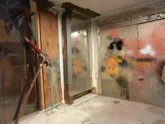
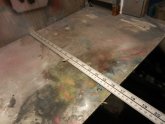
I built the booth to have a height of 16", depth of 16", and width of 31". This fits your average model quite nicely. Now here's the trick to making the setup work to about 80% efficiency: downdraft. I installed ducting along the booth sides and closed in the hood to force it to draw the air from the bottom of the booth instead of the top. Paint dust ad fumes settle, so that's where you want to pull them out from. Harv
|
||||||||||||||||||||
Photos and text © by Harv