|
Next
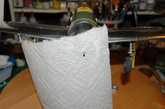
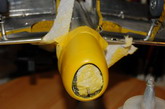
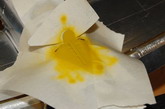
the cowl, it’s painted yellow and black so I start by blocking up the front of
the engine with paper towel.
Click on
images below to see larger images
|
|
|
|
|
|
|
|
|
Photo
03 |
|
Photo
04 |
|
Photo
05 |
|
Photo
06 |
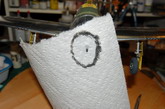
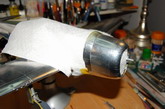
Then
back and underneath.
See
photos 07,
08,
09 and 10
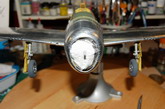
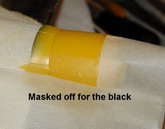
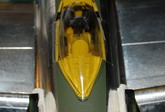
Spray
the yellow. I removed the masking a few minutes after spraying and left the kit
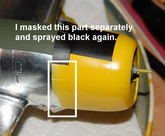
overnight. Next day I masked off the area of the cowl requiring the black (I
only have one masking picture because I forgot to take more), and sprayed the
black. I did this in two parts. The second part was masked off so I could paint
the cowl flaps black all the way around. I just found it easier to do it that
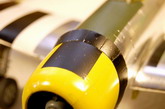
way than it was to do all the masking at once. Just as an aside, the nice thing
about foil underneath paint is that you can take your art knife and make some
nice chipped paint effects.
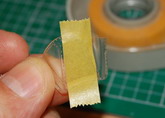
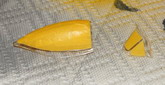
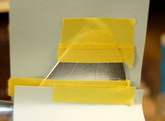
The
next step is to get some interior colour on top of the fuselage where the
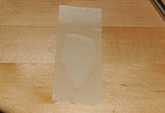
cockpit canopy will sit. I start by placing the canopy over some masking tape
(sticky side up), then cutting out the shape.
See
photos 11, 12, 13
and 14
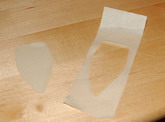
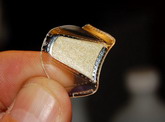
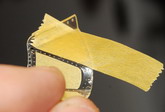
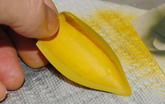
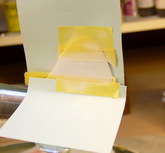
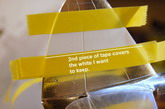
I
stick the tape on the table and cut off a very thing strip all around it. I just
need the tape to be slightly smaller than the outline of the cockpit canopy. Now
place that on top of another piece of tape and cut out the shape again. I want
to mention here that when I’m using regular masking tape on a kit I always
place the tape on my jeans 2 maybe 3 times, to cut down on the amount of
stickiness the tape has. Now you might say use the less sticky stuff right off
the bat (like green painter’s tape), I don’t because I can’t make the
green tape sticker if I need it, but I can lessen the stickiness of the regular
stuff, get it?
See
photos 15,
16, 17 and 18
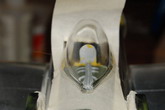
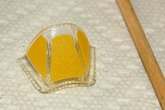
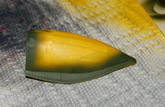
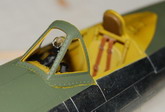
Place
the cut out piece of tape over the cockpit and eye it into position using the
canopy. After you’ve covered up the part you don’t want to paint, spray
away, remove the mask and you’re almost finished. I added a little wash then
brushed on some black powder to get it a bit of the used look.
See
photos 19 thru 23
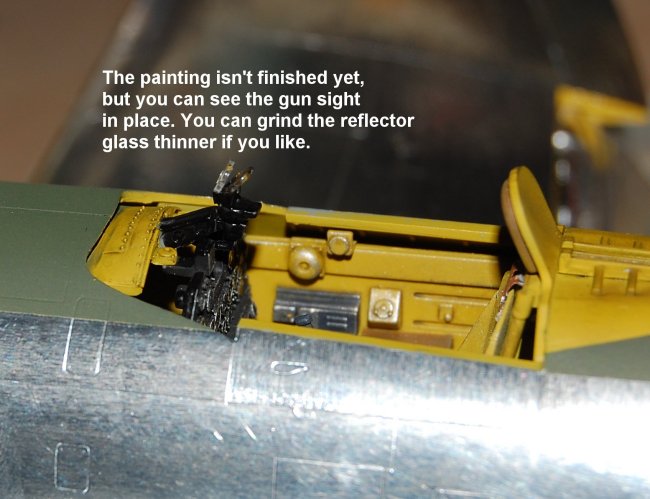
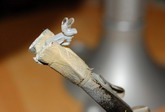
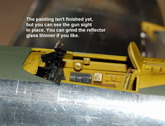
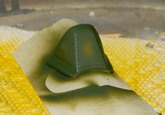
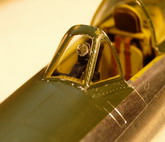
Now,
there are other ways to accomplish what we are ultimately trying to accomplish
here but this is the way I have photos for. Next I threw together the gun sight.
See
photo 24
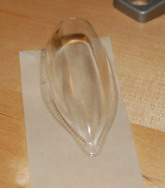
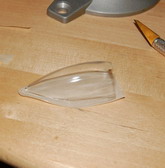
With
that done, let’s move on to one of the bigger mistakes I made while building
this kit, the cockpit glass. I should have prepared and installed the front
screen before I did the foiling and painting. Now it’s going to be a little
extra work but hey, that’s the way it goes.
See
photos 25,
26, 27 and 28
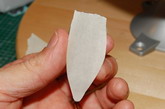
There
are many ways to mask canopies too; Liquid mask, canopy masks from Edwards and
the like, masking, Tamiya and Scotch tape. I’m going to use Tamiya tape for
this demo. Now the thing is you have to mask both inside and outside of the
canopy. Ok, you don’t have to… but I’m going to. If you want to avoid
masking the inside of the canopy, then spray the interior colour on the outside
of the masked glass before spraying the exterior colour. This way from the
inside you will see the interior colour.
See
photos 29,
30, 31 and 32
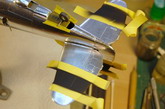
Just
place the tape on the glass, I use a wood stick to press it down and into the
grooves (a cuticle stick I believe), with a sharp knife trim the excess away.
This is not as hard as you may think. If you can, hold the glass against a light
source and just cut away don’t press to hard, just try to cut the tape but
don’t worry too much about cutting into the glass.
See
photos 33, 34, 35
and 36
Spray
on the colours and remove the masking as soon as you can, preferably after about
15 minutes. Though I don’t have pictures of it, the canopy didn’t exactly
fit (side-to-side), so this is another one of those “have patience” times.
Using Tamiya Thin, I glue just one side of the glass in place and left it
overnight. The next day, since one side is in place and dry, I can spread the
glass out so it fits the other side of the cockpit and hold it in place with a
little pressure from a plastic clamp. I applied Tamiya Thin and let it dry
overnight again. A bit of light sanding and touch up painting and that part is
done!
See
photos 37
and
38
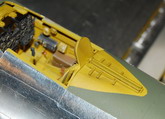
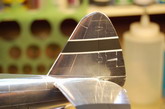
Next,
there is a black & white stripe on the tail. The kit provides a decal for
this however; I always like to paint instead if I can. Using calipers to measure
the size of the decal, I transfer that measurement to the tail. Using ‘Post
It’ notes and tape I masked off the area. I didn’t fret that much about the
position of the strip. Don’t get me wrong, it’s not that I don’t want it
to be correct but you can pretty much eye it into the position it needs to go.
See
photos 39,
40 and 41
After
that has dried for an hour, I masked off the black portion for painting. Spray,
remove mask, done. This is one of those times you want to use some flat clear
brushed on along the edge of the tape to prevent the black from bleeding through
to the white. I should mention that I also masked off the stripes on the
stabilizer at the same time so I could paint them. They are just black without
white trim.
See
photos 42 and 43
Larry Shred
Click on
images below to see larger images
|
|
|
|
|
|
|
|
|
Photo 07 |
|
Photo 08
|
|
Photo 09 |
|
Photo 10 |
|
. |
|
.
|
|
. |
|
. |
|
Photo 11 |
|
Photo 12
|
|
Photo 13 |
|
Photo 14 |
|
. |
|
.
|
|
. |
|
. |
|
|
|
|
|

|
|
|
|
Photo 15 |
|
Photo 16
|
|
Photo 17 |
|
Photo 18 |
|
. |
|
.
|
|
. |
|
. |
|

|
|
|
|

|
|
|
|
Photo 19 |
|
Photo 20
|
|
Photo 21 |
|
Photo 22 |
|
. |
|
.
|
|
. |
|
. |
|
|
|
|
|
|
|
|
|
Photo 23 |
|
Photo 24
|
|
Photo 25 |
|
Photo 26 |
|
. |
|
.
|
|
. |
|
. |
|
|
|
|
|
|
|

|
|
Photo 27 |
|
Photo 28
|
|
Photo 29 |
|
Photo 30 |
|
. |
|
.
|
|
. |
|
. |
|
|
|
|
|
|
|
|
|
Photo 31 |
|
Photo 32
|
|
Photo 33 |
|
Photo 34 |
|
. |
|
.
|
|
. |
|
. |
|

|
|

|
|
|
|
|
|
Photo 35 |
|
Photo 36
|
|
Photo 37 |
|
Photo 38 |
|
. |
|
.
|
|
. |
|
. |
|
|
|
|
|
|
|
|
|
Photo 39 |
|
Photo 40
|
|
Photo 41 |
|
Photo 42 |
|
. |
|
.
|
|
. |
|
. |
|
|
|
Photo
43 |
|