|
Editors note...#1, #2 #3 etc
refer to numbers in photos. [1],
[2],
[3]
etc refer to notes at bottom of article.
For years I have been using make-do
methods for scribing/re-scribing fuel tanks and the like, after losing detail in
the construction stage. The idea is based on the lathe principle, but
using easily obtained materials and not requiring workshop facilities[1]
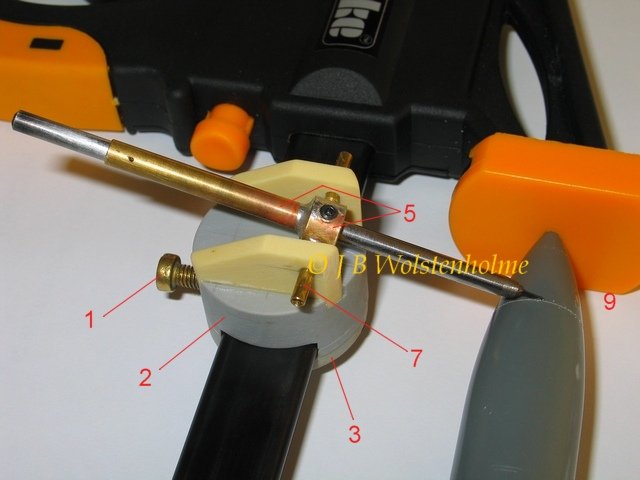
to produce. As can be seen in the photos, I have used a Clarke Spreader Clamp[2]
#1 2BA locking screw to locate sliding mechanism. Tapped[3]
for 2BA bolt.
The cut thread was then 'wiped' with thin cyano to strengthen. #2 Scrap
resin[4]
piece with formed channel to saddle clamp on bar (33 dia x 17mm) #3 Scrap
resin[4]
plate (33 dia x 4mm) drilled and fixed to #2 with panhead self taping screws.
Offset one screw to allow for locking screw #1. #4 Scrap resin[4]
'sidewalls'(4mm thick). Glued one side, then fitted second whilst feeding brass
rod pivots through holes for brass tubing. Used cyano glue. Brass tubes/sleeves
then fitted left and right. #5 Brass collet[5]
(Allen key grub screw to fix
scribing tool) and a length of brass tube, together with the brass pivot rods
(#6) were soldered into pre-drilled holes (at 180 deg) in collet, in one
operation. #6 Brass rods, need to be a 'snug' fit in #7 to prevent
sideways 'play'. I didn't have correct rod/tube sizes, so I reduced
diameter of rod to fit tube
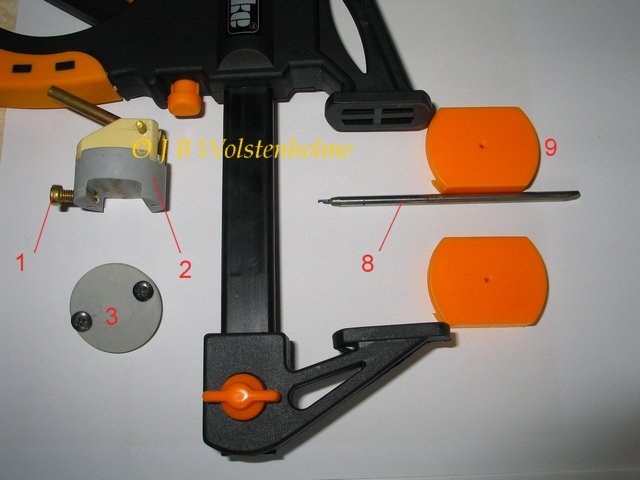
using sandpaper. #7 Brass tubes for pivot. #8 Scribing tool
ground from 4mm silver steel rod. It is secured in and removable from brass
collet/tube. Modify as necessary for commercial scriber.
#9 Removable clamp plastic pads. Drilled at centre points to take
tanks etc. If you drill an array of circumferential holes around the
centre points, it allows variations in component size/angle of scriber.
#10 Plastic (10mm) and 'pin', were removed from the inside to maximise travel of
'sliding mechanism'.
Click on
images below to see larger images
Notes:
[1]
Modeller's vice, hand drill, junior hacksaw, files/sanding block, micro torch
for soldering.
[2]
Available in 4 sizes; this is 300mm (UK supplier, Machine Mart). The button
gives lock release and the lever, finer jaws adjustment.
[3]
'Homemade tap', produced by cutting 4 slots x 8mm (at 0, 90,180, 270 deg) in a
2BA brass bolt and very slightly tapering the end with a file, to thread the
pre-drilled 4mm hole.
[4]
I keep all casting blocks from resin parts. These I think came from Aires stuff.
[5]
R/C aircraft modellers use these for wheel fixing.
J
B
|
|