|
When I submitted
Flankers in the past to ARC and other sites I was sent many complimentary
letters asking how I painted the engine areas and got the burnt metal
effects. I thought with all the interest in Flankers (1/32 kits, new
decals, group builds..) I would try to help others improve an important but
often understated part of painting these and other kits. Flankers have a
lot of bare metal and make a good example as well as being my favorite.
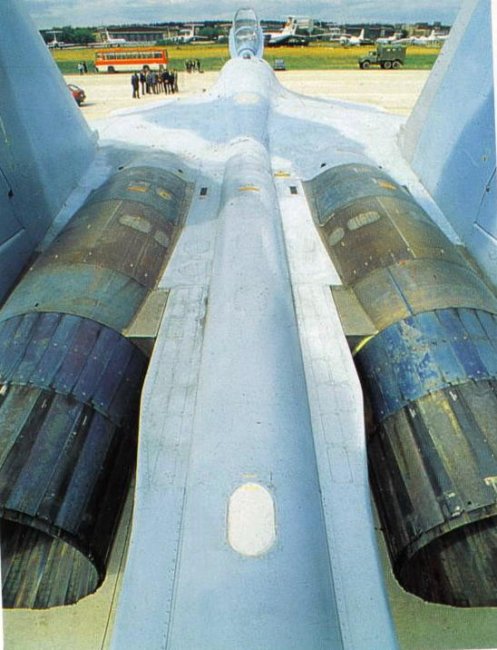
Loads of references
are helpful, each plane has different effects from usage. I chose several
clear ones that show a lot of discoloration (Su-35 from Concord book).
Then I pulled out every tin and bottle of silver paint, all shades and some
Tamiya clear blue, clear red, clear yellow and smoke.
|
Click on
images below to see larger images
|
 |
 |
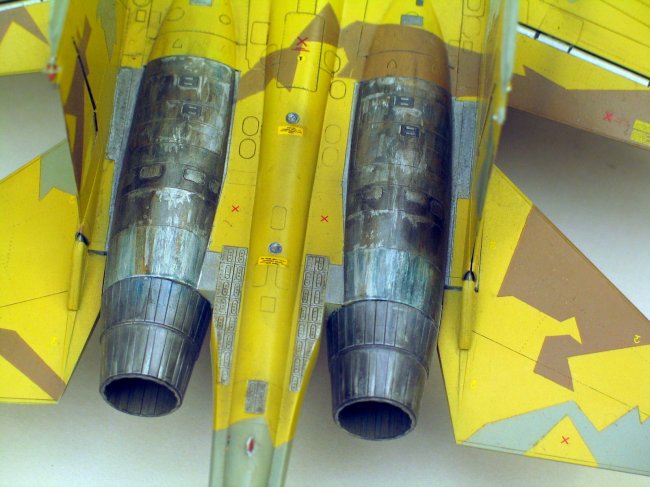
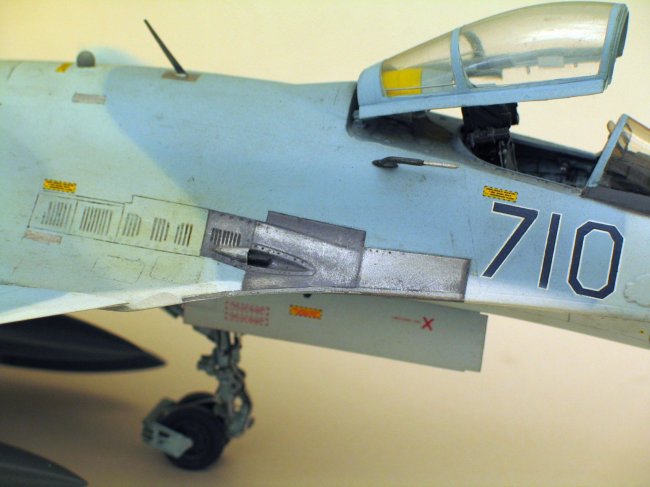
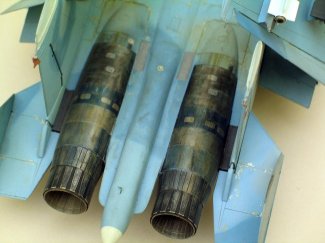
| Su-33 |
First I sprayed a
coat of Alclad, not too light or dark for the base, then masked off some of the
bigger panels and painted them a different shade. These could also be
brush painted if necessary. After the bigger panels I moved down to the
smaller ones, brushing various shades of lighter silver on them, using the
references as much as possible. This all makes the engine areas look more
interesting but a little too clean. It is also the end of exact and
controlled painting, the rest is rough and looser. To remedy this sterile,
clean look take a larger panel area and mask it near an edge of another panel
and dry brush some silver next to the edge. You can even put down some wet
paint and finger rub it around the masked border. The idea is not to
change the entire shade and color of the panels but to show a bit of
discoloration. Do this to a lot of them, not forgetting the bottom and
that some panels curve down and can be seen from the side as one piece.
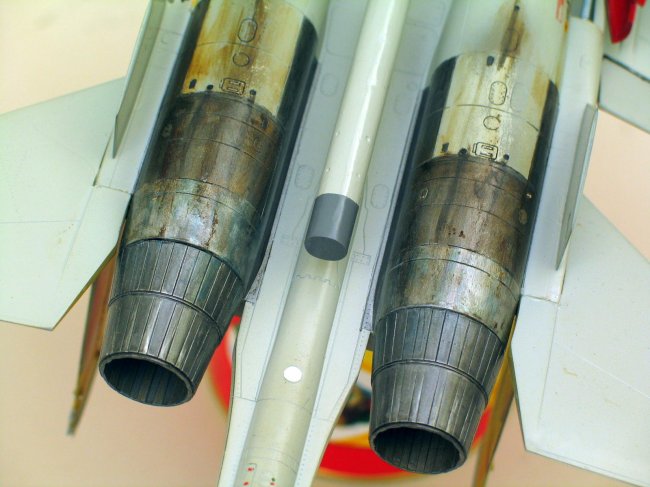
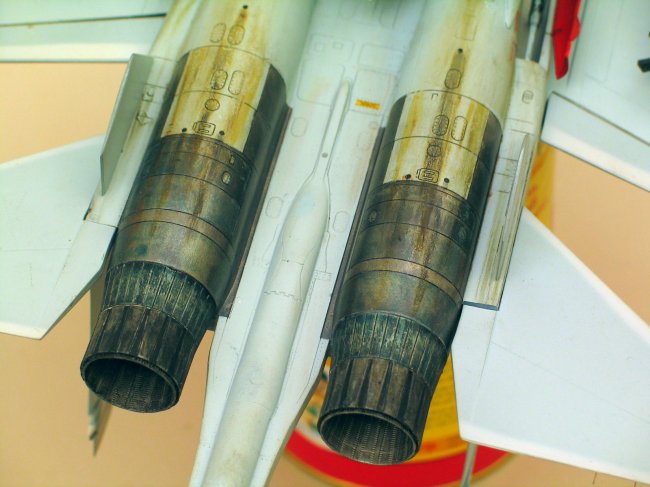
When this is
finished, scrape the panel lines and give the whole engine area a good
coat of Tamiya smoke to seal the paint and darken the panel lines.
I then use some clear blue/smoke mix and loosely brush it around the
hotter rear areas of the engines, even some random "turkey
feathers". Also seen on these references besides the blue stain
was a yellowish metal stain.
Again, a mix of some smoke,
clear yellow and a touch of red make a dirty gold stain that can be
brushed and smeared around an affected area. Black areas between the
turkey feathers can be roughly painted and rubbed with an enamel flat
black to sharpen up the burners. |
Click on
image below to see larger image
|

|
|
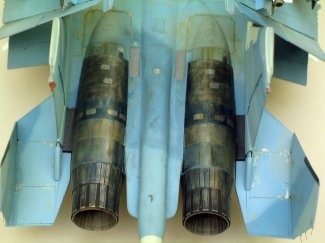
Su-35 |
|
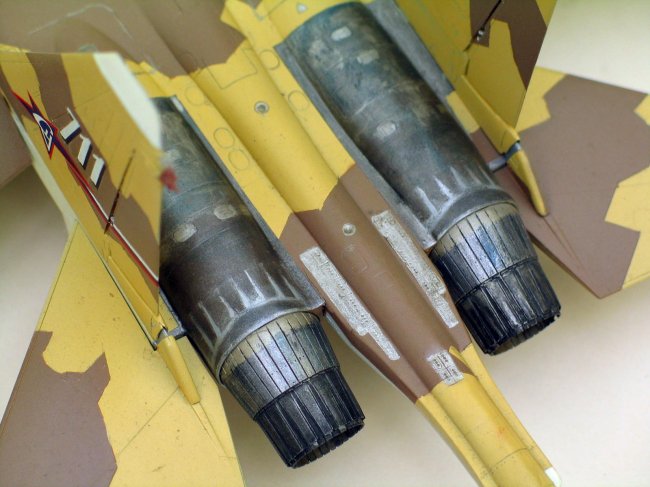
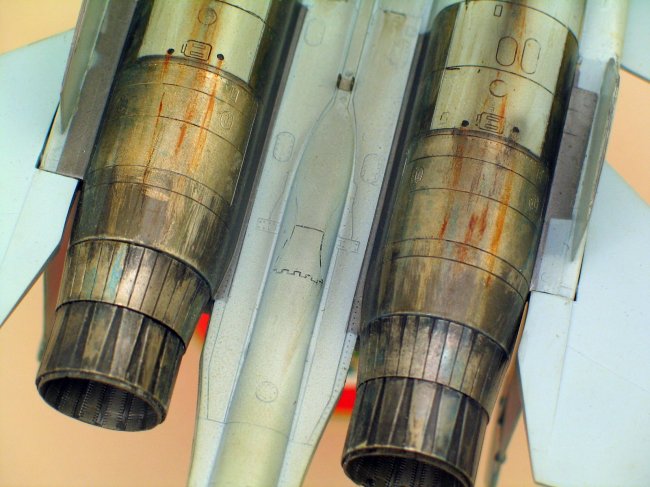
| Finally I take
raw umber tubed water color, as well as black and burnt sienna and start
to make oil stains and some more color effects. One way is to place
some drops of raw umber on a panel line and smear it back (windward)
across the other areas. Where there are drainage holes the same
thing, take some burnt sienna with a touch of black and put a drop on a
drain, let it sit a few moments and then smear it down like before.
On top or in another area add a drop of raw umber and black mix and smear
it down, it makes a nasty, oily greenish hue. This with some
airbrushed shading on top looks pretty good to me. If it goes bad
wet a cloth and rub it away and try again, the coats of smoke and clear
colors will protect the silvers from too much rubbing. |
Click on
image below to see larger image
|

|
|
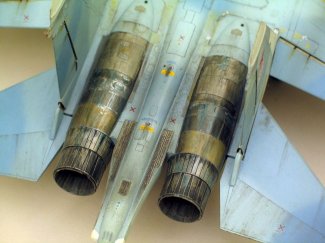
Su-27 |
|
|
Click on
images below to see larger images
|
|

|
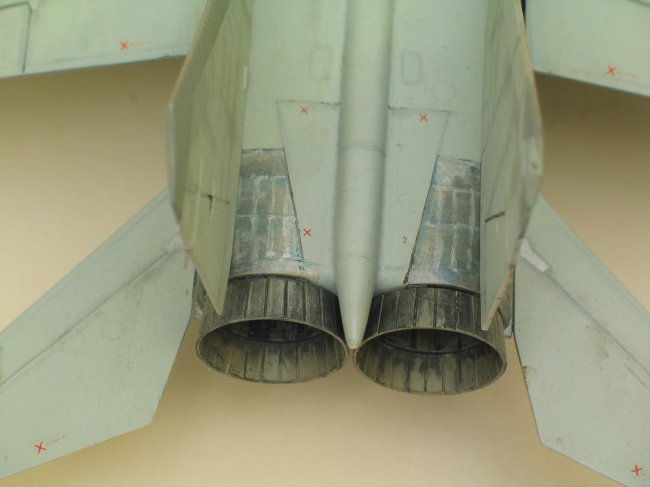
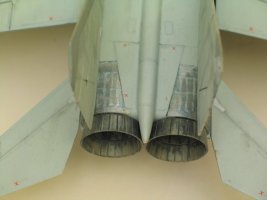
| Su-27 |
| All said these
combinations of clean colorless silvers and cool blues and warm umbers
make a nice reaction. Next to a camouflage pattern they start to
really look like metal which helps your overall paint scheme. This
technique can also be applied to smaller metal areas (Mig-25 photo) as
well.
I hope this is
helpful and relatively understandable. Good luck.
Paul Brown
|
Click on
image below to see larger image
|
 |
|
MiG-25
|
|
|
|