|
Photos By Steve
Bamford
Applying model putty to fill seams and gaps, and then sanding and filing to
shape is one of the most difficult aspects of scale model building. Often,
this process is messy, time consuming, and damages surrounding surface detail.
Results can be frustrating and discouraging.
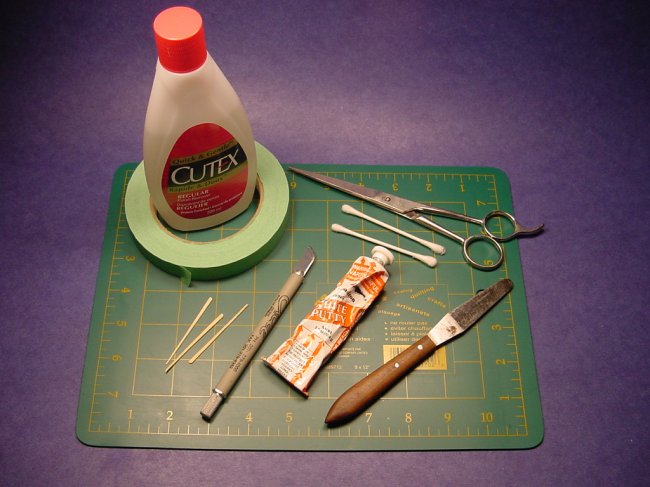
Here is a process that I have found to be consistently successful for certain
filling applications. It involves the use of readily available Toluene
based fillers such as Squadron White putty and Green Putty. Also required are
normal strength nail polish remover, and a few simple tools, as shown. Work
in a well-ventilated area!
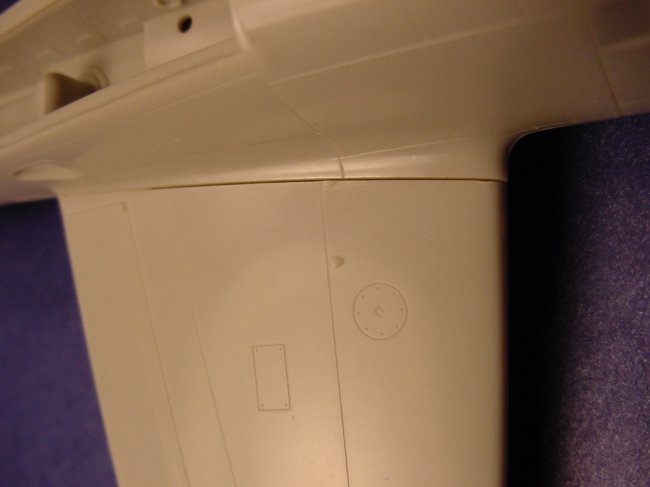
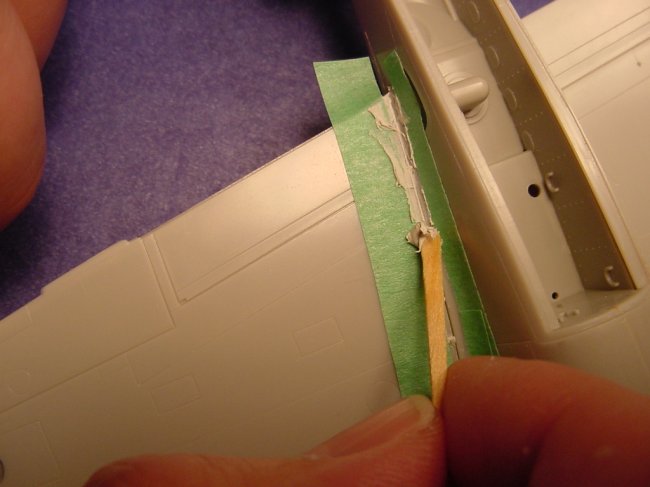
Here's the
offending wing root seam gap on our example......Hasegawa's 1/48th P-38J
Lightning.
|
|
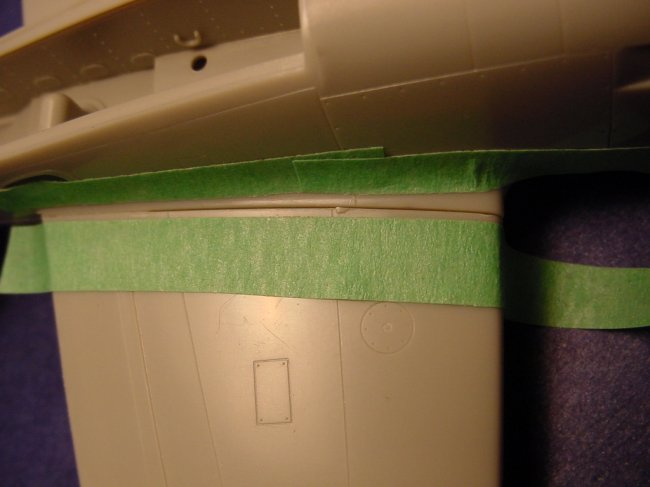
Basically, one
masks off the areas to be filled. This step prevents
errant filler from "etching" into the surrounding
plastic. |
|
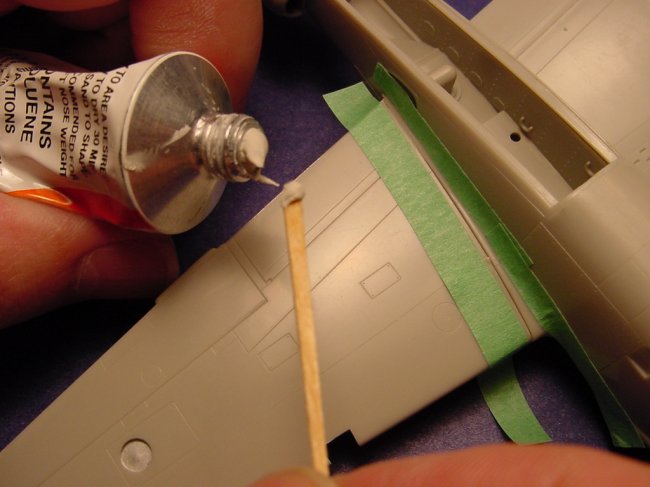
| Filler is
applied to our high-tech putty knife.....a toothpick. |
|
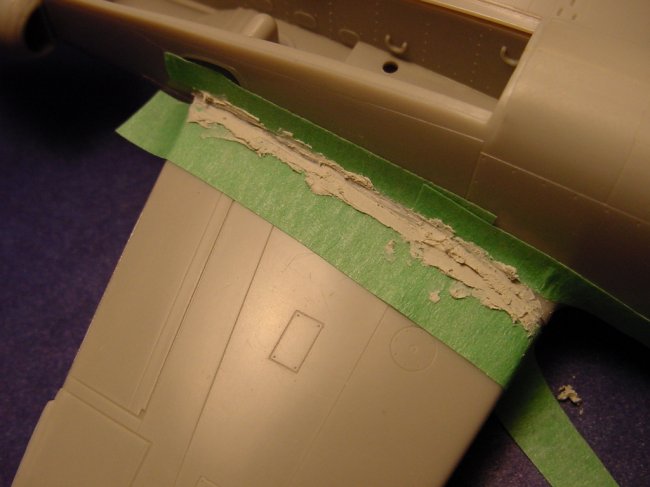
The filler is
applied to the masked areas, in this case the lower outer
wing panel/boom joint. |
|
| Filler is now
fully applied. |
|
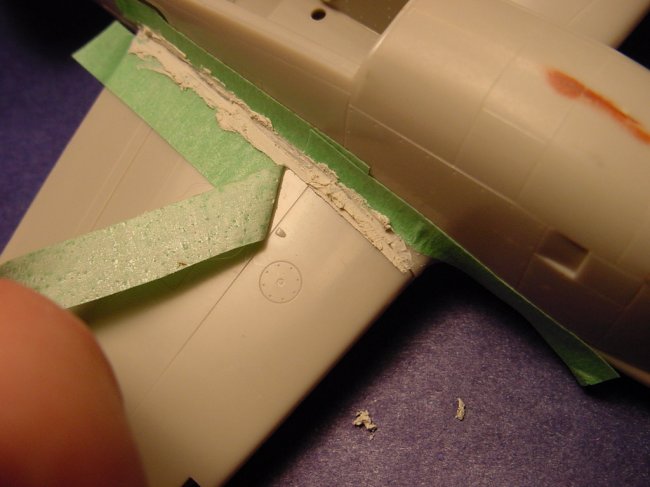
| The masking
tape is then removed. |
|
|
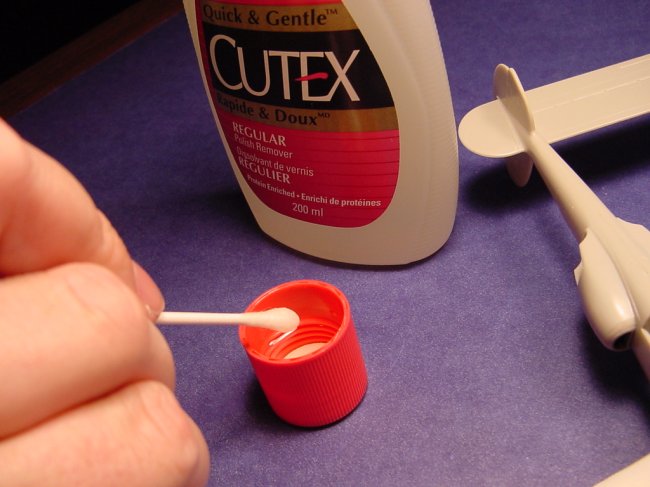
Now comes the secret part: moisten a
Q-tip, cotton ball, or a bit of cotton cloth with normal strength nail polish
remover.
|
|
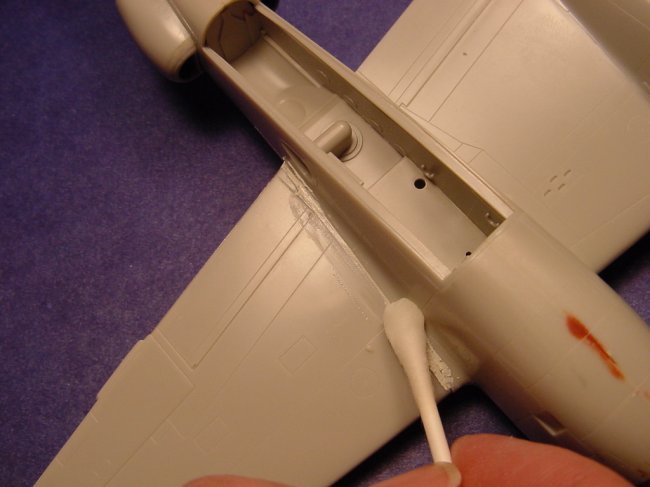
Now with the
moistened Q-tip, smooth and blend the filled areas and
remove excess filler. Best results are obtained just as the filler
begins to dry. The beauty is that the filler can be smoothed perfectly
flush with the surrounding surfaces, without harming the plastic or
raised detail. If filler gets into scribed surfaces, just remove it with
a wooden toothpick, moistened in the nail polish remover. Clean up
residue with a cotton cloth. Repeat if necessary. |
|
|
There!
Clean, blemish-free filled gaps in less than five minutes! I
usually let the filled surfaces dry several hours before painting. |
 |
This technique is a revolutionary way to apply filler, but
without the
need for sanding or filing! It has the added benefit of preserving
detail, which would otherwise be destroyed by filing and sanding, while
dramatically speeding up the process. The best application I can think
of is filling wing root gaps. It also works very well in hard to reach
areas, such as wheel wells and bomb bays. The technique also preserves
raised detail on older kits, such as the Monogram classics. Best of all,
it is quick, clean, and easy!
| Before
and after....This is the wheel bay of the 1/48 Hasegawa P-38. Will
quickly did this technique in under 3 minutes to this wheel well to give
you an idea of the difficult areas this filler trick could be really
helpful. Obviously this particular filling job isn't
complete....this is more of a rough example of the types of places this
trick would be the most help. |
 |
 |
| Before |
After |
Disclaimer:
The active ingredient in nail
polish remover is acetone: IMPORTANT:
DO NOT use full strength
acetone, as this will severely damage the styrene surfaces. Nail polish remover
is an emulsion of acetone and water, and various girly oils and essences... Also
do not use the "Environmentally Friendly" acetone-free substitutes;
they just don't work! Normal strength nail polish remover (such as Cutex) will
not harm styrene or resin: if you are unsure, try it on a scrap piece first.
It
will, however, strip paint, so be careful.
Work in a
well-ventilated area!
Will
Hendriks
Does this work
with autobody finishing filler?
My filler of choice
is automotive autobody finishing filler (comes in 1 pound/.5kg tubes).
Automotive autobody finishing filler smells like it is lacquer based. So,
I tried Will's above technique and it works fine with the autobody finishing
filler I prefer to use, so this new technique will be one I will use to a great
degree. Steve
Bamford
Additional info;
Denatured alcohol
will also work for this method. While still nasty stuff, denatured alcohol
isn't quite as virulent as acetone. Dave
Lake
If you'd like to
use this article in a monthly club newsletter etc....all I ask is you e-mail Will Hendriks
for permission and
give credit and URL for Aircraft Resource Center.
|
|