|
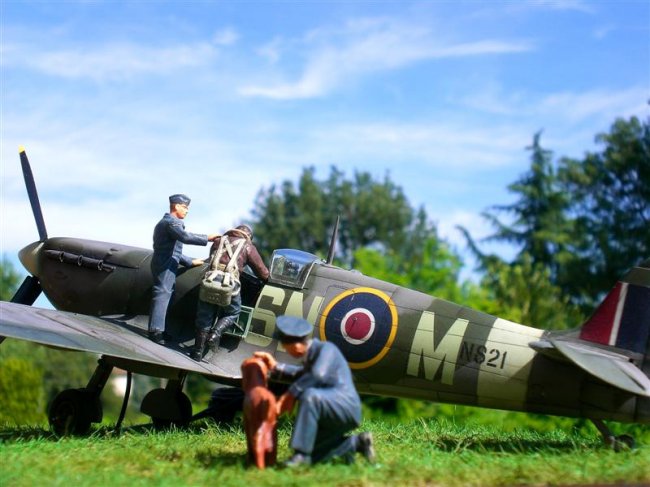
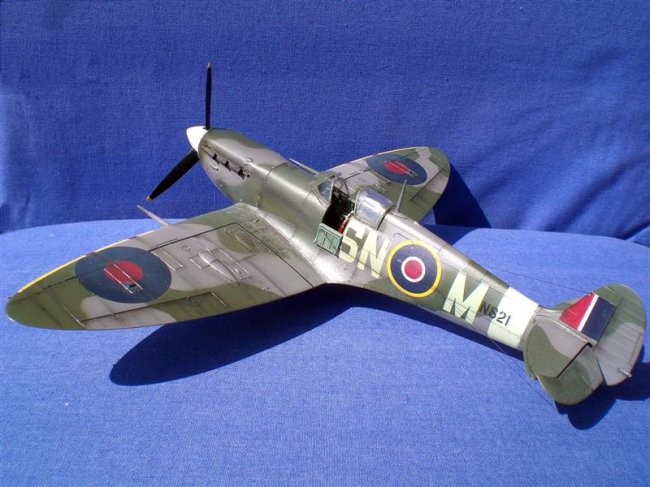
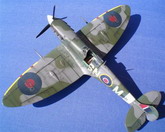
This my 1/48 Tamiya
Spitfire Mk.Vb (limited edition with 7 RAF crew figures) representing a ship of
the 243° Squadron based in Ouston, County Durham, during the summer of '42.
This kit represents
Tamiya quality at its best with perfectly fitting parts and superb detail. The
only issue I've experienced was with the decals, but more on this later.
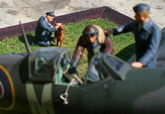
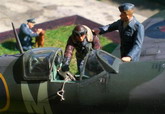
I'd like to spend a
couple of words about the figures sprue that comes with the box. It's by ICM
and, in my opinion, it's a little gem.
The figures are crisply molded and once assembled they look incredibly
"natural". The level of detail is amazing: I could make out the seams
on the pilot's parachute harness!
Together with the 7 figures (and a dog) there are other nice items like a
stepladder, a workbench, a jack, a gas cylinders cart and two jerrycans.
This box literally cries for a mini-diorama and I couldn't help but fulfill this
request. Goes without saying that I strongly recommend this box to anyone, it's
really great value.
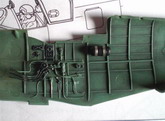
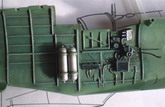
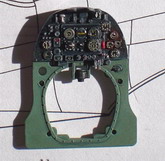
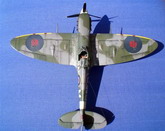
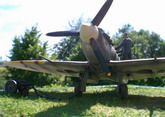
I built the model
without any aftermarket parts. Cannon barrels and exhaust stacks have been
drilled out and all of the extra detail in the cockpit, landing gear and
radiator was scratchbuilt using copper and solder wire, lead foil and plastic
sheet. I dropped the elevators and set the rudder slighly off-center. I also
replaced the rudder actuator push/pull rod below the left tailplane which is
moulded solid on the side of the fuselage. I cut it away, leaving the rudder
actuator horn on the rudder and replaced it with a short piece of copper wire.
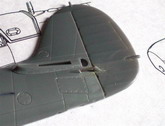
The pilot's seat area needs special care, if you plan to leave the access door
open. The seat and especially the armor plates are too thick and must be filed
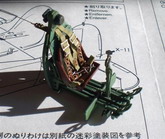
away to look more realistic. The Sutton harness was completely scratchbuilt with
lead foil and thin copper wire using photos found on the Net as reference.
The cockpit was painted and drybrushed with Humbrol enamels and artist oils were
used for washes.
Click on
images below to see larger images
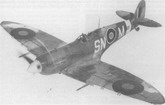
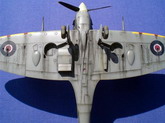
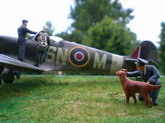
I was able to find
only a couple of b/w pictures of "SN - M" on the Internet which show a
pretty worn and dirty machine and I used a mix of Humbrol enamels and Gunze
acrylics to reproduce this fatigued RAF camo scheme: Hu 116 (Dark Green), Gunze
H69 (RLM 75 is a close match to Ocean Grey) and Hu 126 as Medium Sea Grey.
Some panels were sprayed with a lighter shade of the base colors to achieve a
faded look. The rear fuselage band was masked off and painted Humbrol Sky along
with the spinner while the yellow ID bands on the leading edges were masked off
and painted Hu 24 "Training Yellow".
A coat of Tamiya Clear sealed everything and I was ready for decals.
Here's where I met the only problematic part of this built.
Tamiya decals usually lean on the thick side and this sheet is no exception.
So I ruled out from the beginning the "overlapping decals" solution
offered for the roundels and fin flash (white decals on which the roundels &
fin flash proper are to be applied).
Instead, I masked off and sprayed the areas covered by those decals with a light
coat of Tamiya Flat White followed by a coat of Future to ensure good adhesion.
The decals were applied with liberal use of Micro Set and Sol and went on
reasonably well, except for the upper wing roundels. They just wouldn't bed down
properly despite the liters of setting solution I poured on them. All this
soaking and blotting mangled the roundels so badly that I had to remove them. So
I masked off and sprayed the upper roundels with a homemade mixture of blues and
reds that, luckily, seems credible enough.
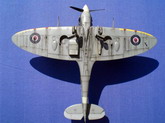
Another coat of
Tamiya Clear prepared the model for a pin-point wash with oils along panel
lines. Streaks of oil and other fluids have been simulated on the underside by
putting small drops of black and browns oils in the area aft of the engine and
slowly "working" them with a fine brush dipped in turpentine following
the airstream. Even the pampered Spitfires still flying today show rather dirty
"bellies", so don't be afraid to muck up big-time the undersides of
wartime Spits... 8-)
Panel lines were post-shaded spraying a very thinned mix of black and brown oils
and Humbrol Dullcote along the edges of Post-it notes. The same mix was used for
smoke and soot stains on exhausts, machine
guns and cartridge ejector chutes building these up
progressively to match reference photos.
Humbrol Aluminium was applied to simulate paint chipping partcularly along wing
roots, engine cowling fasteners and weapons inspection panels.
To finally tie everything together I sprayed a 50:50 mix of Humbrol Satin and
Dullcote over the entire model.
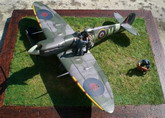
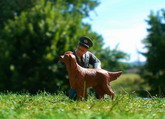
About the
mini-diorama, I gave the starring role to...the dog!
I imagined the scene of this dog watching tensely his good friend leaving for a
sortie, as if he could sense the perils of this war mission while the kneeling
officer is trying to calm him down.
Poetic, isn't it? ;-) I may title
it "Be careful up there, old chap!"
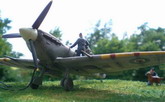
The dog and the
kneeling officer were only slightly modified while the pilot received a face
transplant (the donor was another Tamiya pilot) because the ICM one had the face
half covered by the oxygen mask. The latter received new straps and oxygen tube
made of lead foil and thin copper wire. Figures were brush painted with
Humbrol enamels and oils following the detailed painting guide.
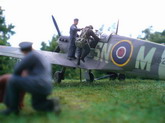
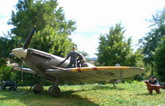
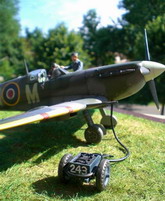
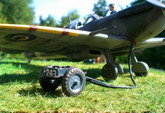
Observing wartime
photos, I noticed that accumulator trolleys were almost always present close to
planes preparing for take off and further research showed that early types of
these accumulator trolleys were rather crude, nothing more than a garden cart
with a couple of big batteries plugged to a length of thick electric cable.
A garden cart is easy to scratchbuild, and I built mine with a couple of wooden
matchsticks, a toothpick, plastic sheet, some soft electric cord, two wheels
from an old Atlantic GMC truck and a Bf109 tailwheel from my spares box.
I
had a lot of fun building this, I hope you enjoy it too.
All
the best,
Lorenzo Cassinadri
Click on
images below to see larger images
|