|
What
can I say about this old kit? Vintage?… Yes. Lacks
certain details?…. Yes. Fun to build?… Absolutely.
This is another oldie, but goodie. I don’t think
anybody can argue that. Revell made a fairly good quality
helicopter kit in the big scale compared to some of their other more painful,
less detailed, inaccurate predecessors. The kit is pretty
accurate throughout accept for a few areas that really need updates.
Fortunately, people like Cobra Company, Werner’s Wings, and even Eduard
have come to the rescue. The canopy, cockpit, and weapons
turret seem to have the biggest flaws. However the rest of
the model is decent unless you are really that anal about details and rivets.
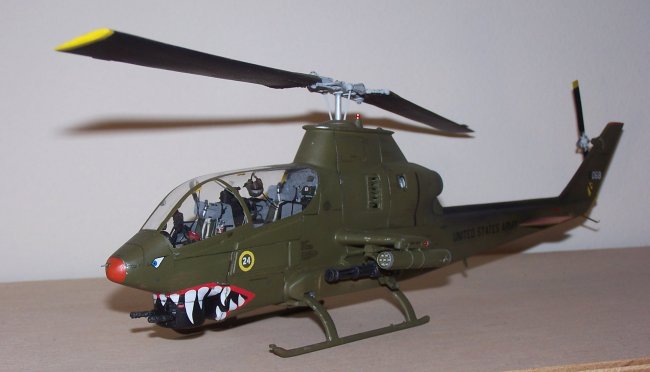
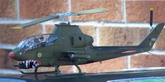
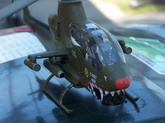
So, I give you Revell’s Big Cobra Gunship, winning the hearts of
rotor-heads everywhere.
This
build is pretty special to me because of my Dad. I remember
dad buying this kit for me when I was 11 or so. Depending on
how I did in school, I would get a new model every month. This
particular one is now rare to find…. It was the old 80’s box art "Vietnam
Assault" version. I have not seen this box art since.
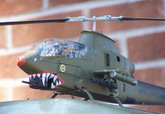
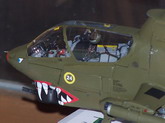
It was one of the most fun models I remember building, with it’s dark
green mold, funny looking pilot figures, and cool shark mouth decals to go along
with it. Though I can’t recall what happened to my original
cobra, I didn’t realize then how lacking the details were until I bought the
re-issue in 2005.
Click on
images below to see larger images
Molded
now in light gray, as are most new Revell models, the details are as poor as
they were back in the day, just better decals and rocket pods to add to the
“new” Revell Ah-1. When
I first got it, I wasn’t planning on using any aftermarket sets and then the
bug bit me and I ended up with Fireball Decals, two sets from Cobra Company, the
tail & toilet bowl exhaust, and a new canopy, courtesy of Floyd Werner.
I ended up starting this kit finally in early 2008.
The
build was going well up until late May when tragedy struck…. (No, I didn’t
drop the completed model or have any animals somehow destroy it) But,
my father became gravely ill and passed away, leaving a very empty void in my
life. All modeling came to a halt. Like
the flick of a switch. Not to be turned on again for long
time. It was really difficult to just get back into the hobby
after such a personal loss. I couldn’t bear to even enter
my model room. I didn’t go in there for six months.
For six months my cobra sat. And I melted away taking
my love for modeling with it. My dad had a huge influence on
my model building. He got me into it. Taught
me how to make a model look great, and not to mention how to use a razor blade
without cutting my fingers off. I also remember him helping
me finish my first Cobra build… He masked the canopy and painted it just as
good as could be. Used to say how proud he was of me and my
models. When he died, it was very difficult for me to pick up
that cobra and finish it. But as they say, time heals all
wounds, and I finally came out of my molt, starting up again in Dec 2008.
This model was finished for Dad, in his honor. I wish
he could see it now. Papa, when I look at this finished model
– I think of you.
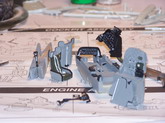
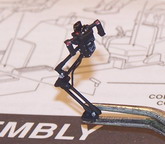
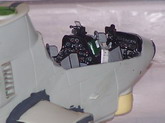
The
Build. I updated the kit details with the resin cockpit set
and M-35 cannon rig from Cobra Company, along with the excellent canopy from
Werner’s Wings, snake decals from Joseph Osborne, the toilet bowl/tail
conversion, and did some scratch building of my own. The
resin is fantastically detailed and canopy has the proper bubbly look found on
the real helicopter. I bought two of these in case I messed
up, which I did one canopy, forcing me to use the other. I
was really disappointed that I was unable to locate the Eduard PE set which I
found was discontinued. I looked all around the net and
nobody seemed to have any of these sets. It’s a shame
really. Though it’s not really needed if you choose the
Cobra Company set, but it does provide some nice exterior details for the
fuselage.
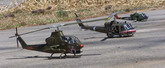
I chose to build Randy Zahn’s
ship, “Cindy Ann” after reading his book Snake Pilot, which is an excellent
read by the way. I chose to use xm-157 rocket pods, external
gun pod, and the 20mm cannon. Most cobras flew using the
xm-158 pods, but I didn’t feel like scratch building them. Now,
the references for Cindy Ann show the bigger xm-159 19-shot rockets in use
instead of the external gun pod, so my ship is not correct. Another
thing that is not correct is the tail rotor… Fireball decals show the rotor on
the starbord side, but actual reference photos clearly show it on the port side.
I didn’t catch this until after installing the new tail fin assy. Oh
well!
The following are mods that I
did to improve the model.
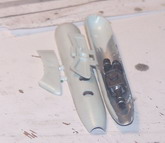
Stub Wings - remounted them at
a better angle using a simple nail and superglue.
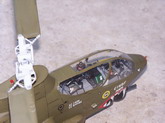
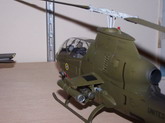
Cockpit – I added
wires, manual, papers, comcords, and helmets.
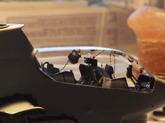
Canopy – I thought it would
look more realistic with actuators, straps, handles, latches and a mirror.
Cannon – added a few wires to
the housing as per photo references.
Gunner Sight – took the kit
parts and cut and reshaped them to make it look more realistic.
Gun Pod – took the kit
minigun and installed it inside the gunpod (one note- I glued the wrong halves
together so the two port holes are inboard and they should be outboard)
Once again, oh well.
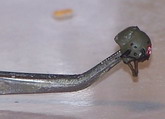
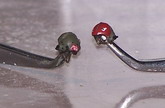
Helmets – I used the kit
pilot helmets. I had to do a lot of cutting, reshaping to get
the proper shape of the sph-4 helmet. I also used quite a bit
of putty and sanding along with tape, tinfoil, and stretched sprue. I
really like how they both turned out.
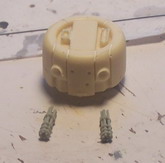
Turret guns – I simply used
the gun barrels from Academy’s Huey Frog kit. Simple.
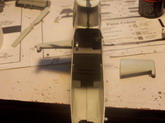
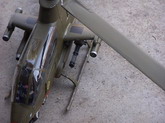
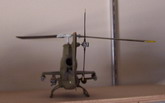
Tail Rotor – I made a shaft
from solder wire to make it look more accurate and still allow the rotor to spin
with ease.
Complications.
-Getting the helmets and cables
to hang inside the canopy, while sealing the canopy was somewhat of a choir.
Honestly, I don’t know how I did it without screwing anything up.
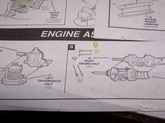
-The resin cockpit and ammo
bins required a lot of sanding, trimming and fit forming. I
don’t gripe much on this since it is usually that way when dealing with any
resin.
-Decals. This
is the first time I have used alps decals. They’re really
nice, but they are thin and tend to break. The only decals
that really gave me trouble was the US ARMY markings on the tail boom.
They just seemed to break all over. Maybe it was the
way I prepped the sheet, I don’t know. But I am sure I will
get more experience using the decals soon enough. Overall,
they are wonderful. Crisp, clear, and the end results look
great. Thanks Mr. Osborne! Keep more
sheets coming!
-Canopy details. My
wish to display things attached to the canopy required the use of superglue,
which as you all know, fogs up canopies. I read somewhere
that future floor polish will prevent any fog build up. So I
dipped the canopy and began attaching scratch built parts to it. No
fogging! However, after completing the details, I washed the
canopy again and when I did, it seems the future somehow came off and the whole
canopy started fogging up! So I just gave it another future
bath, hoping I didn’t ruin a canopy and two weeks of work. But
as you can see, it turned out nicely.
I did just basic weathering to
the finished model. Simple stuff like paint chips and exhaust
with a little brown dirt on the bottom of the bird. Gotta
love that brown-red dirt found all over Vietnam!
Overall, I really enjoyed
building this kit for the second time. But I was glad to
finally get it over with. I do plan on building another one
someday, only it will be a USMC bird with open doors and cowlings showing off
details not seen on my Army bird. Until then, Happy Modeling!
Cheers,
Ben Z. Nielsen
Click on
images below to see larger images
|