|
Today (November
18th) marks the 30th Anniversary of the first flight of the F/A-18 Hornet. To
commemorate the occasion,
there is a Group Build for the Legacy Hornet running at present through to
November 30th. This model did not participate as it was too far completed before
the GB started. Construction of the Hasegawa kit has been covered ad nauseum in
articles and in the forums, so I won't go into a huge amount of depth here,
other than to cover the changes and details I added.
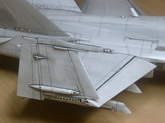
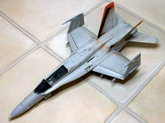
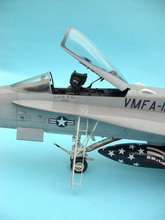
The kit had a resin
copy of the white metal Hasegawa wingfolds added courtesy of a friend who cast a
few copies for me (thanks Jim). Note: when folding the outer wings, the leading
and trailing edge flaps on the outboard wings should be raised and in line with
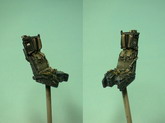
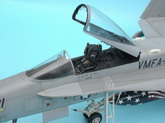
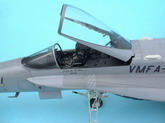
the wing. The Black Box cockpit was used (this part of the kit was built long
before the gorgeous Aires cockpit set was available), but I replaced the seat
with one from an Aires set, and also used the canopy rails from the same set.
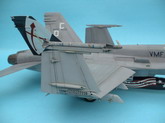
The kit's gun port
on the upper nose and the two vents either side were opened up. Chaff/flare and
gun safety hold back indicators were added on the port side of the nose. The
characteristic sharkfin comms antennae above the spine and beside the nose gear
door were added from scratch as was the GPS dome and the reinforcement plates on
the inside base of the fins. The antenna bulge on the nose gear door was
reversed and it's position corrected.
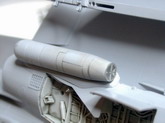
The ladder was built
from scratch, but utilised the photoetched ladder cover from the kit. The two
LEX vents on the port side on this aircraft were the later herringbone type, and
so the kit vents were filled and sanded and a pair of very nice etch parts from
a Fine Molds photo-etched set were added in their place.
Click on
images below to see larger images
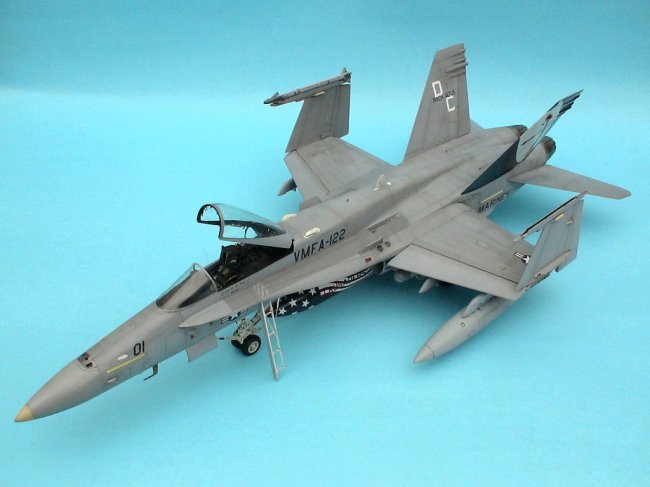
This kit actually
started out life with the intent of wearing markings of VFA-94
"Shrikes" (or SHWFOTS - "Sierra Hotel" World Famous
Orange Tailed Shikes) and after initial construction, had even got so far as
completing the painting and some decalling on the tail fins. The kit got put
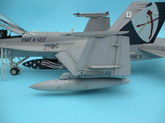
aside after this stage and forgotten for about 2 years. Not long ago, MAW
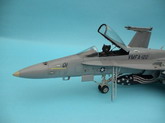
released their VMFA-122 Crusaders decal set and I decided right away that this
aircraft would become Nickel 01, in line with realigning all my F/A-18s to USMC
subjects.
I duly stripped and
repainted the centreline fuel tank and both tail fins and finished off the
camouflage and TPS touch-ups. At the same time, I filled all of the under-nose
gun vents, and the four on the tail and then sanded and touched up the paint as
these items were a very fine mesh on this later airframe. These were provided as
decals on the MAW sheet, which are about the only way to accurately portray this
very fine detail in 1/48. Then the model sat that way for the next 18 months.
At the start of the
Group Build, I also decided that the F/A-18A model I planned to build would be
my entry for the IPMS NZ Nationals in mid-September. To cut a long story short,
that model met with two accidents in quick succession, which ruled it out
getting finished on time for the contest. With only 3 weeks remaining, this
model was pulled from the cabinet and work started in earnest to try and finish
for the competition.
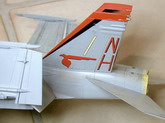
I finished all
painting and then glossed the kit, before adding the MAW decals, which all
behaved beautifully, although the two large shields on the tail and the two wavy
red and white stripe sections on the drop tank all required copious and numerous
applications of setting solution to conform to the surface. It was when I
applied the walkway decals, that I discovered they appeared to be a grey-green
colour against the kit paint. These were pulled off with some Tamiya tape before
being masked and airbrushed on.
Unfortunately, in
the process of removing the masking, the 'VMFA-122' title on the port side had
the 'M' and rear '2' pulled off by the tape. I then had to mask and paint these
two letters and thankfully did not suffer any further damage to the paint.
Weathering was achieved with an oil wash and some airbrushed dirt and oil
streaks, and a little chipping on the ladder.
Decalling was
finished with a set of chaff and flare dispensers from a Flying Leahernecks
decal sheet and landing gear data stencils from both MAW and Flying
Leathernecks.
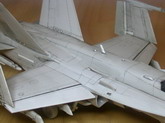
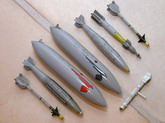
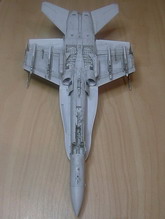
I wanted to finish
this aircraft with a load which might be appropriate for a CAX deployment, so
that one day I can build an aircraft from the Werewolves (the unit had to be
renamed as a PC move for deployment to Iraq) armed for war. I also found out via
Ken Middleton, that VMFA-122 was cleared for use of the AIM-9X, a weapon I have
not had a chance to use on any other kit yet (not in use by many USMC units that
I have finished a model of). The decision was to add an inert AIM-9X (CATM-9X),
and a luggage pod (CNU-188 blivet), use the colourful centreline tank, and the
two pods most commonly used by the Legacy single-seat Hornets.
The CATM-9X was
taken from a Tamiya F-16 - I drilled out the nose and added the seeker assembly
from clear rod, then the clear seeker dome from 5-minute epoxy. The CNU-188 was
taken from a Hasegawa A-4 and the two access doors and fasteners scribed on. The
centre line drop tank was extended by 2mm to correct the length. The AN/AAS-38
FLIR and AN/ASQ-173 LST/SCAM (or LDT) and adaptors were added from the kit
parts, but the rear of the FLIR pod had the relief missing from the kit part
added using the very nice piece from the Fine Molds etched set.
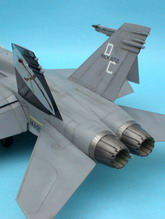
Final assembly was
to glue all the stores in place (except the FLIR pod, which was attached and
painted with the rest of the model early on), attach the landing gear with
flattened tyres, install the painted Aires exhausts and glue the canopy in
place.
Craig
Sargent
Click on
images below to see larger images
|