|
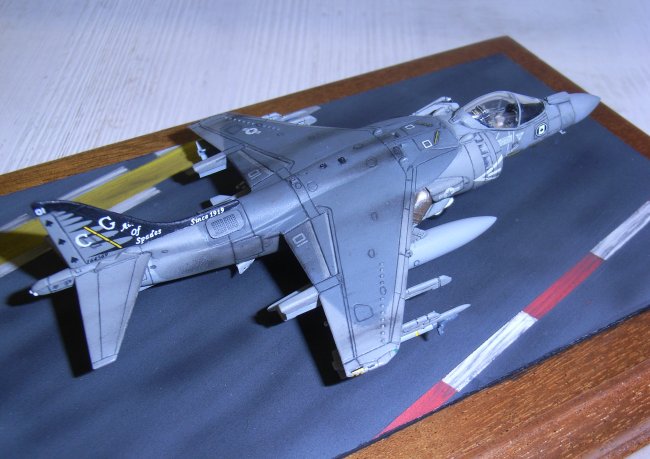
Ok, so how much
modeling can you get into a £3.00 kit? as most of you will have guessed this is
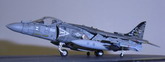
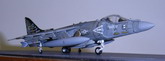
the 1/144 Revell AV8B, pretty much out of box-except, I just had to fiddle with
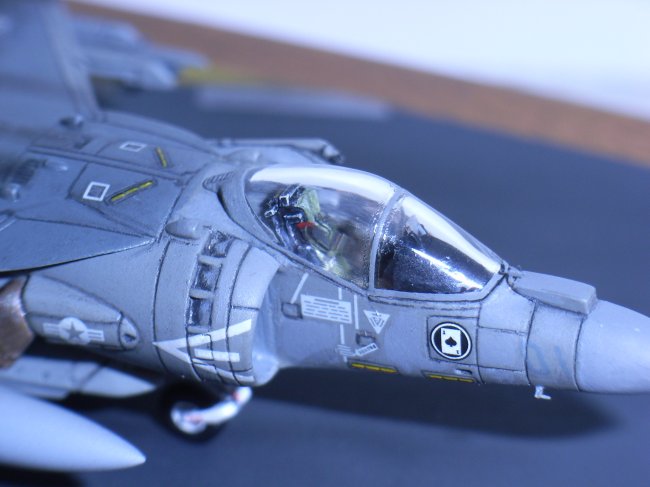
the ejector seat didn't I, so it got some detailing with stretched sprue, tiny
cubes of plasticard and paper seat belts. I should have stopped there, but-
The air brake was cut out from the fuselage, a false floor was put in the
resulting gap and a piece of 5 thou shim brass was cut up and curved to make the
brake, which was superglued in place with an actuator made from more stretched
sprue.
To paraphrase an old warning "no filler was harmed in the making of this
kit"- it all stayed in the tube, safe and sound. the only thing to watch
out for is the wing. if you pack up the rear end of the recess in the fuselage
with a sliver of 10 thou plasticard, you should find a nice smooth transition
from wing to fuselage with no gaps. This really is a wonderful little kit! Now I
should really have stopped there- but,
The chaff dispenser covers- at least that's what I think they are, are missing
from the kit, you get a decal with the outline of the cover so another couple of
pieces of 10 thou were cut to match the decal, curved, and glued in place.
Ah! the auxiliary air intakes, bane of a Harrier modellers life, these were
reworked using a jewellers piercing saw to create a cut at each side of each
intake blade and then cut out to a 30 degree (ish) angle using a number 11 blade
and a jewellers screwdriver sharpened to a chisel point to smooth everything
off. Do one at a time otherwise you lose the bit in between- ask me how I know!!
two or three had to be replaced with slivers of plasticard. And this is where
any one of a normally sane disposition would have reached for a paint pot but oh
no! I just had to be clever.
Finally comes a pair of pitot tubes and the yaw indicator. These were fashioned
by chopping up a piece of Gold Medal Models etched 1/700 ships railing and
superglueing them AFTER the model was completely finished, this is madness, I
should have stopped at my third attempt to glue the things to the aeroplane
instead of the tweezers, fingers and seemingly everything else in the workshop
instead of the DARN MODEL. They were touched in at the end by using dilute
Humbrol enamel, which sort of nicely leads into the painting.
Click on
images below to see larger images
Nothing fancy in the office, just
painted, washed, highlighted and then drybrushed to add some hi-
highlight, just like it says in 'tools 'n tips except there's less of it to do
in this scale.
With the cockpit masked off Humbrol enamels were used using the FS numbers
called out in the kits painting instructions, the main body colour was
airbrushed on first , and then lightened in the centre of each panel- not that
anyone can tell!. once it had dried off- a good couple of days, the masking off
was done for the darker upper colour, again, tools and tips to the rescue.
Rolled up Blutack ( silly putty?)sausages formed the outline, and masking tape
covered the rest. the dark grey was then sprayed on with, once more, a slight
lightening of colour in the middle of panels. One week later ( I ain't in no
hurry!) came a couple of coats of Future. Brushed on, it's thin enough to cover
like water colour, and then the decals went on, a stroll in the park except for
the two biggies on the fin which just didn't want to play, would they line up
straight? would they hell as like. I ended up cutting soggy decals into bits and
putting them on like pieces of a jigsaw, thanks god for Microsol thats all I can
say!- and if any one wants a colourful anglo saxon dictionary I think I can now
oblige.
With Decaling all done and there's a surprising number for such a tiddly little
lump, out came the Xtracolour extra matt varnish and a couple of misted coats to
bring everything out to a matt finish. Panel lines were then added using a home
brew grey made from black and white artists guache, I like this stuff, it has
more body than ordinary watercolour and seems to flow more easily into the panel
lines. With a fine brush and a bit of practice you can actually run the colour
down the line leaving very little overspill to clean up afterwards. The same mix
was also used to add shadows and depth to the auxy. air intakes. Exhaust
staining and general filth was added using the bare minimum of ground up artists
pastels black and burnt umber mixed together, finally another misted coat of
matt varnish to seal everything in.
Last of all to go on was the canopy after it had been dipped in Future ( you do
realise modelling as we know it could come to an end if they ever stop making
this stuff?), this was hand painted with a fine brush apart from the glazing bar
over the top which was a stripe of grey paint on a piece of clear decal sheet. I
used an old fashioned bow pen to do this, but it could just as easily be done in
a number of different ways, I just took the old fashioned difficult way because
I'm a Luddite at heart.
And that was it apart from the base which cost less than price of a decent pint
of Bitter from Armstrong bases. A piece of plastic card was cut and painted to
look like a corner of an LHD deck and that was about it.
Oh, once last little tip that I picked up from somewhere, I can't remember where
or I would add a very public salute to this wise personage. The easy way
to get a Harrier to sit with all its gear on the deck at the same time is to fit
the nose wheel and out riggers first, and then adjust the main gear to fit the
resulting gap afterwards, so simple and it works! after all that fiddling- I
could weep.
Now after all that
you think I would have had enough of small stuff- well if I was sane I would,
However then Revell went and released the GR7 didn't they- but that's another
story. The fool on the hill will return at another time.
John
|
|