|
The B-17 has always been a favorite
of mine (my birthday is the same as its first flight!), as evidenced by the fact
that I have two finished ones, as well as one in progress and two that I built
when I was still very young and didn’t know that models weren’t meant for
“flying” and “crashing” all over the house. This kit was the second
“good” kit that I built. This kit is getting harder and harder to find, but
I managed to pick it up at a local show in 2006 for $20. It sat in my room for
awhile as other projects took priority, and as I gathered up reference
materials. I wanted to do this kit justice by adding a lot of detail. However, I
can never really afford aftermarket detail, so I would have to scratchbuild
pretty much everything.
Finally, after working up the
courage to start it, I was off. After about six months of on-again off-again
work, the kit was finished, just in time for the June 2007 show. Below is the
process that got me there:
Work started with the cockpit
(doesn’t it always…). I didn’t add too much detail, because a lot of it
won’t be visible, but I did add these things:
-
Detailed the throttle
quadrant/center pedestal
-
Added sidewalls from my old
B-17G kit
-
Reshaped the seats and added
seatbelts
-
Added control surface and tail
wheel lock levers to the floor
-
Added oxygen bottles from a
Monogram B-29
-
Added soundproofing material
from Kleenex, wetted down and attached with white glue
-
The top turret received some new
framing, as the kit part is incorrect. It’s still not 100% correct, but
it’ll do.
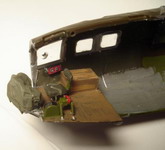
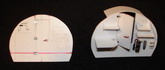
Once that was finished, I moved
forward to the nose:
All Revell included for the interior
was a floor and a crude bombsight, so I had to do some work. I added the
bombardier’s seat, the navigator’s table (also from the old -G), a new
bombsight mount, and some minor sidewall detail. I also added some soundproofing
material. The aircraft I was modeling had an extra .50 caliber machine gun
mounted in the nose that could be fired by the pilot, so I added it and its
ammunition box, and drilled a hole in the nose glass for it. The nose glass also
received ball mounts from an accurate Miniatures B-25 in the two molded holes.
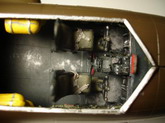
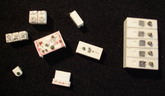
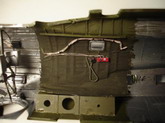
Next was the radio operator’s
compartment. Revell doesn’t include any parts for this area at all, so I had
to add everything. Using the parts from the old -G, as templates, I made my own
floor and bulkheads from .020” styrene. I added the radio operator’s table
and several brackets for the radio equipment to the forward bulkhead, and then
scratchbuilt the equipment. I added strip-styrene frames to the sidewalls, and
the fuselage stringers were added by scribing a in deep lines with a hobby
knife. This was then covered up with “soundproofing material”, and gave it a
very realistic effect. The big radio equipment came from several sources. The
equipment on the right side of the bulkhead was made both by scratch building
and by making a putty cast of the radio from a B-29. The equipment on the left
was scratchbuilt, including the landing gear cranks stored above the radio. The
seats all came from the old -G again, but they were heavily modified by
reshaping. I also added seatbelts from tape and fine wire. I also added the
camera compartment below the floor, and had planned on displaying it open, but
then decided against it.
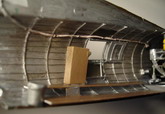
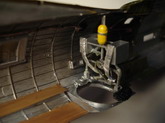
With that, I moved on to the rear
fuselage. I added structural detail with .010x.020 strip styrene, (and .020x.040
in a few places), and added stringers again by scribing. The waist windows were
modified and placed in the open position, and I added a floor from .020 sheet. I
also added the gun mounts and the rear bulkhead. The hardest part was the ball
turret framing. The basic part from the -G was used as a base, but I added the
ammunition boxes and belts. The belts were made my folding/rolling aluminum foil
ti the correct width and thickness, and then squeezing them in the jaws of a
pair of pliers to get the ribbed texture.
Once that was done, I got ready for
paint. The cockpit was painted mostly in a custom-mixed bronze green color, with
the details picked out in silver, black, white, red, etc. The radio compartment
was painted with another color I mixed that is similar to brownish interior
green. The rest of the interior was natural metal, with dark green/olive drab
soundproofing blankets.
Click on
images below to see larger images
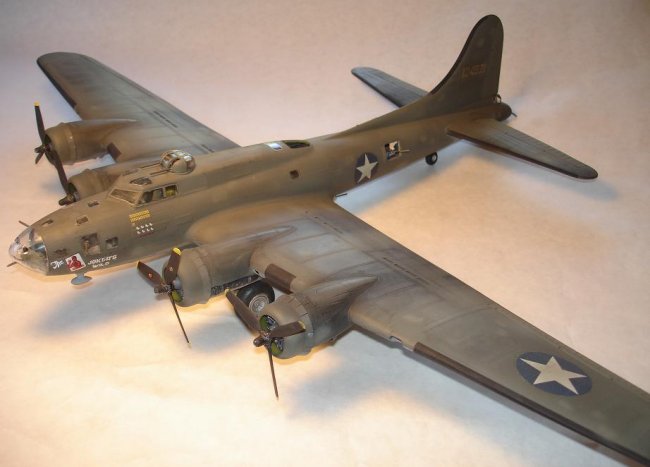
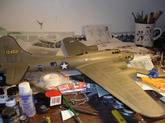
Finally, I was able to move on
to the actual assembly. The interior went together pretty smoothly, as did
the rest of the model. I used some filler in the usual places, like the
wing roots and the top of the fuselage.
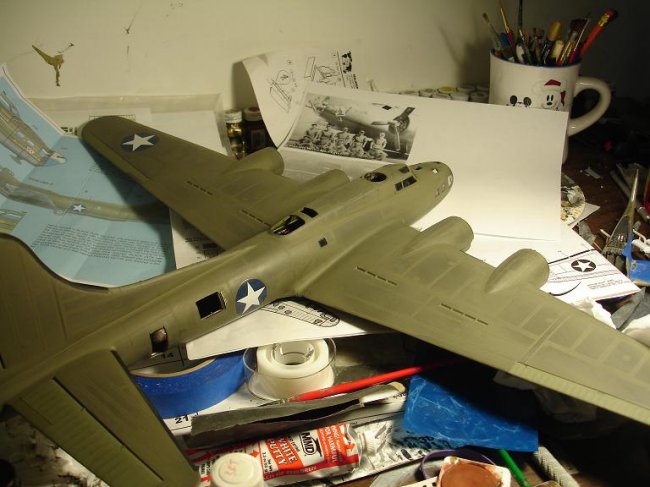
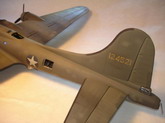
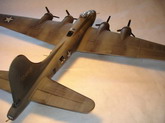
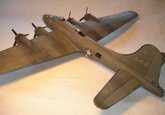
After the model had set for a couple
months while I tried to get the motivation to finish it, it was time for paint.
I painted the model with Model Master neutral gray and acrylic olive drab. I
used Zotz decals for “Black Jack,” with the kit’s insignia decals. I can
only say good things about the decals. They were extremely thin, in perfect
register, were very accurate, and they went on without a hitch. However, the
kit’s insignia were old and yellowed, so I trimmed away the clear film and
after several applications of micro sol, they finally settled down.
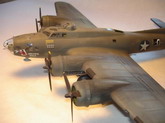
The weathering was done by
airbrushing black watercolors lightly over the entire model, and then going over
the exhaust areas a bit more heavily. To finish the exhaust stains, I wiped them
down with a damp paper towel, which gave them a nice streaky look. Once that was
done, I added a clear flat coat and all the small details.
Josh
Click on
images below to see larger images
|
|