|
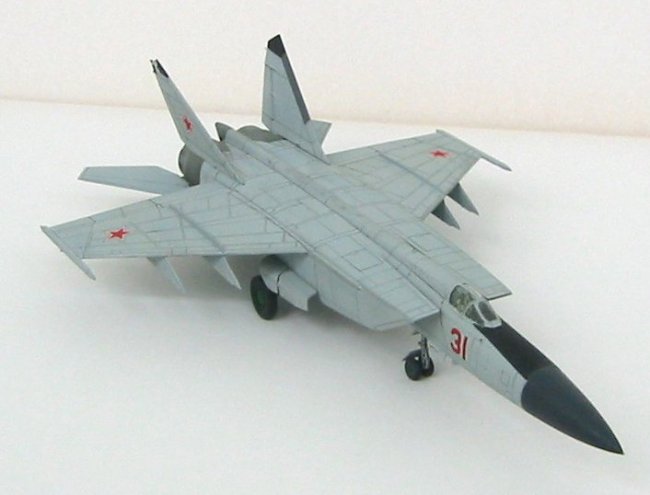
The MIG-25
Foxbat was the Russian interceptor answer to the American B-70
"Valkyrie" Mach 3 bomber project which was cancelled after just
2 prototypes where built and flown.
Several versions of the
infamous Foxbat where build (Interceptors, Trainers, Recognition) and
exported to Libya, Egypt, Saudi Arabia, Iraq and others.
Click on
images below to see larger images
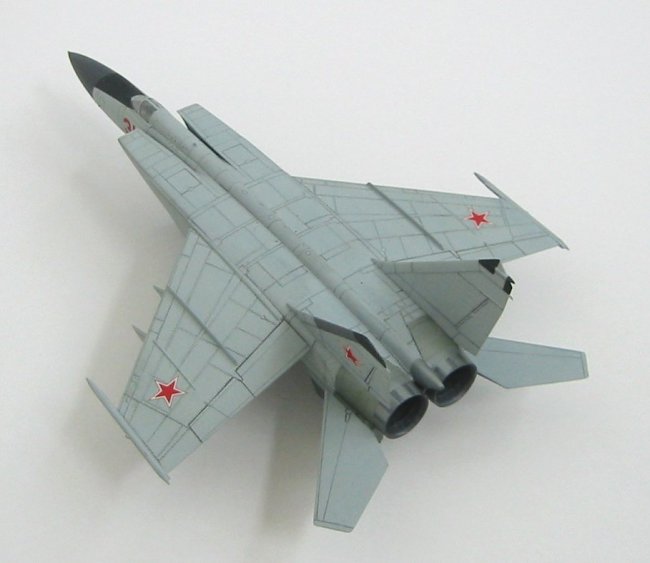
The Hasegawa MIG
25 is very accurate in size and dimensions, but it has a simplified
cockpit, a "super-bullet-proof" canopy and the impressive
exhaust nozzles are just to be glued blunt to the closed end of the
fuselage. Oh yes - and the kit has fine raised panel lines.
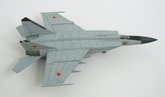
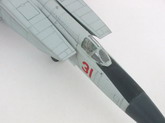
The cockpit was upgraded
with a resin seat from True Details and the canopy was vacuformed. As the
glazing is not giving much possibility to take a look inside I decided
that the seat is enough additional detail inside the cockpit.
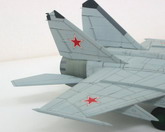
The next surgery step were
the blind afterburners which needed to become afterburner cans. I took the
trusty Dremel and routed the blind end of the cans away - as well as the
corresponding areas of the fuselage. I found that the cans of an Hasegawa F-4
British Phantom and that these could be used when they are cut to length - the F-4 in 1:48
scale I mean! So I only had to glue the Mig 25 nozzle ring to the F-4 can
and the assembly into the fuselage and I had nice big and deep exhausts on
my Foxbat.
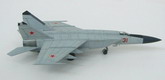
I started to scribe the wings and
stabilisers but decided not to go on with this method and try something easier:
I assembled everything for
airbrushing and started to spray the entire model in black. After several days
of drying I sprayed the MIG 25 in its typical grey colour. Several days later I
used fine sanding paper and moved over the MIG from front to back to grind the
grey colour from the raised details to expose the black colour again. The panel
lines which where already scribed or sanded prior to painting were picked out
with a sharp pencil - as well as the riveting and other details.
The grey colour is a mix based on
Humbrol 147 - I added a bit of white and one or two drops of blue, untill I
thought it looks OK.
Next came the gloss clear coat,
the decals and the finishing dull coat.
The natural metal area around the
exhaust was done with Model Master Stainless and weathered with Tamiya clear
yellow and smoke.
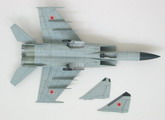
In between construction I managed
to brake - correct - the nose probe. I also lost it to make things complete. I
could not find a satisfying solution up till now so I will have to do a new one
later as a photo etched part.
By the way: I leave the stabilisers
un-glued if possible - you can pull them out, turn the model upside down and
transportation becomes much easier f.e. when you move, as the fagile gears are
now showing up and are unstressed.
René
Click on
images below to see larger images
|