|
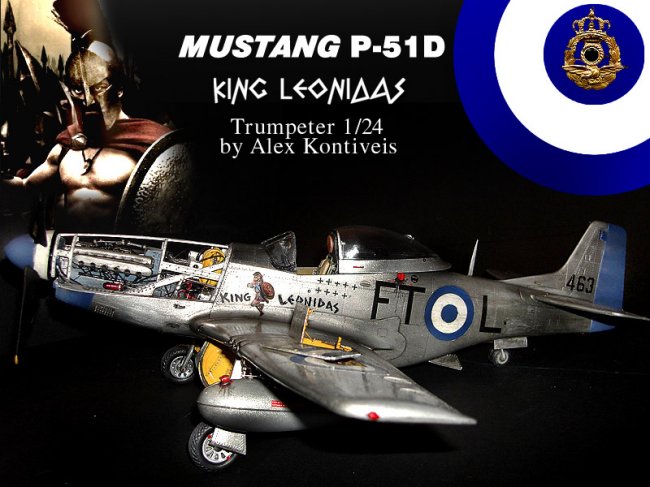
PREVIEWING
THE KIT
To
tell the truth, I never liked P-51 models! I always believed that this type of
aircraft had so few details to offer, because it was just so simple a
construction! Since I took a look at Rodney Williams’ article for a
Trumpeter’s P-51b (conversion!) I was at once delighted and changed my
mind immediately! Although I never believed that I’m a modeling expert,
I decided to make an effort to build a nice looking model, trying to catch
a medium level at least. For every modeler, it’s the effort that counts
(that’s my opinion and I’m speaking for myself only).
THE
KIT
This
P-51d kit was my second Trumpeter kit after the very good
Spitfire Mk Vb trop (already in ARC gallery pages), so I already
knew what to expect. Unfortunately every time Trumpeter seems to have a
tradition of inaccurate (and under scale) pilot’s seats! What a
disappointment! For a moment I thought that my model supplier sent me a P-
51 in
1/32! Another hard point was the Engine! Very good in itself with a lot of
extras, but everything seems to be useless, because of its mounting!
Too
low, and after the construction it looks so small for the Kit! Everything
else appear to be detailed to exceptionally good levels, although anyone who buys such an
expensive kit, expects more detail, more choices, and more quality. I do
not want to mention other kits but I met better detail in 1/32 for the
same model! Anyway, I thought it’s a challenge for every modeler to
prove his qualifications on working on large scales! So, let’s get
started!
Click on
images below to see larger images
CONSTRUCTION
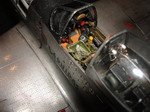
COCKPIT
AREA.
I
began with the floor. I used real wood flit and I painted it in a way to
look old and very weathered! I added 2 aluminum foot panels and then I
began working with the pilot’s seat! I tried many different ways to make
it a “seat”, but none of them were accurate for me. So I decided to
make a new one! I discovered in my spares box a part that I could use for
the pilot’s seat. Using plastic card I made the seat’s back, rounded
with copper. For its mounting I used springs from a watch and metal pins!
For the pilot’s back pillow I dressed a plastic sheet with real leather
and a painted it in khaki color. The rest of the seat was painted with
metallic olive drab mixed with some yellow. The final result was quite
good (much better than Trumpeter’s own 1/32 idea of a seat!).
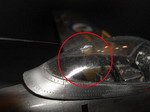
My
next step was the instrument panel. I replaced the instrument’s film
with a new one made with CorelDraw! I designed all the instruments one by
one copying the real ones. I placed them in the right position and then I
laminated them to give the glass cover effect! The result is very
impressive and it changed the panel’s look at once! I added switches and
levers as many as I could and I rebuilt the gun sight. No improvements
were needed for that, although I knew it was not correct.
For
the pilot’s side panels, everything is scratch-built. I had to rebuild
everything because I found all parts very fat and under-detailed. These
parts were improved using metal, spring, copper and plastic sheets. The
main interior color is a mixture from Olive drub, earth, and yellow.
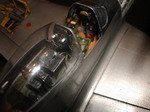
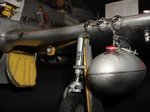
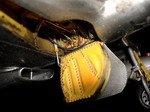
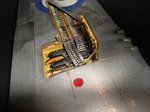
RADIATOR
– GAS TANK
These
parts didn’t need many improvements. Although I had little information
on the particular areas, I used my knowledge in mechanics and I added all
the details needed, such as gas tubes, reservoir tube, electric sockets
and of course the electrical connections! I painted the main gas tank with
army green, and weathered it with dark grey and silver. Gunze Oil was used
around gas tube connections.
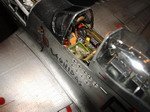
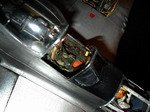
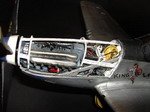
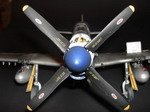
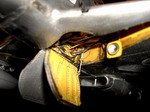
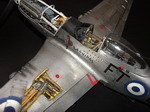
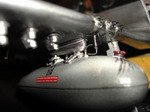
ENGINE
Here
is a BIG (?)!!!
Actually,
I never heard anybody who chose Trumpeter’s kit say any good words about
the engine area! You will not need any specific knowledge to understand
why! Although the quite good detail of the engine’s main body, and the
other parts, the final assembling seems too small, compared with the large
size of the Aircraft. The mounting is too low and finally the result makes
you really desperate!
Even
though I decided to take the risk, I already knew that I would fail.
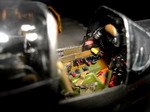
I
studied very carefully the real engine compartment, taking a close look at
a large amount of photos of the real aircraft. The risk was too big if we
count the hours of work needed for a good result!
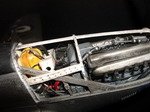
So
I started working without thinking the bad dreams of failure, as if
everything was ideal! I used all the pieces that the kit already gives
except for the oil filter (scratch build). All the other additions were
made close to real engine parts, using metal, rubber, and stretched sprue.
I
chose to paint the main body with a light azure blue, silver and white
(only for the engine’s fire wall and engine’s panel holders).
The
final result was very good and represents the P-51 engine very close to
the real one. The only problem was the fitting on the fuselage!
I was
afraid of the large amount of detail. …And, unfortunately, I was right,
since I had to rebuild half of the engine again!!!
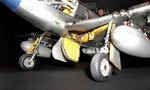
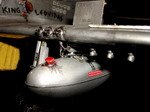
WHEELS’
WELL
Trumpeter
managed to simulate the landing gear in very convincing level, so I
didn’t have to make a lot of improvements. I replaced the suspension
tube with metal bracket to make them look really natural, and I added the
valves and the lug nuts on the wheels.
Next
step was the whole improvement of the wheels’ well. Although the kit
gives a compact detailed wheel well, it seems rather too poor, especially
if you have already done a hard work in all the other parts of the kit.
So
I decided to add all the extra items and ribs needed for a well-detailed
look, according to close up photos of the real aircraft. This kind of work
was really quite boring for me because of the –nano – work I had to
do!!! In fact I can’t see the use of working on a part that nobody can
take a close look on.
Any
way, I did the best I could, working more than 5 days!
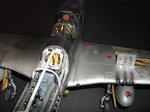
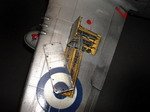
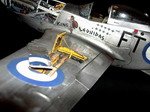
GUNS
It’s
a fact, Trumpeter did a very accurate job in this sector. Separate bullets
were the better way to achieve a very good result. Firstly I painted them
Matt black, and then I gave them a silver tone by dry brushing. Then with
a very thin brush, I painted them with gold and bronze. Then I weathered
them with black. My next step had to do with the Brownings. Painting them
with Gun metal and adding all the electric and hydraulic connections
according to real close ups, were enough to give them a convincing look.
Of course I replaced the guns’ plastic massive tubes with real ones from
metal, since the bullets have to find a way out somehow…! A close look
on the guns’ main panel gives an idea of the amount of work I did on it.
I tried a lot to construct the port mechanism, using metal pins and some
scratchbuild little items. I think I did my best on it, and …that’s
it!!! FINISHED, with the basic build.
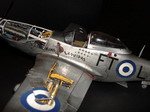
PAINTING
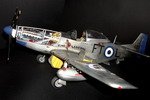
After
a test on test-fitting the fuselage and the wings, I almost thought to give up!.
“Saint Filler” had to make his miracle! But most impressive was the left
upper wing part! It had to be shortened more than 3mm to fit exactly with the
rest of the parts! After the masking procedure I had to decide what to do with
the painting! Trumpeter gives the modeler only one choice! And nobody (99 out of
100 kits) follows this! The answer (I think) is that this particular choice is
not such impressive, as other more famous and colorful Mustangs!
So
at first, I decided to please Trumpeter, by making their aircraft! But finally I
changed my mind! Although
Greece
never owned P-51s in WWII or later, (for the record, Greece
fought against Axis forces with Spits, Hurricanes and Harvards with over than
250 aircraft), I thought that it would be a good idea for a “what
if” P-51!
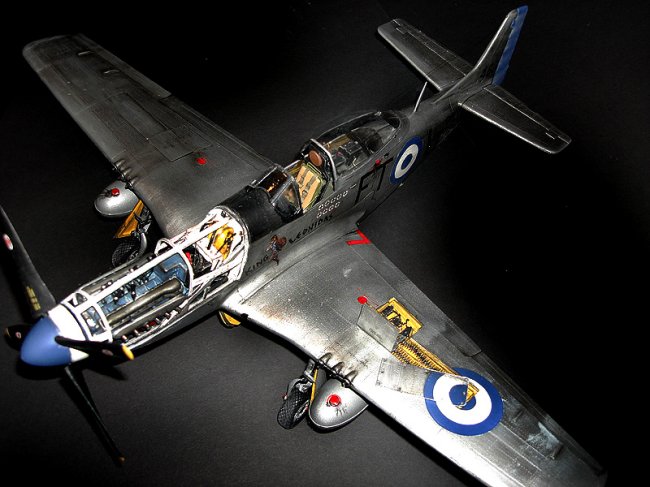
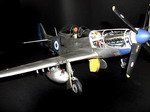
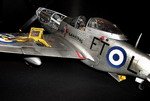
So
this particular aircraft never existed. I name it, “LEONIDAS”
king of Spartans, as a tribute to his great achievements!
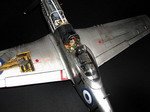
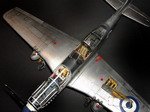
I
painted it with shining Gunze silver, which I partially polished to give it the
contrasts I wanted. Then I airbrushed all of the aircraft with thinner adding
few drops of black, and I whipped it with a hard paper. The result was quite
good (I’m not an NMF expert guys, I did my best)
For
the decals I made masks with Vinyl (using Computer) and I painted them with
reflex blue.
With
a very fine brush, I draw King Leo! (I do not suggest it to inexperienced
modelers)
ENDING
King
Leonidas, is a fact! Although the particular aircraft is a ghost, I loved it as
it represents a unique P-51, much different than the already known ones. Anyway,
I hope you enjoy it and I think it deserves a place among the few high quality
P-51 builds. If anybody has any questions, they are welcome to e-mail me.
NEXT
PROJECT
Bf
– 109 G6 (early) –Trumpeter 1/24-
Alex
Click on
images below to see larger images
|