|
The
Saab
Draken has been my favourite plane since I was a kid. Those unique shapes were
sexy and futuristic even if the aircraft was designed during the '50s, that is
why I build lots of Draken kits in almost all scales: Airfix and Heller in 72,
Arii and Tamiya in 1/100 and I'm still waiting for a 48 scale kit that will make
me the happiest modeller in the world.
By
the way the best Draken kit ever made, so far, is the Hasegawa one in 72 scale.
I built several of them in the past and you can find pictures in my web
photoalbum here: http://album.foto.alice.it/modelsfromitaly
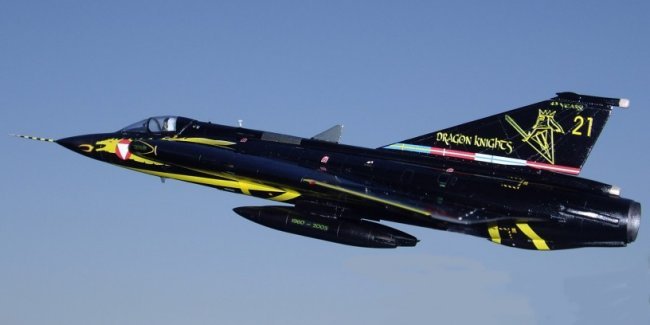
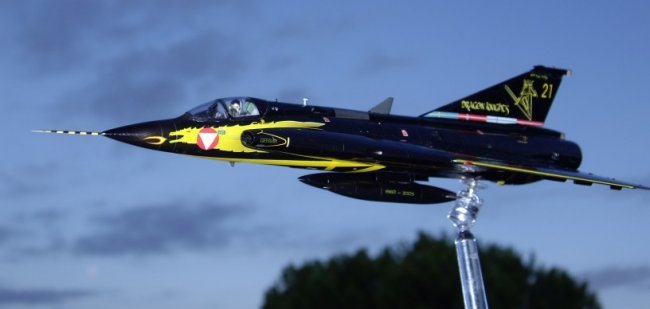
Last
year saw the sad demise of this aviation legend and the Austrian Air Force
made a special colour all black Draken to celebrate the event.
Hasegawa
was also quick in developing a special box with two kit inside: one is the
very famous "Ostarichi" that flew for many years in a red-white-red
colour scheme, and the second one is the Black Knight.
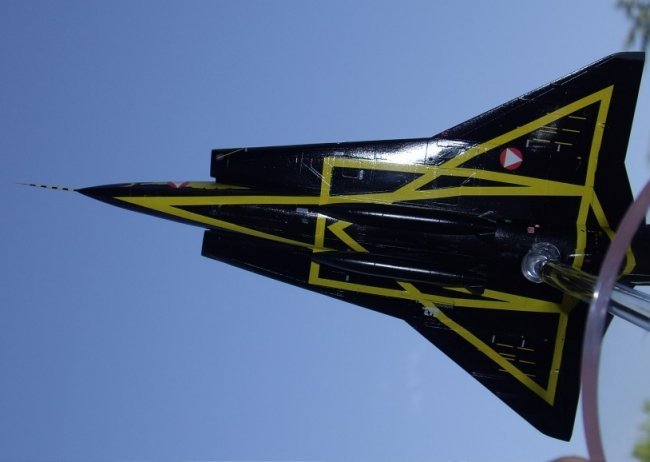
Click on
images below to see larger images
By
the way to build an Austrian Draken the Hasegawa kit is not enough. The Japanese
model is a J- 35F and lacks the modifications added to the Austrian machines.
Österreichische
Luftstreitskräfte bought from Sweden 24 old Saab J-35D. These aircraft before
delivering to Austria got just a few modifications the most visible one was the
introduction of a new more rounded canopy, the same used on J-35F/J.
The
Austrian Draken were called Saab 35Ö and during the early '80s flew armed with
just two guns, since Austria was banned from using missiles since the end of
WWII.
By
the way during the long civil war in ex-Yugoslavia Austrian skies become more
and more dangerous so Österreichische Luftstreitskräfte was able to upgrade
its interceptor with AIM-9J Sidewinders missiles and Radar Warning Receiver
systems. Missiles, under wing pylons and launchers again come from Sweden while
RWR systems were token from Danish Air Force Drakens that were retired in those
years.
The
modernized and armed Draken in Österreichische Luftstreitskräfte become Saab
35Ö Mk.II.
To
build an accurate kit you will need to scratch build those RWR antennas on the
tail and around the exhaust, but those pieces are really small one and I think
is better to use the resin bits produced and sold by IPMS Austria.
IPMS
Austria kit gives you the whole fuselage end as a solid resin part and this
piece is much more detailed than the original one given by Hasegawa.
Another
resin part in the IPMS Austria kit is the correct fuselage hump of the J-35D
model, quite different from the J-35F/J that you can find in the Hasegawa kit.
Fitting of the resin hump is almost perfect but you will need to add 1mm piece
of plastcard to the back of it since the resin part is a bit too short and would
not fit the canopy without that simple addition.
The
resin hump also has a small PE parts that you need to add to it to represent
some scoops that gave air to the avionics. Fitting is a little tricky since the
PE set is a little too big, but trimming and cutting it is all you need to do to
achieve a perfect fitting.
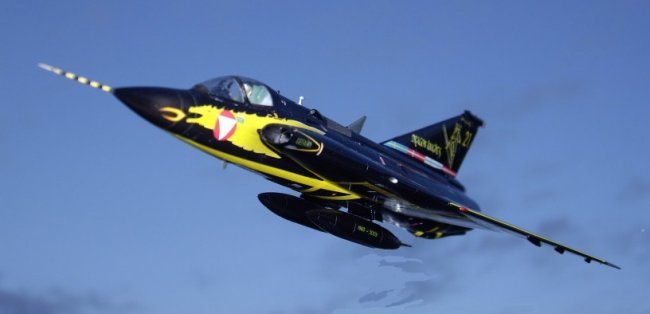
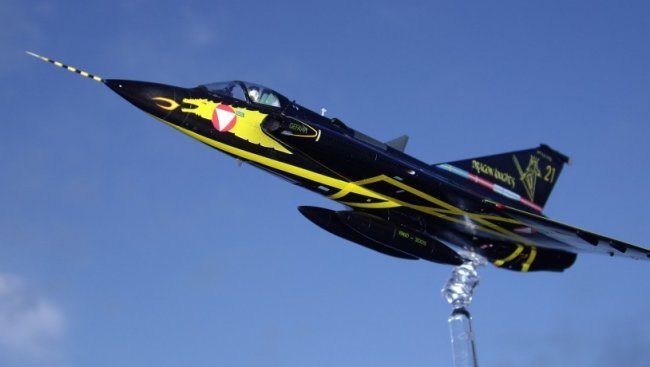
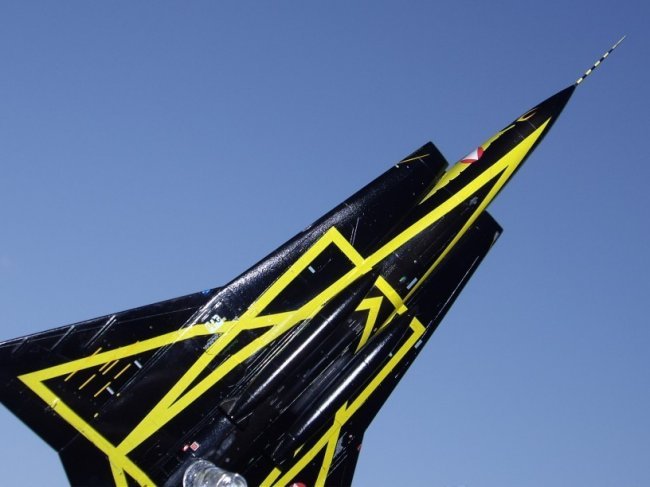
I
choose not to spend too much time in detailing the canopy since I choose to me
this plane in flight attitude because the most spectacular part of it is on the
bottom.
So
the cockpit just got a gray-green paint and the decals from the kit box; a pilot
(from Hasegawa F-16) was added later.
The
most difficult part of the building process come later: closing the landing gear
doors. Some of them (especially the small ones in the resin tail) would not fit
in closed position so you will need time and patience to add putty and plastcard
to make them perfectly closed.
The
rest of the kit is very simple to build; you only need to spend a bit of time in
polishing it well when finished since the glossy black scheme would show any
flaws.
To
paint the kit I used Tamiya glossy Black thinned with GSI Creos Mr. thinner.
That way the colour becomes easier to spry.
Then
was the time for the decals.
Hasegawa
gives you two very thin and well printed sheets, by the way the yellow is not
that deep and, especially the smallest one, let the back underside to show
trough. That is why I choose to apply two set of decal, one above the other, on
all small yellow drawings (the Knight on the tail, the numbers on the fuel tanks
etc..).
Hasegawa
decals are so thing that you can barely see that there are two one above the
other.
By
the way Hasegawa forgot to print a piece of the shield and many gray stencils
that are around the wings and fuselage, especially on the bottom.
For
the gray stencils I cut some pieces of old decals from the spare box (a walkway
from Fujimi A-4) the missed horizontal yellow band, just in front of the fuel
tanks, was cut from the second Hasegawa decal sheet.
Than
I washed the kit in warm water to remove any glue from the decals and sprayed a
coat of Future to protect the decals and restore the high gloss finish of the
model.
Final
details were added at this stage: the pitot tube in the kit is horrible and
unsuitable, I made a new one from a needle worked with a motor tool to made it
conical; then added the anti collision light from small CMK resin bits, one on
top of the fin and the other under the fuselage were Hasegawa tells you to put
just a red decal.
The
T shape antenna on the hump was added as the last one since I managed to loose 3
of them!!! (Anybody can spare one or more for my next Drakens?).
When
the model was finally finished I made a hole in the belly to put it on the
Hasegawa clear stand, it was from the time I made my last Matchbox kit (26
years) that I didn't made a model in flight but I must say that the Draken looks
much better in flight than on ground, isn't?
Pierpaolo
Click on
images below to see larger images
|