|
At
the Beginning...
in
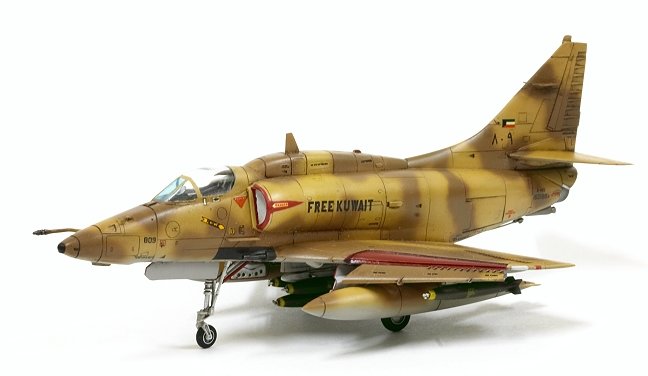
1970s, Kuwait bought some A4M and TA4J from US surplus with some modification
for adding and removing some electronic equipments, which resulted with some new
antenna at nose, back and the upper tail and become A4KU and TA4KU respectively.
This A4s formed the front line services between 70s and early 90s. During Gulf
war 1991, they escaped to Sandi Arabia and joined the allies to liberate their
country.
They
carried out some ground attack missions and took only 1 loss throughout the
campaign, in which their commander was downed and being the POW at the first day
of strike. After the war, the planes sold to Brazilian Navy and now Kuwait
flying with F18s.
Building
the Kit
Fujimi
A4s series is almost the best 1/72 in the market, while the Hasegawa come with
raised line and Italeri with A-4F version only.
This
plane is Fujimi 1/72 A4KU re-boxed from A4M, it's nose section is come from A4M
while the fuselage section is from A4E/F. The detail of the cockpit itself is
enough for 1/72 scale especially with small canopy like A4, I replaced the
original seat with an aftermarket resin but really not noticeable when the
canopy is closed.
Similar
to other A4 version by Fujimi, it is suffered from over-engineering. The nose
does not fit well with the fuselage section. Some filling is need for the air
intake and I replaced the original refuelling probe at nose section with a
plastic rod since the position simply doesn't match with the remains in the
fuselage.
The
other parts were fine and the fitting has no problem, note that don't forget the
follow the instruction to add the antennas and drill out the hole at the front
of the cannon barrel.
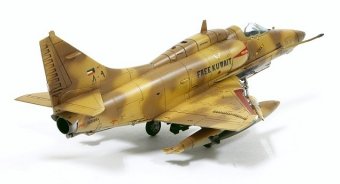
For
the loading, experts in ARC told me that most of the case was 1 + 3 + 1
MK82 with 2 fuel tanks. So I put them on while the Zulu rocket set was put into
the spare box for other US navy planes in future.
|
Click on
images below to see larger images
|
|

|
Painting
and Decaling
For
painting, since the supply of Xtracolour in my town was hard to reach, therefore
I followed the instruction sheet to use the Gunze one. The colour I used were
H66 RLM Snady Brown 79 for base yellow, H72 for Dark Earth for camo,
and XF19 for lower part of the plane, all added some white to tone down. Exhaust
pipe painted with silver while the pipe's inside with H76 Burnt Iron, XF2 white
for wheel bays and Gun Metal for the cannons.
At
the beginning I tried to mask it with masking tape but found really hard to do
so, therefore I sprayed the camo by hand freely. Effect was fine but still too
soft when compared with masking by paper, this will be the best way I think.
Decal
was come from the box only, after applying them and let them dry, I sprayed a
layer of gloss and washed with black enamel paint. Finally, I applied a layer of
flat clear to finish it.
Last
but not least
This
is my first rolled out plane, I still have many things to learn as a beginner.
Many tanks for advises and comments by ARC experts, without you guys' tips and
hints, this plane still no chance to show.
Eddie
|