|
I’ve always had an
interest in the Su-25 Frogfoot and wanted to build a scale replica of this
aircraft. Only two 48th scale models have been released (as far as I’m aware)
– one by Monogram and one by Kopro.
However, finding either of these in South Africa posed a problem. It was after
many moons searching for this kit (both, I believe, having been discontinued)
that I finally found a Monogram one in some backstreet “hobby” shop. The kit
is generally good with delicate recessed panel lines – however the cockpit has
very little detail. The decals provided with the kit are for “blue 15” which
was the T-8 (i.e. pre-production)
Frogfoot A sent to the Paris Air Show in 1996 after an operational stint in
Afgahnistan. To make a production Su-25 Frogfoot A, a number of changes are
required :
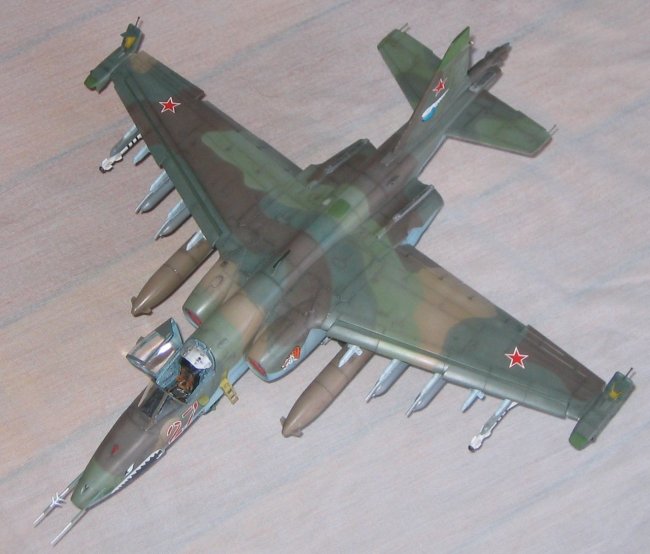
-
Delete two lower
nose probes provided with kit – apparently these were antennae for
compatibility with western navigation systems for the trip to Paris
-
Add intake to
base of vertical stabiliser
-
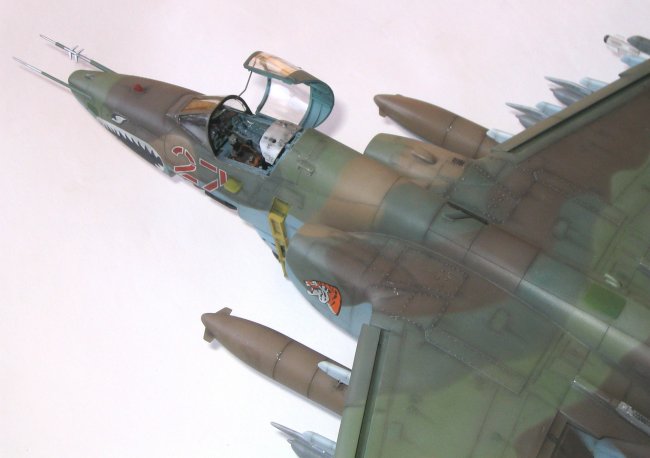
Laser range
finder window in nose has a different configuration to that provided in the
kit – best to refer to photo references to correct this
Apart from that,
there are several other errors in the kit :
-
Throw away the
rocket pods – totally incorrect (nasty bits of plastic)
-
The two inboard
wing pylons are incorrect. All four wing pylons are the same size and
configuration. The outboard two pylons provided in the kit are of the
correct configuration
|
Click on
images below to see larger images
|
|
|
 |

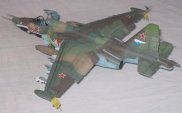
|
Before starting, I
bought the Concord Colour Series Publication #4012 “Su-25 Frogfoot” and
Squadron Signal #1129 “Su-25 in Action”. These books provide a lot of nice
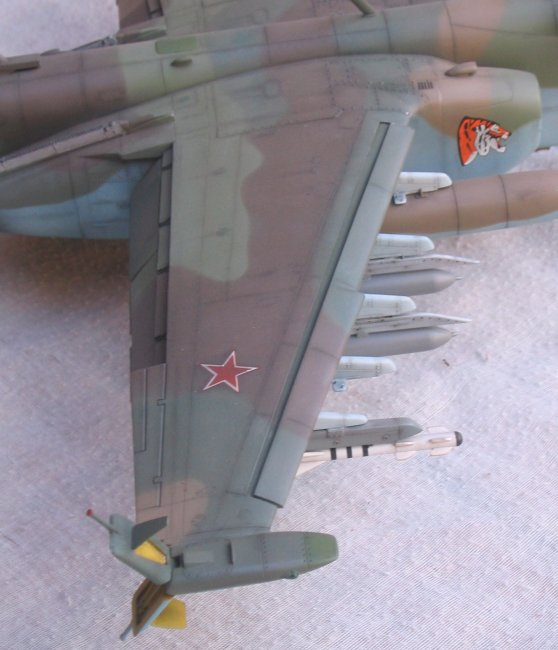
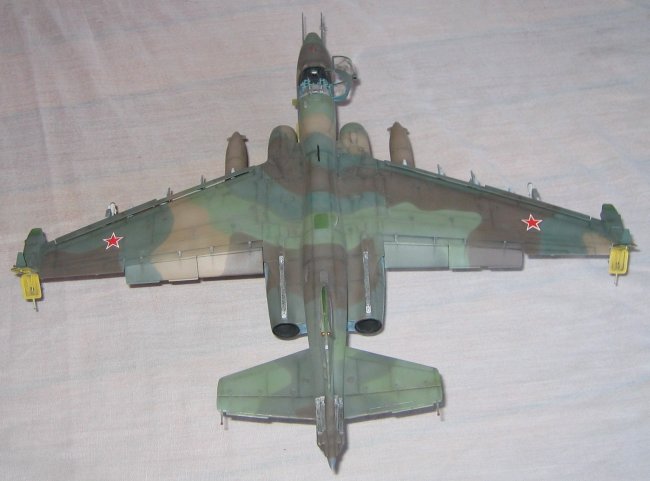
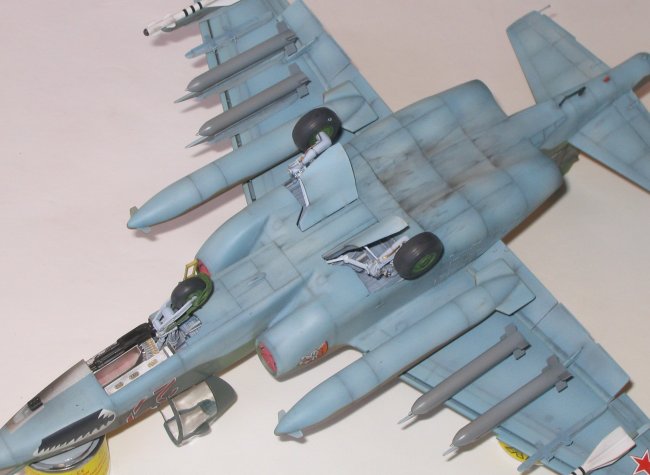
detail shots of the Frogfoot and so I decided to add extra detail to the model :
-
Split wingtip
airbrakes – kit parts were removed and modified to reflect the unique
double air brakes in the open position.
-
Dropped flaps
– Su-25 has double-slotted flaps. Flaps were cut away from the upper and
lower wing halves. Note that the engraved line representing the forward
extent of the flaps on the top wing section is incorrect (too far forward).
Lots of cutting, sanding, adding of plastic card etc. was required. Flap
tracks were also added. Note also that the outboard flap should have two
trailing edge tabs which are missing on the kit wings.
-
Dropped leading
edge slats – again lots of cutting, filling, sanding required. The slat
sections were cut from the kit wing top and bottom halves. The wing halves
were joined and the gap filled with recessed plastic card. Actuators were
made from plastic rod and the slats added.
-
Lots of plumbing
on main undercarriage units and bays
-
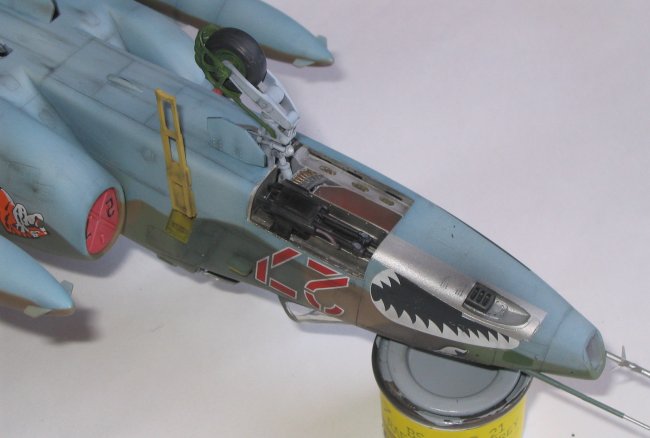
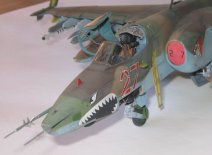
I decided to
scratch build the GSh-30-2 30mm cannon and ammo tray and installed these
into a suitably modified forward fuselage.
-
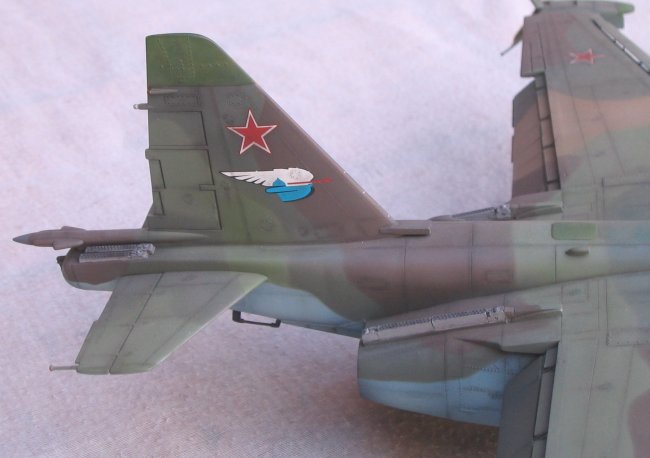
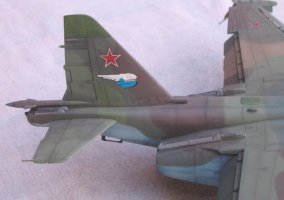
I added the
chaff and flare dispensers using Cutting Edge Su-22 items trimmed to length
and shape. These are installed on top of the exhaust outlets and each side
of the vertical stabiliser and were a feature of many operational Frogfoots.
-
Intake at the
base of the vertical stabiliser was made from plastic card
-
Glare shields
were added to the wingtip pods – these were introduced to prevent the
wingtip mounted landing lights from effecting pilot vision
-
“Canards”
added to the front of the kit wing tanks
-
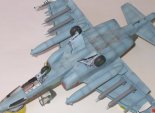
Kit inner wing
pylons were discarded. I made a mould of one of the outboard pylons and cast
4 units from resin. The inboard pylons (for the fuel tanks) were then
detailed with sway braces.
-
As the kit
rocket pods are totally unusable and I could not find replacement parts, I
decided to include S-24 (240mm) unguided rockets – there are some nice
pics in the Concord books of Su-25’s firing these things (very impressive
and apparently used with great effect against caves in Afghanistan). A
master was made from plastic rod and card, moulded and 4 units cast in
resin. The adapter launch rail was also scratch built, moulded and 4 units
cast in resin.
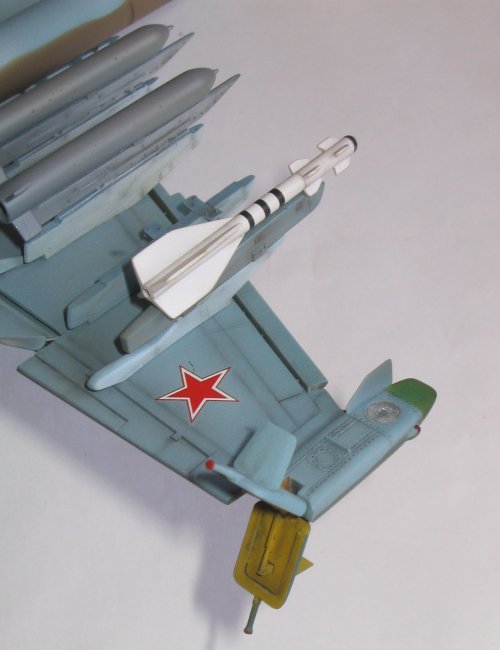
-
The AA-8 (R-60)
Aphid launch rails in the kit are incorrect. I made a mould of a rail
obtained from the Academy MiG-29 and cast two units in resin
-
I blanked off
the intakes with suitable protection covers. The kit supplied intake
trunking does not look good and, at this stage, I was not in the mood for
any more modifications to the kit.
-
The pitot probe
and air data probes were scratch built from plastic rod and card and
replaced the out-of-scale kit parts.
-
The laser range
finder window was modified to the correct configuration
-
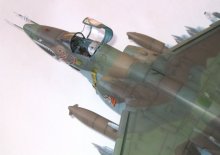
I used the
NeoMega cockpit set – looks nice and busy. I particularly like the armour
plate over the top of the seat – no doubt for protection from Afghan
tribesmen sitting up in the mountains.
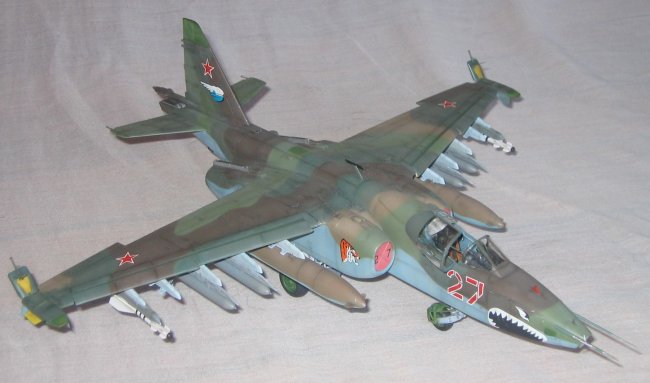
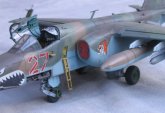
I used Linden Hill decals as the
kit decals are for the T-8 at Paris. The Linden Hill decals are
beautifully printed and settle down well with MicroScale Set and Sol. The model
was painted using XtraColor gloss paints for the upper surface colours (X616
dark green, X620 light green with light overspray of 50/50 X408/X616, X619 dark
brown and X617 tan – these were all lightened by 10% white for scale effect.
The undersurface blue is a bit gaudy but, according to colour references, is
accurate – I
used Humbrol H98 with 30% white. Weathering was done using pastel chalk to
highlight the panel lines. Minimal chipping was also added using a silver
pencil. Some raised areas were highlighted using dry-brushing.
Model was then matt varnished and Oil/fuel/hydraulic streaks were added using
enamel paint thinned with white spirit.
|
Click on
images below to see larger images
|
|

|
 |

|
All I need now is for Trumpeter
to bring out a 32nd scale Frogfoot and Fitter. If the weapons sprues on their
35th scale Hind are anything to go by, the first 10 hours would be spent
deciding on which weapons fit to use !!!
Malcolm
|
Click on
images below to see larger images
|
|

|
|
 |
 |
|
|