|
I’m certainly
getting around a bit with the different scales since I started modelling again.
A couple of 1/48s a couple of 1/32s and even a 1/24th car. Some
planes HAVE to be in 1/144 scale though, if you stand any chance at all of
having somewhere to put it after it’s finished, and the B-52 has to be one of
those. The trouble is that it’s a scale that’s hard work to get looking
right, as almost everything needs to be overscale in order for it not to
collapse under its own weight…
Undaunted, I
had a go at the Revell B-52H kit in 1/144, primarily as I needed a rest after
the detailed slog on my previous couple of models, and the all hidden cockpit
and modern colour scheme of all over grey seemed like a simple task. However, as
I filled all of the seams, and especially the wing to fuselage shoulder (huge
step to get rid of there) I sprayed the model with grey primer to show up any
flaws, and I realized that the finished article wouldn’t look much different.
HOW BORING! Despite the fact that I’d taken a good set of walkaround photos of
the kit subject’s sister aircraft at RAF Fairford last year, I went off the
low-viz scheme.
|
Click on
images below to see larger images
|
|
|
 |

|
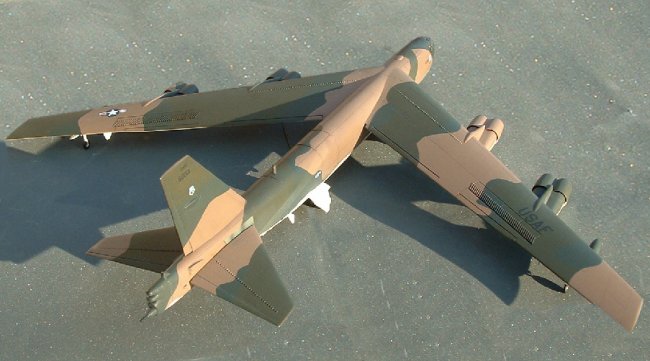
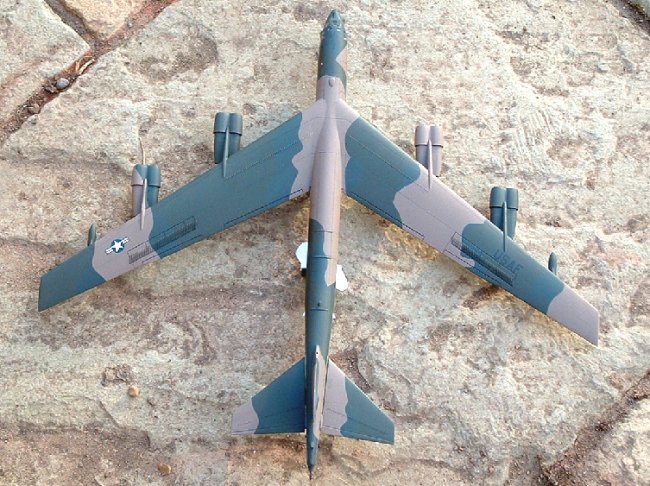
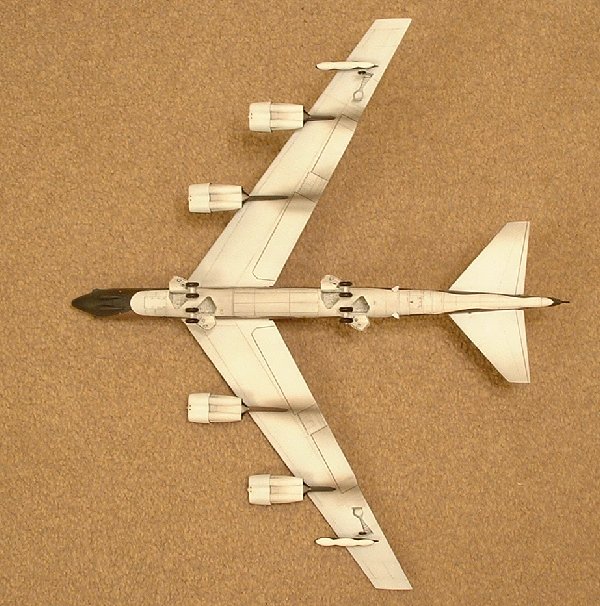
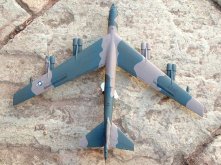
I
had a look on the internet for B-52 schemes, and found a tiny three view diagram
of a B-52 in SEA camouflage, two greens and a brown. I thought that it looked
the part, and with it being awkward to mask properly, having no idea what the
pattern was on the starboard side of the aircraft (So no comments about the
gross inaccuracies please!), and with no suitable decals available, I found
I’d set myself another challenge.
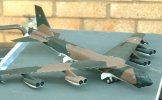
The
painting went easy enough, but I found that the greens I’d used were too close
to each other in colour. It’s only in some lights that you can see there’s
two different greens on there at all! Masking wavy lines for the top/bottom
delineation was trickier than I’d expected, especially on the small items like
the underwing tanks. Had to redo those a few times…
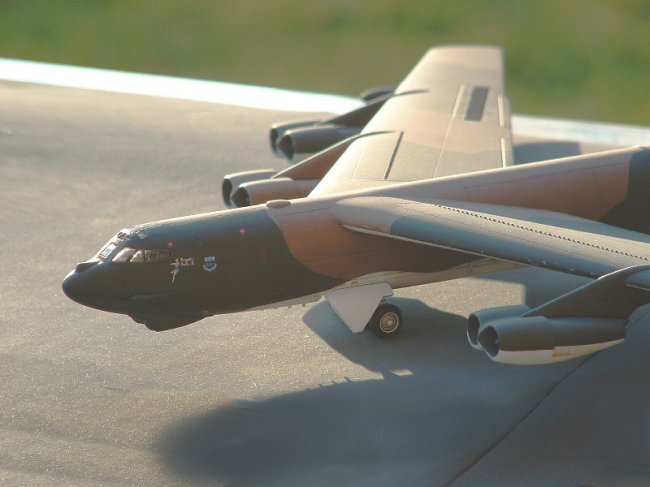
Then I had a problem with decals.
I had no suitable hi-viz markings, so I decided to make my own. It’s usually
worked in the past, but no luck this time - the stars and bars were printed out
on white decal paper, but it was impossible to slice round the design without
the white underneath showing around the edge. So, onto plan B, and as a result,
the markings are totally fictitious, and are a combination of the stencils and
nose art from the kit, stars and bars from a 1/144 F-4E for the fuselage, a
proprietary star for the wing, and a USAF for the right wing pinched from a 1/72
SR-71 kit. But as I’ve often said, I’m one of those modellers who isn’t
particularly worried about accuracy, preferring instead to make something that
looks nice. One problem I did have which was new, was that the Microset solution
I used reacted badly with the Johnson’s coat, and caused a strange bluish
white bloom to appear in the glosscoat. It scrapped the decal, and discoloured
the paint to the extent that I had to spend a long time polishing it out with
toothpaste. Happened twice, on different parts of the airframe, so I gave up on
the solutions for the time being. No idea what caused that. Any thoughts?
|
Click on
images below to see larger images
|
|
|

|

|
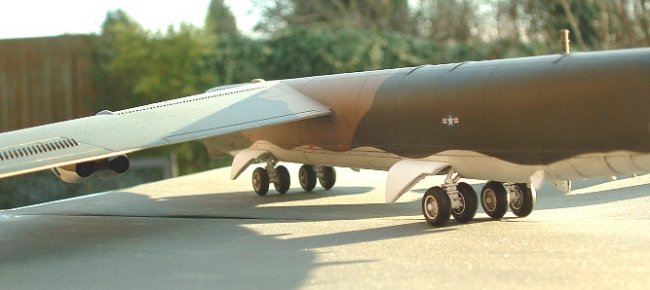
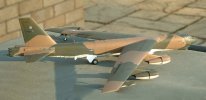
Then it was
onto a pastel chalk panel line wash, and engine exhaust streaks done with the
airbrush and Tamiya Smoke and matt black. The underside of the fuselage received
a bit of a dirtying up, paint chips were added with a fine brush and silver
paint, and then it was time to assemble the engines and undercart. This plane
just has too many of everything! Trickiest part of the whole job was getting all
ten wheels to touch the ground simultaneously, but patience won out: I fitted
the main wheels on one side only, propped the model up on those wheels so that
the wingtips were the same distance from the ground, and then fitted the other
side’s wheels so that they touched the ground also. (I’d previously bored
out the wheel hubs to give me a bit more wiggle room). Then it was a lot of
pushing and prodding around with long implements so that the wheels were
vertical and all in line by the time the glue set!
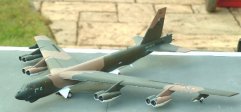
Final matt
coat, unmask the cockpit windows (which last saw the light of day about four
months previously!) and that’s it for the BUFF. I waited for the sun to
come out and took some pictures in the back garden, with the plane resting on
abrasive paper on top of my wheelie bin. The “in flight” photo was cropped a
bit to remove my fingers gripping each wingtip as I hoisted the model over my
head! If the kit had had an option for lowered flaps, it would have been a more
convincing representation of an evening landing…
Don’t know
why the first F in BUFF stands for Fat, do you? In proportion to its size, the
B-52 has one of the slenderest fuselages I’ve ever seen…
Dean
|
Click on
images below to see larger images
|
|
|
|
|
|
|