|
Hi all,
I started this plane with the aim
of putting a CJ blk 50 Viper in my display case, and it's turned out to be one
of my longest 1/48th projects, and also one of my best. I originally intended
this to be a normal OOB build; but it quickly turned into another superdetailing
project where no detail was considered to be extra.
|
Click on
images below to see larger images
|

|
|
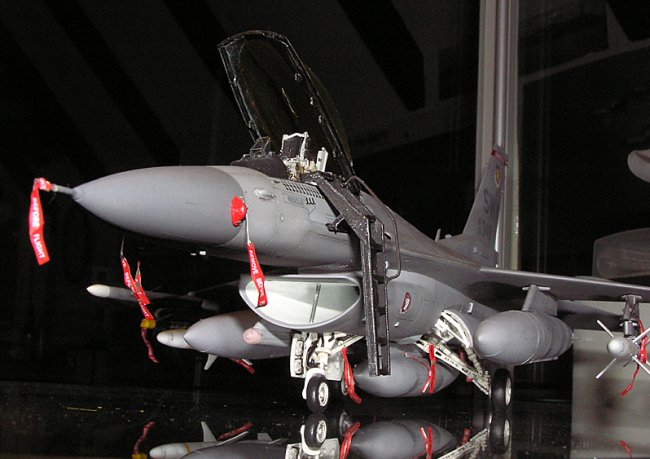
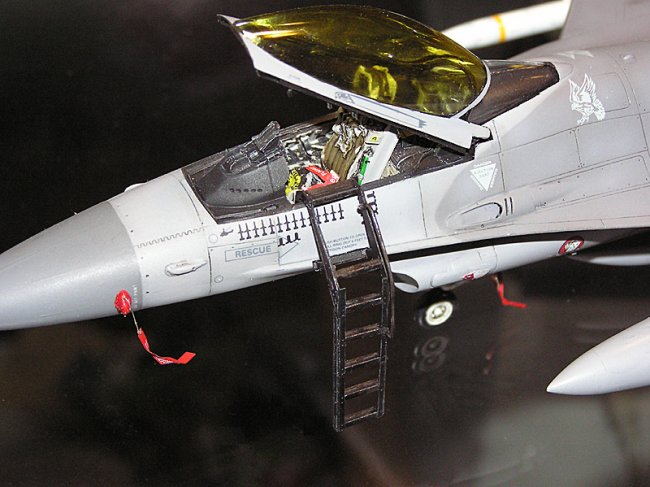
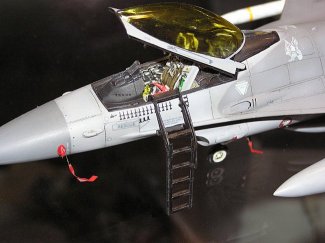
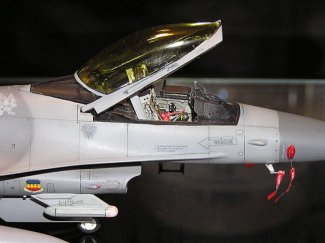
Cockpit:
I used the BlackBox pit, and much much sanding and fitting was needed
to get it in. The instructions weren't entirely clear as to how much of the
canopy sill to chop off, I ended up chopping off all of it and had to rebuild it
later. The rear bulkhead was a real pain to fit and I ended up having to force
some areas to stick together with copious amounts of superglue. Everything was
painted with Gunze acrylics, washed with oil, drybushed with FS 36375 and little
bits of white and silver sometimes. I also added the front canopy seal from an
Eduard photo-etch F-16CJ set. The seat was painted; everything was sprayed with
future and then given a wash to enhance the contrast.
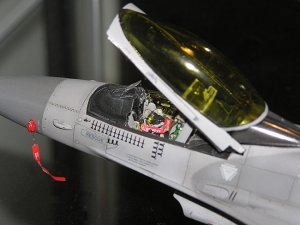
| The cockpit. I
added an Eduard photoetched RBF tag to brighten up the grays and browns,
had quite a tough time folding it to the desired shape! Next time I'll use
a paper printed RBF tag |
Click on
image below to see larger image
|
|
|
More photos of the BB pit:
|
Click on
images below to see larger images
|
 |
|
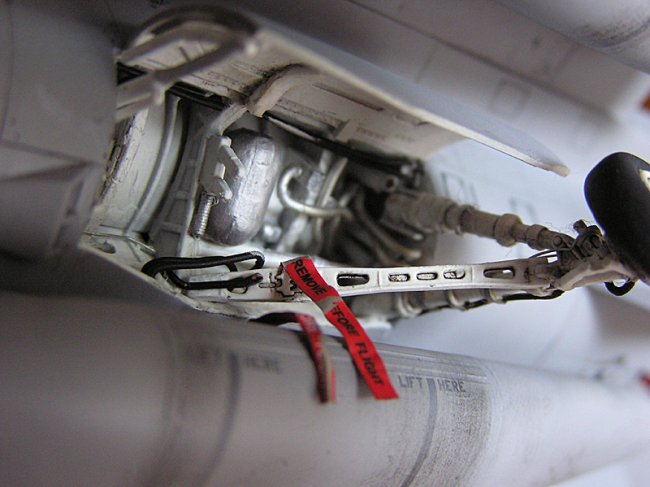
Wheel bays:
Since I was going to add more
detail, I purchased an Aires wheel bay set from spruebrothers.com
and worked on the cockpit while it flew over (in about a week). The molding was
beautiful, each detail intricate and well defined. However, at 19USD a set, I
wasn't gonna buy many more of these! I also had the FM set, and so I decided on
the next best course of action to preserve my cash (for more kits) -
scratchbuilding! I started small - adding strips of styrene, using the Aires
bays as a template. Below you can see a side-by-side comparison - it's far from
done!
The final product for
wheelbays:
I added the blue box, the silver
bottle, as much detail as I could muster without going crazy (wire for brake
lines, piping etc); sprayed them white, washed etc etc you know the drill.
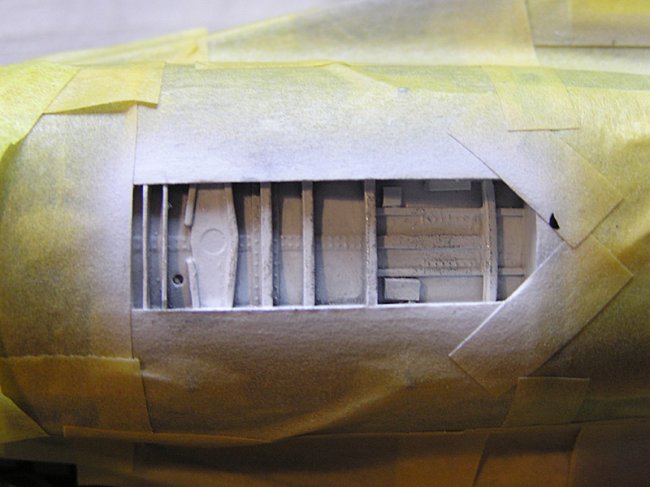
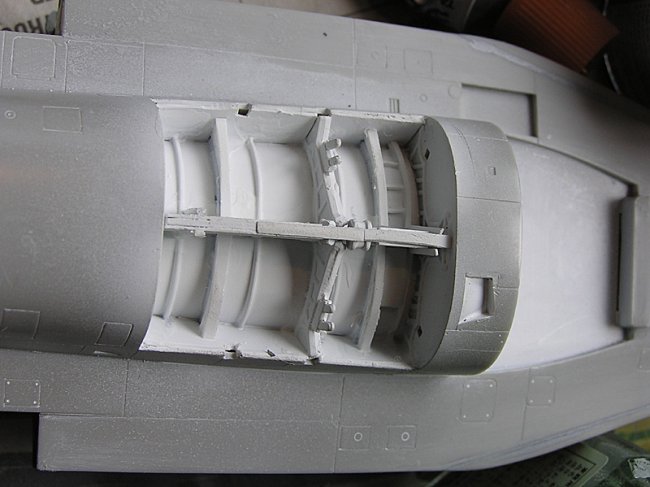
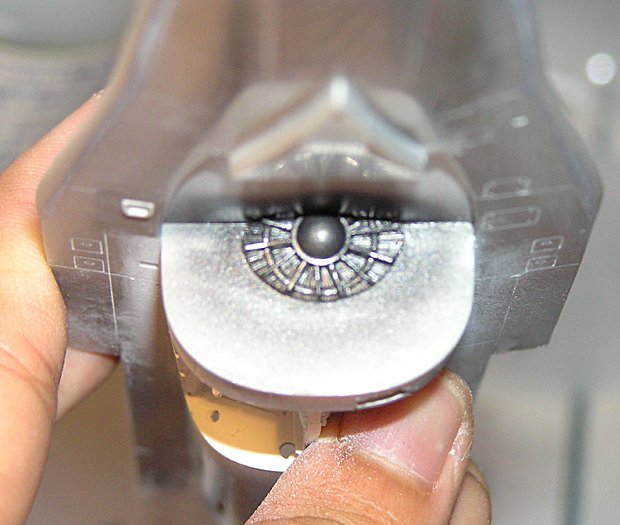
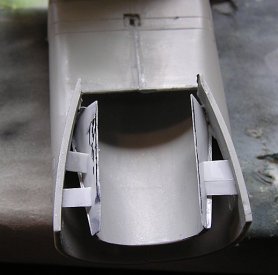
Intake:
One of the greatest weak points
of the Hasegawa kit is in the intakes. A flat wall marks the end, plus, it's
real hard to get a smooth seamless intake. I didn't want to shell out for more
resin (I actually have 2 sets of seamless suckers, but never used them cos I
keep hearing bad reviews), so I decided to try and create my own
"seamless" intake. I didn't want to do any cutting of sorts of the
main fuselage, so I merely built a pseudo-seamless intake.
|
Click on
images below to see larger images
|
 |
|
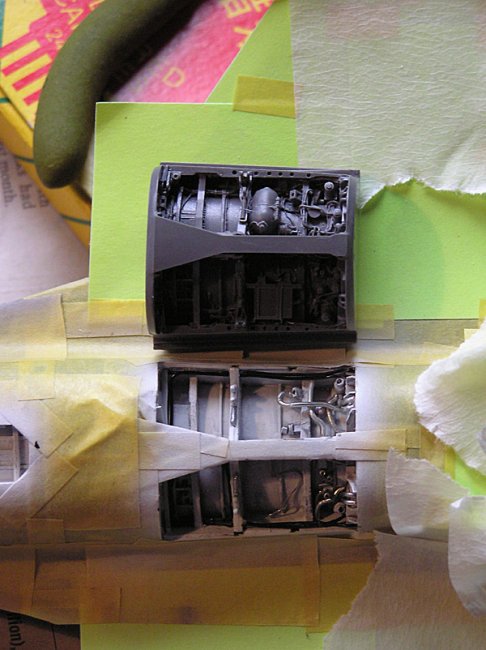
First, I took a look at what I had to make a
fan face. I was gonna' scratchbuild the whole thing, till I saw the P&W fan
face included in the kit for the P&W exhausts. I took that, cut that to
shape, sanded the back down, added a few strips of styrene for more fan blades,
painted it and drybrushed it silver. For the intake, I added more styrene to the
duct to complete it, then used putty and carefully applied nail polish remover
with a q-tip to smooth it down into a real seamless intake. I then painted it
gloss white, put in the painted heating thingy and masked up the demarcation
line. Below is the final result.
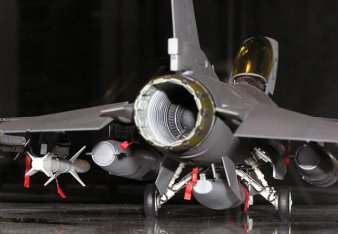
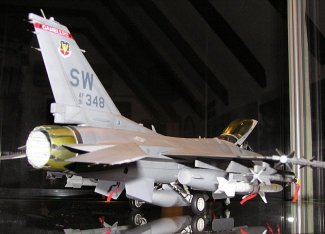
Exhaust:
Again, the kit's one was painfully
poor in detail. I considered buying Shawn Hull's resin replacements; as they
were pretty affordable, but I couldn't wait, so I decided to find a way to
scratchbuild some detail on. I use strip styrene, and a sharp blade to score
lines on the styrene, then cut it up into smaller strips to fit the exhausts.
The exhaust duct was simply detailed with styrene strips as well for some
texture. It was all then sprayed white and given some streaks of black, and more
white sprayed on top. Basically I was trying to achieve a dirty streaky kind of
look inside. I painted the outside using Tamiya Bare Metal Silver, and shaded it
with clear yellow (I think I overdid it in some parts). The darker petal overlap
areas were actually masked off with copies of the petals before spraying the
bare metal silver.
|
Click on
images below to see larger images
|
 |
|
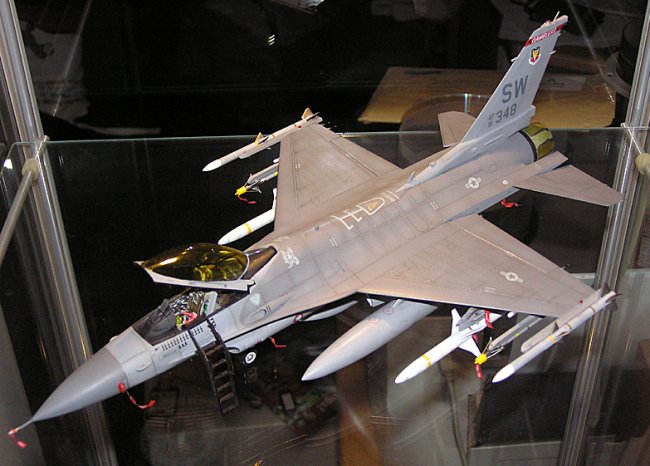
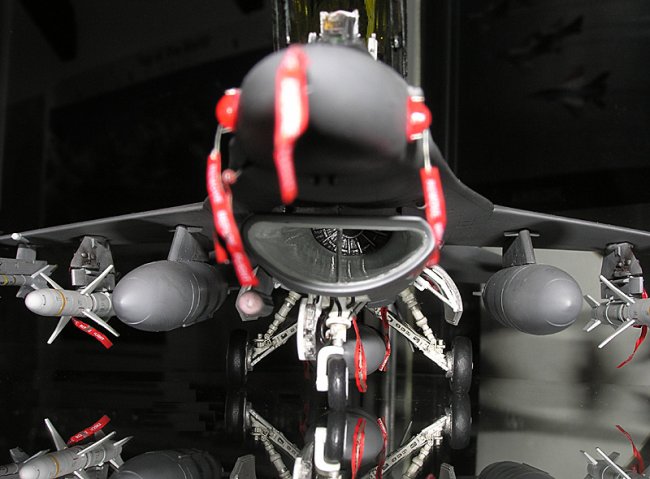
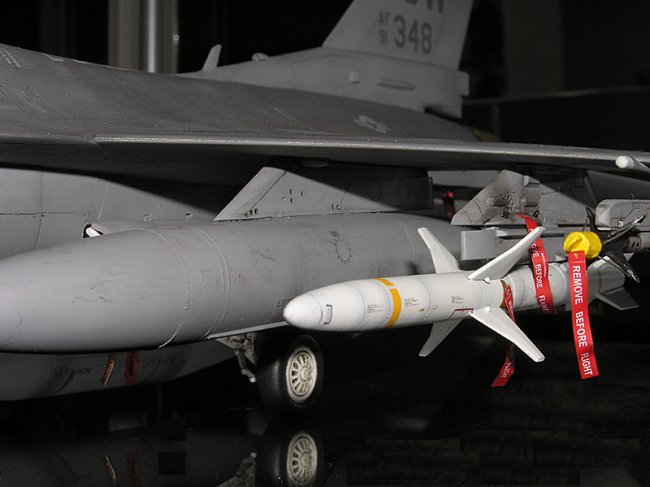
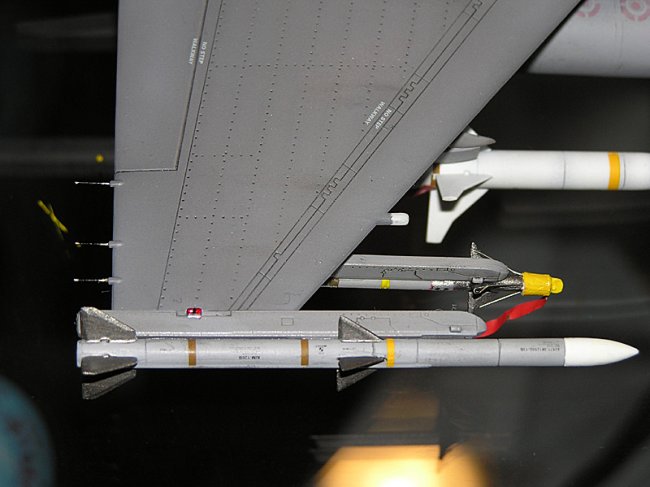
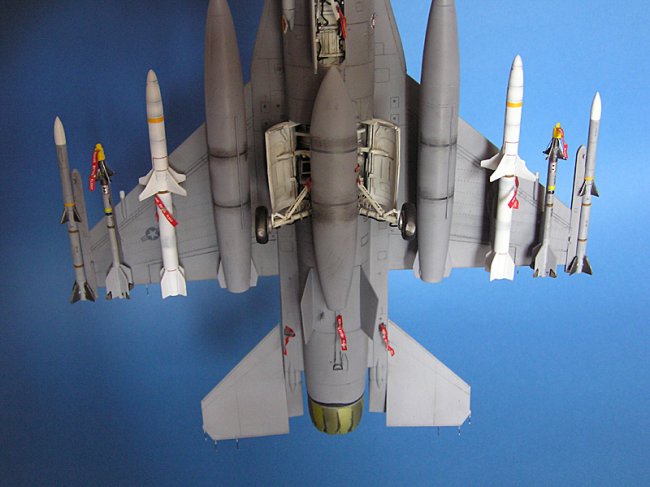
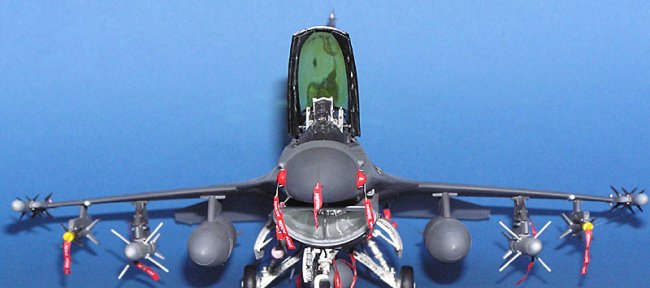
Decals:
I used Twobobs OIF Vipers. Had
Afterburner released their CJ sheet a little earlier, I would have build their
wing king jet, but as it is, I'll have to do with this. Mission markings
include a helicopter which was destroyed on the ground. Twobob's missile
decals were used for the HARMs, AMRAAMs and sidewinders. I learnt from my
previous builds (ie mistakes) and cut the one piece missile decals into
smaller bits for application. All the decals went on beautifully; which is
actually the norm for Twobobs.
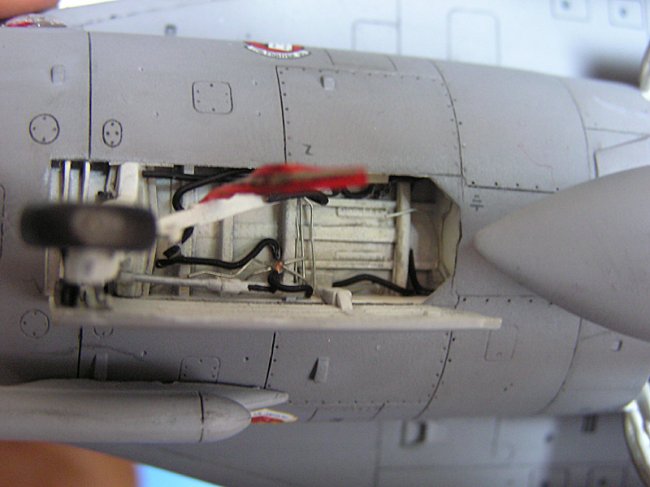
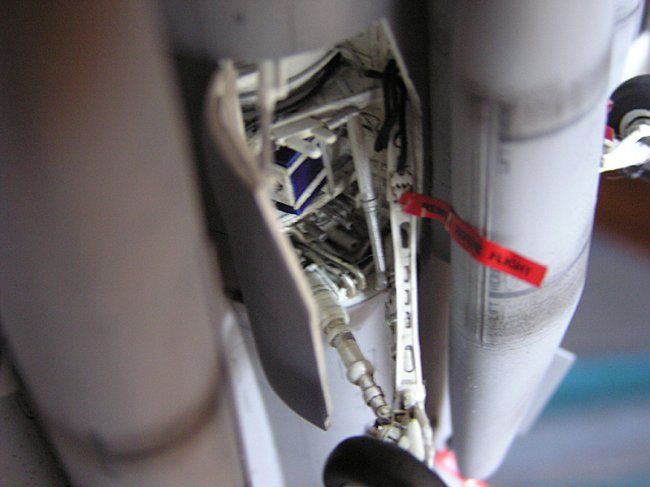
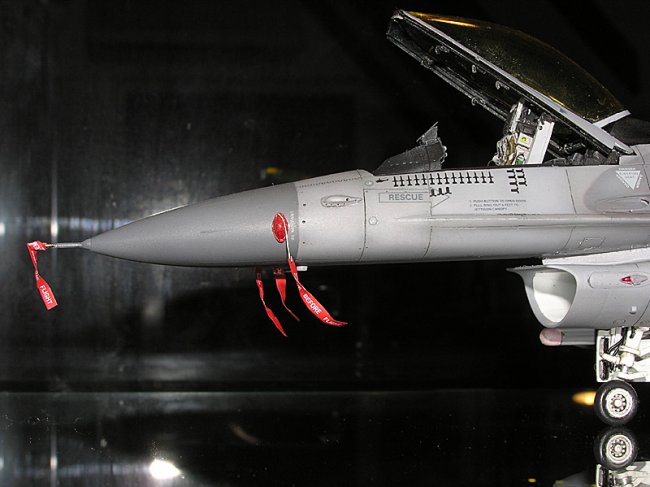
Others:
I used DACO's book as a reference
for RBF tag placement. They seem to be everywhere! AoA probe covers were
scratchbuilt from strip styrene and excess resin from the BB cockpit set,
simply filed to shape. Sidewinder head covers were made from q-tip plastic,
with styrene in front, painted yellow. Static
dischargers were toothbrush bristles, painted black with gold tips and
bases. I used some chalks to add some dirt to the fuel tanks, and also to
the wings (which were rubbed off with a wet q-tip; I didn't want too dirty
a jet). Wash was oils, paint was entirely Gunze Aqueous. I also added a
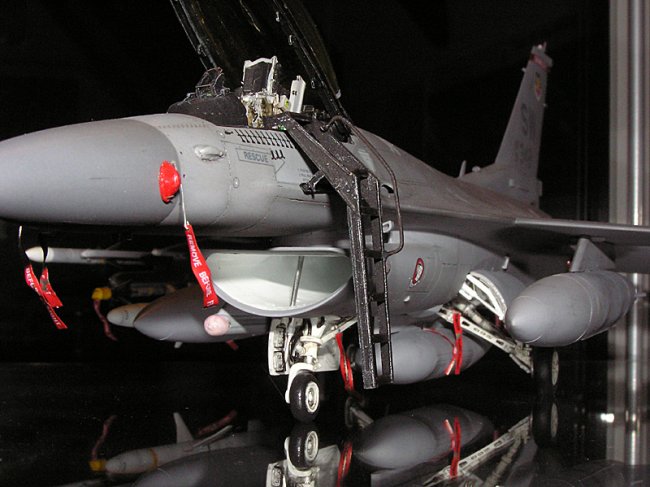
ladder from Eduard photo-etched, which cost me (IMHO) a bomb for a ladder!
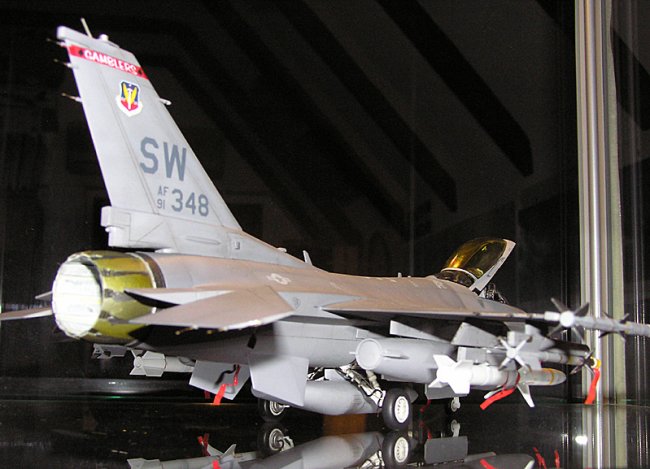
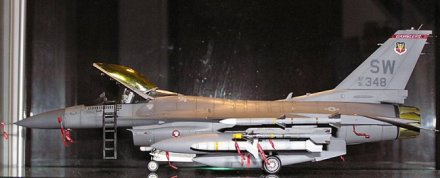
A few more shots;
some of these are real favourites of mine.
David
|
|