|
Aero
Team’s Sukhoi 25 kit is more accurate in shape than Monogram's kit regarding
the real airplane, but this does not mean that it is totally correct, Aero
Team’s kit demands more work to assemble than Monogram’s; but, the plastic's
thickness allows making corrections with sandpaper and another tools and
obtaining the best model. Below I'll show some changes that I made to this kit.
|
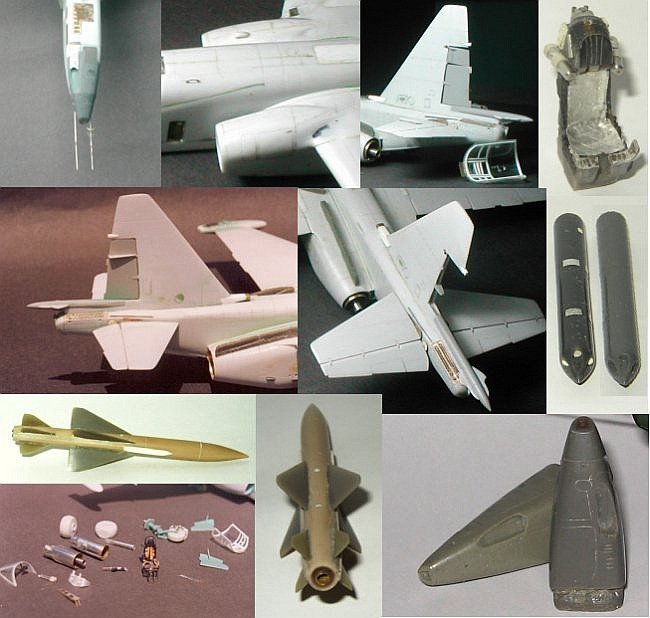
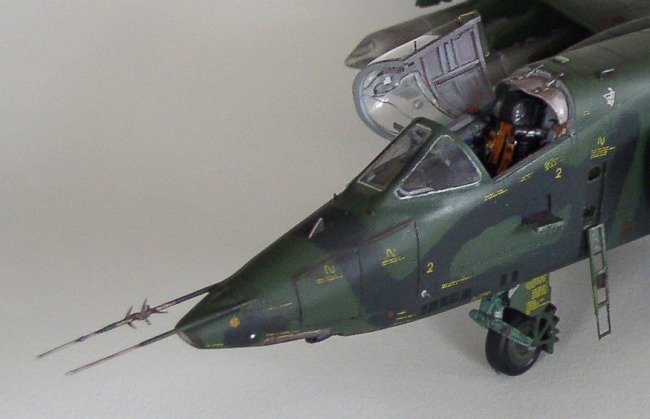
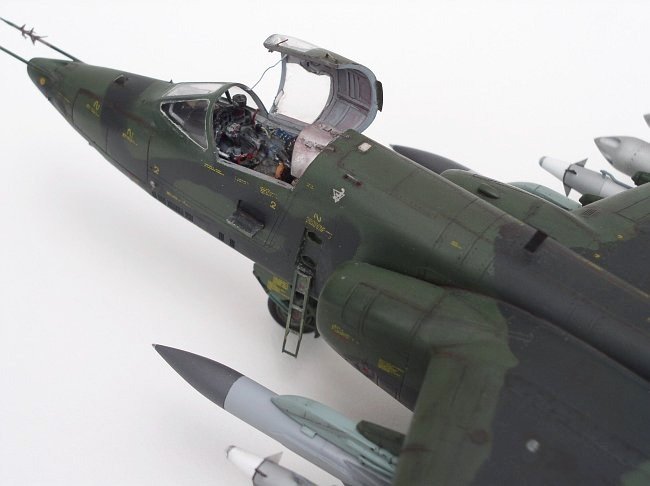
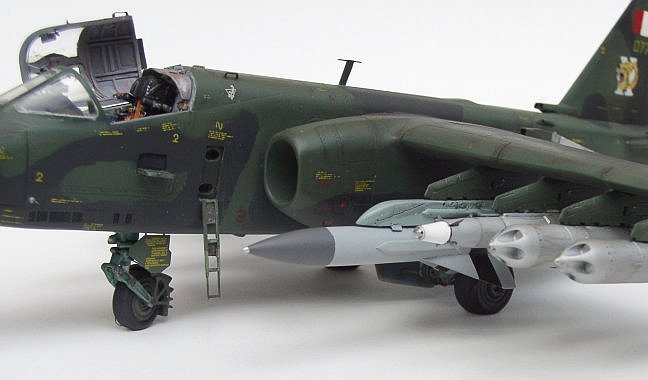
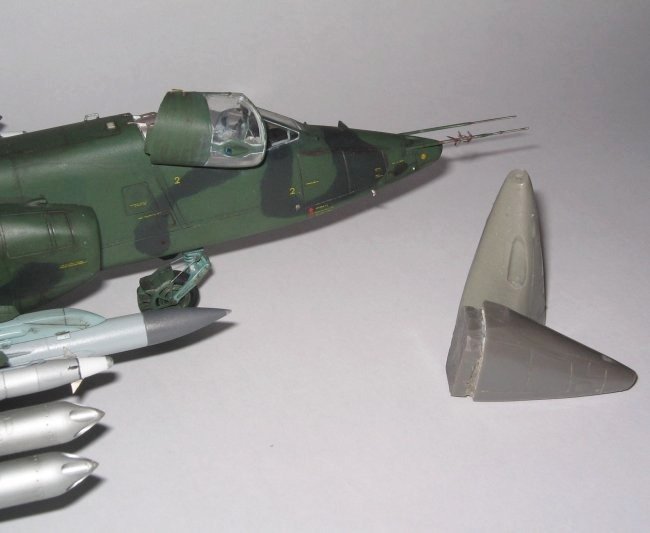
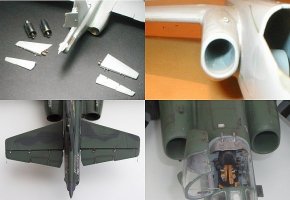
·The
nose was replaced with one that it was produced in resin, which was
designed by me.
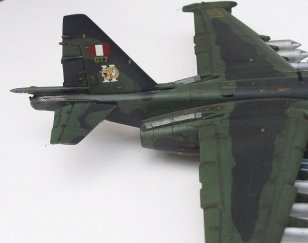
·Correction
at the very top of air intakes of the turbines with the wing's union.
·The
vertical rudder was corrected by cutting 3 mm along the rear and by
reducing the thickness in almost 2 mm using a sandpaper, but previously,
the vertical rudder inside was filled with resin in order to remake the
details lost in the reduction work regarding the thickness issues.
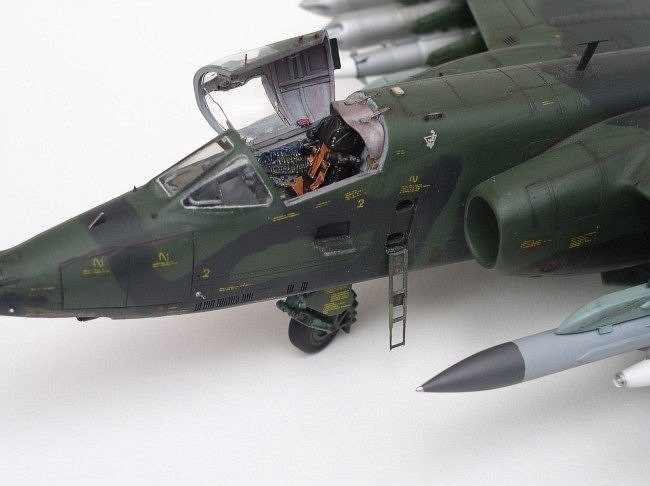
·I
replaced the K - 36 seat with one that was produced in resin, which was
designed by me.
·The
kit’s lateral parts were corrected, chiefly at the same altitude of the
main trains section. |
Click on
image below to see larger image
|

|
|
|
Click on
images below to see larger images
|
 |
 |
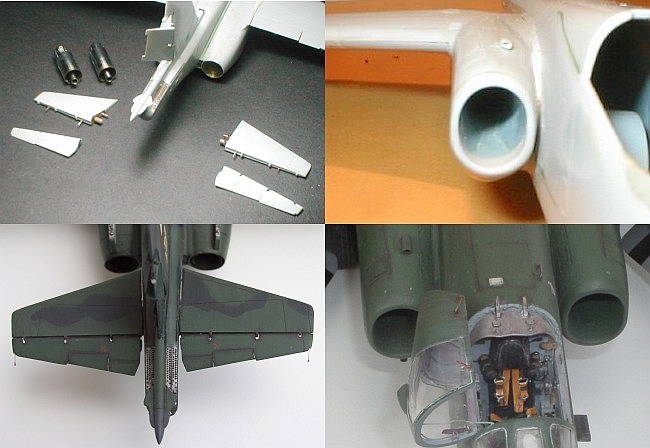
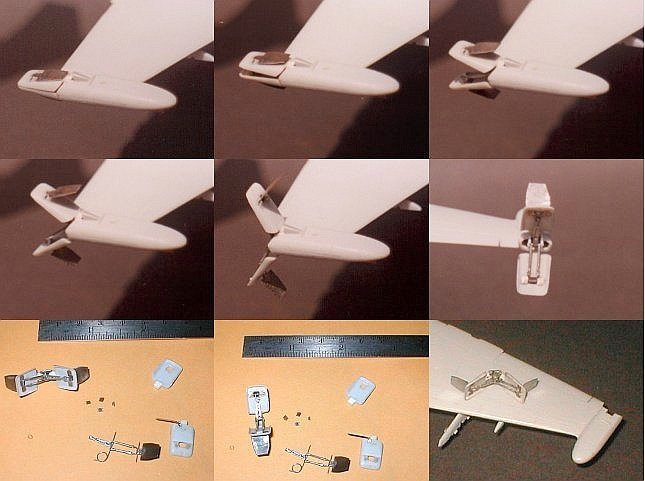
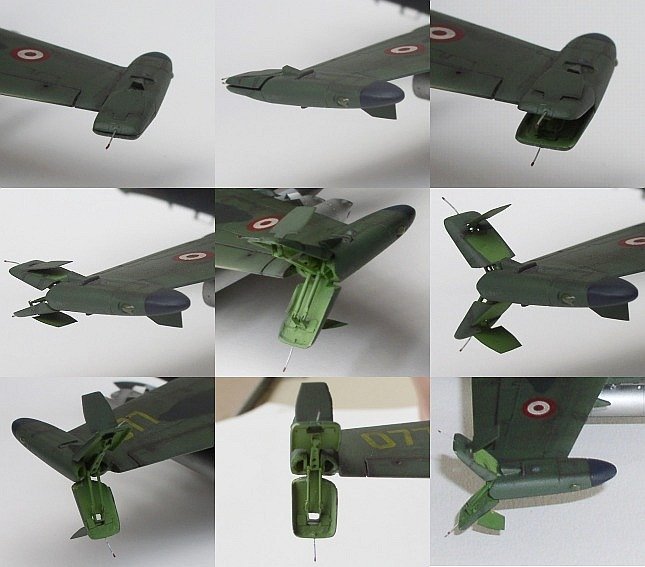
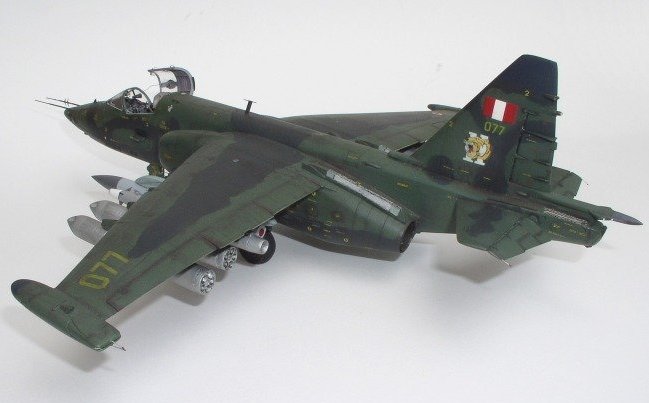
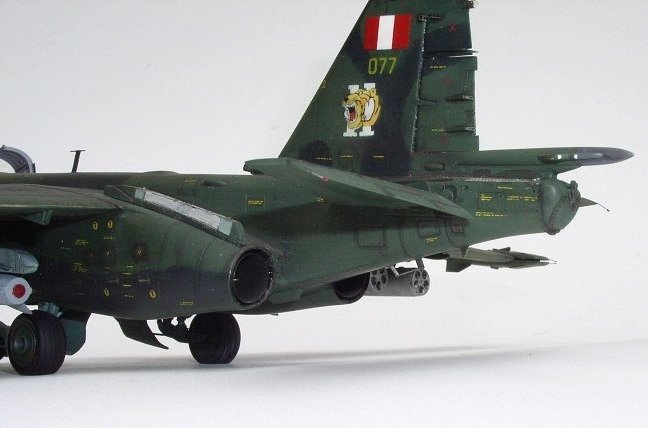
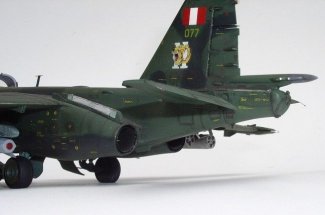
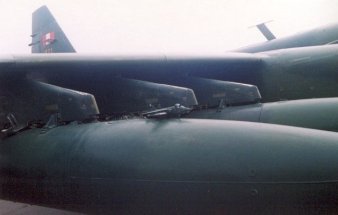
·Professional
model’s brand chaff flare's launcher were modified 50 per cent to get the
right shape.
·I
replaced the air take of the vertical rudder base for one made of plastic and
metal.
·Plastic
ribbons were added in the inside of the cockpit to obtain high relief in the
inner structure.
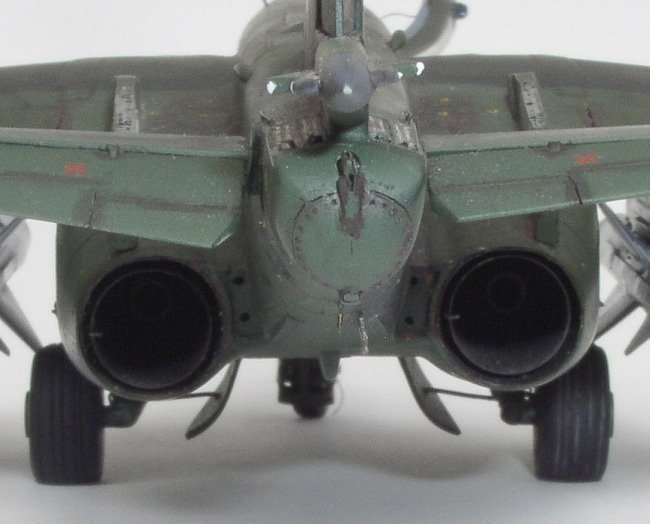
·Speed
brake’s movable system were built in metal.
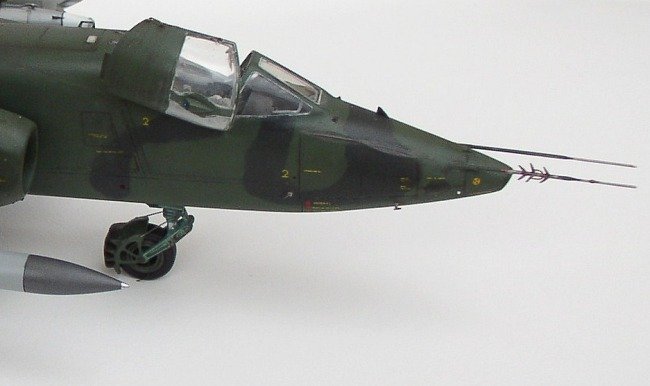
·Pitot
tubes were built out of hypodermic needles by lathing and welding little tin
wings to them.
·Fore-train
height was reduced by many millimeters.
·Cannon
was replaced by a pair of hypodermic needles adapting them to the muzzle.
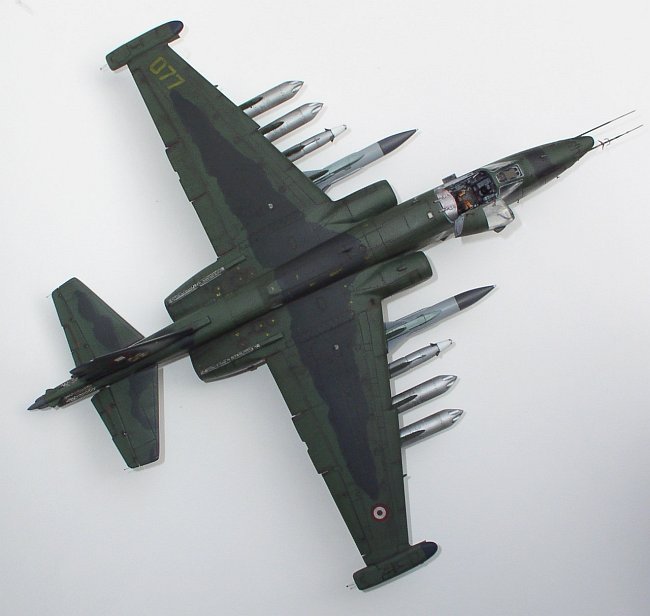
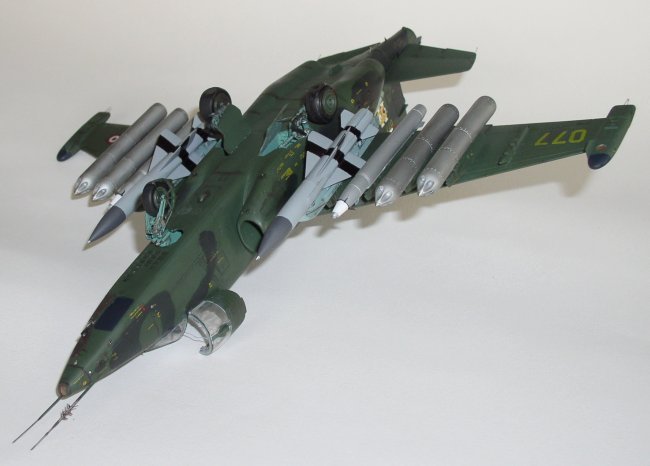
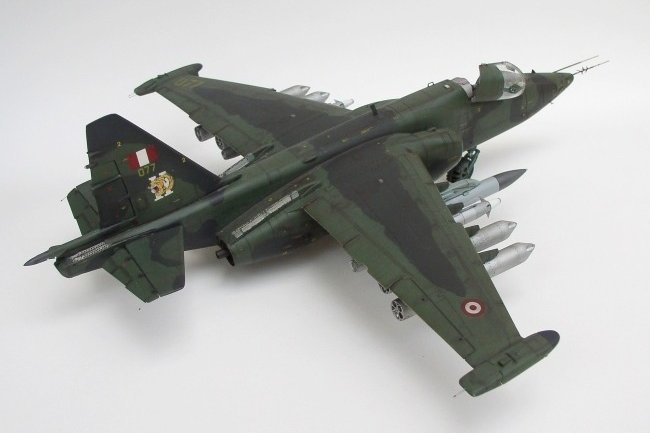
·All
weapons which belonged to the current configuration are made of resin; however,
in the case of the Kh-58E and S-25LD missiles, I used as
a platform from the resin kit made by my friend Ernesto Ponte. These
missiles were modified in order to obtain another variant out of every missile;
besides the B-13L rocket launcher was designed by me and produced in resin.
·Cockades,
buntings, numbers and Grupo11’s logo decals are of own production by
serigraphy and impression laser, the rest of the little yellow decals were
obtained from 4 different kits.
·Intake
nozzles for the jet engines were replaced by two made of bronze.
·Part
brand S48-042 photo etched was used, also the kit’s own photo etched.
·Posterior
wheels were lathed to shape them right and also around 50 smaller modifications
were made in all the kit.
The
section which took more time to build was the speed brakes because this
mechanism consists of 23 metallic parts and 4 plastic parts by speed brake kit.
These metallic parts were built in steel and bronze and welded with tin.
On
1997, when I first assembled this kit, I built a speed brake entirely in plastic
but it was too weak and moreover I could not get the right thickness.
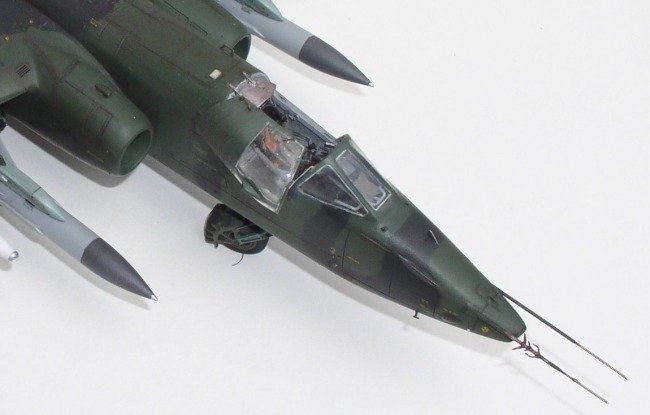
The
cockpit is almost completely scratch made, except the photo etched board which
has some tin welded details. The rest was made mainly in resin, plastic,
aluminum and bronze and steel wire.
The
protective armor panel above the headrest was replaced with one made of aluminum
more than one millimeter thick.
To
stick metal with plastic or with resin is advisable to use epoxy based glue
since it has a better adherence than cyanoacrylate.
A
good replacement for putty used to join plastic with plastic or resin with glued
characteristics is cyanoacrylate mixed with fine talcum, this is dusted right
over the area where cyanoacrylate was applied and the remaining talcum is blown.
A few minutes later it can be sanded with sandpaper.
It
is advisable to repeat this step many times if the cavity to fill is relatively
wide and not to do it in only one step. This
technique is good when we need to cover the bas-reliefs made by mistake and we
do not have to wait a long time as with other putties; moreover, its hardness is
similar to plastic and therefore when it is sandpapered, the plastic and the
putty have the same erosion.
|
Click on
images below to see larger images
|
 |
 |
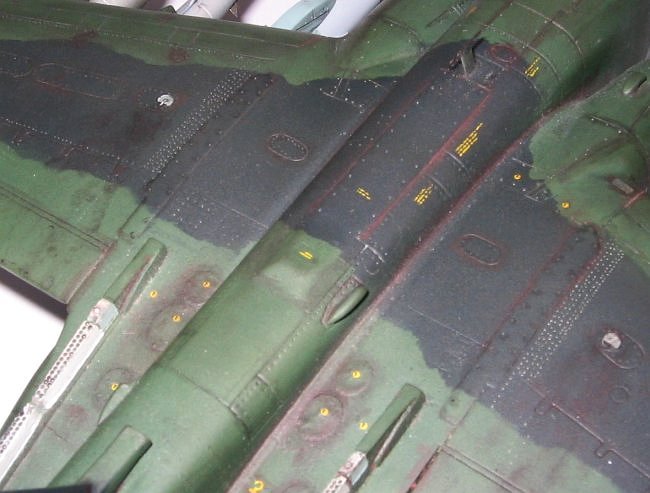
Paint:
The
2 main colors used were tinged in acrylic based on thinner, guiding me with a
paint sample of the real airplane.
|
Click on
images below to see larger images
|
 |
 |
I
want to thank very much my friends at the Talara’s air base. They allowed me
in many instances to take photos and measurements of their aircraft, without
this help I could not have satisfactorily concluded this model.
Dony
|