|
Sanger are the
company that produces 1:48 kits of RAF two and four-engined aircraft that
other companies have so far avoided. Unfortunately they are vac-formed
kits of the "old school" requiring serious plastic cutting, sanding,
scratch building and a big hit to the spares box. In short they are great
fun but not for the faint of heart (or sane).
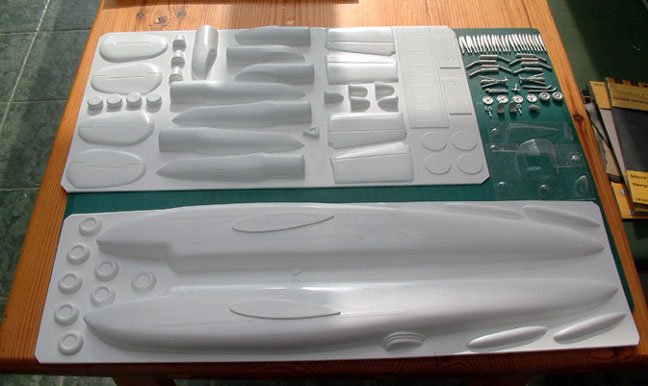
I got my MR3 kit
from Hannants. It is packed in an insubstantial plastic bag with large vac-formed
white styrene sheets containing the fuselage, wings. tailplanes, engine
nacelles, part of the nosegear leg (unuseable) and mainwheels (also
unuseable). The cockpit, nose and tailcone transparencies are supplied in
thick but well-formed clear plastic - you only get one set so care is
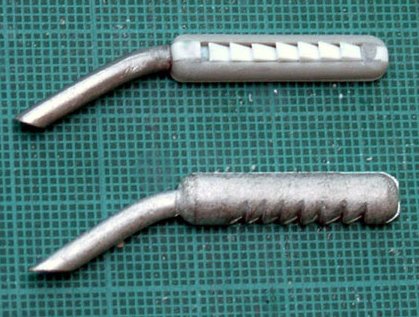
needed when cutting. The nosewheels (wrong tyre tread), maingear legs,
engine exhausts, propeller blades, control yokes and cockpit seats (unuseable) are
in white metal. A large decal sheet provides codes that appear to be for
an MR1 but does supply appropriate yellow wing walk markings.
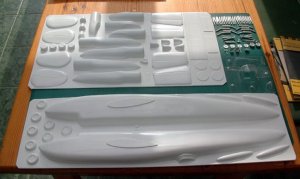
| Kit parts out of
the bag - fuselage and engine nacelle sheets plus transparencies and white
metal parts |
Click on
image below to see larger image
|
|
|
|
Click on
images below to see larger images
|
|
|
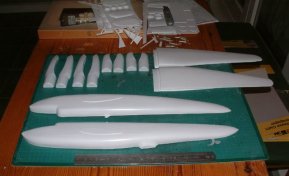
The vac parts were
cut from the backing sheets and sanded down in the usual fashion - sandpaper
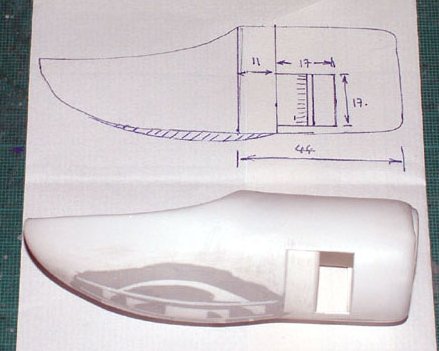
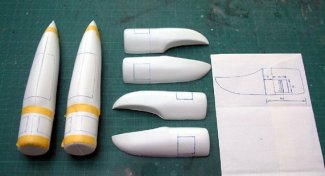
laid flat on a sheet of glass (an old refrigerator shelf). The engines
are supplied as left and right halves and require intake flaps to be cut in
the sidewalls. Based on photographs I sketched sideviews of the
inboard and outer nacelles and marked where they were on each nacelle half.
They were then cut away to form the openings. Pre-curved sheet was
laminated and re-attached to fill the rear half of each opening and a
thinner "flap" was attached to the forward half to match the photo
images. The vac-formed engine fronts were scored with a P-cutter and
cemented just inside the front of each nacelle. Offcuts from the vac
backing sheet were fashioned to make the "dividers" in the engine
fronts.
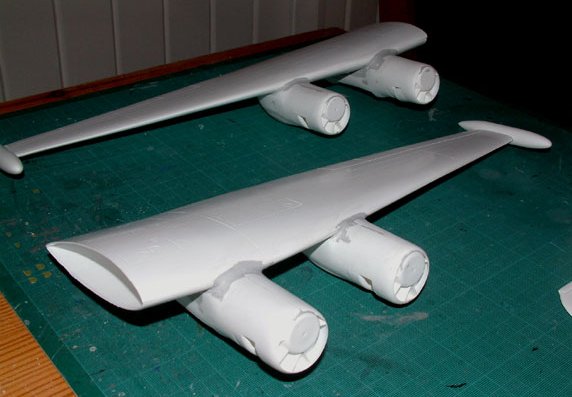
The outboard nacelle
"tubes" are moulded parallel but the MR3 outboard nacelles have a
bulged underside that is quite distinctive. This was created by cementing
curved formers to the nacelle underside and filling the gaps with offcut vac
backing bits and finally Humbrol plastic filler. Once hardened these were
sanded smooth to form the bulged nacelle undersides. The nacelles
were then grafted onto the wings using super glue (cyano) and lots more filler.
Once I had removed much of this from my fingers it was ready to sand.
The tailpalnes are moulded with
quite a bulbous thickness to them so these were ruthlessley sanded down to
produce a more scale thickness. The rudders were also separated to give a
better effect. Steel pins super glued into holes drilled using a pin vice secured
the tail assembiles together.
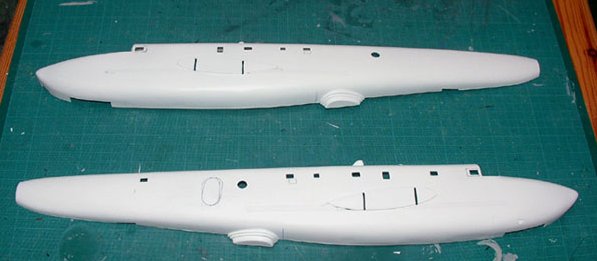
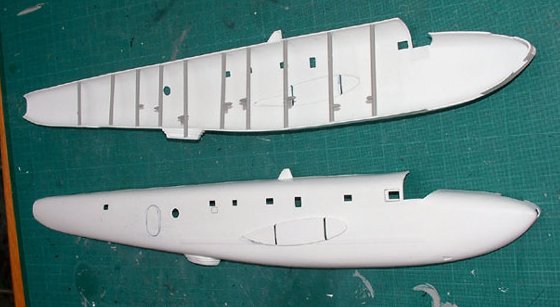
The fusleage halves have door and
window locations indicated by embossed perimeters. Unfortunately these are
in the wrong positions and so they had to be filled and the windows marked,
drilled and cut out in the correct locations - photo references helped a lot
with this task. The starboard rear door was re-scribed in the proper
position. The joint between the fuselage halves was reinforced with
plastic strips (more vac backing offcuts) and sprue lengths from an old
injection moulded kit were used to ensure the correct vertical separation - this
prevents the vac fuselage halves from "squashing".
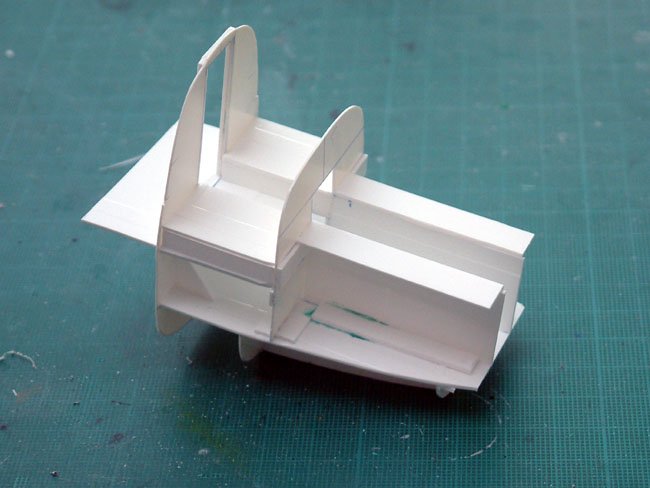
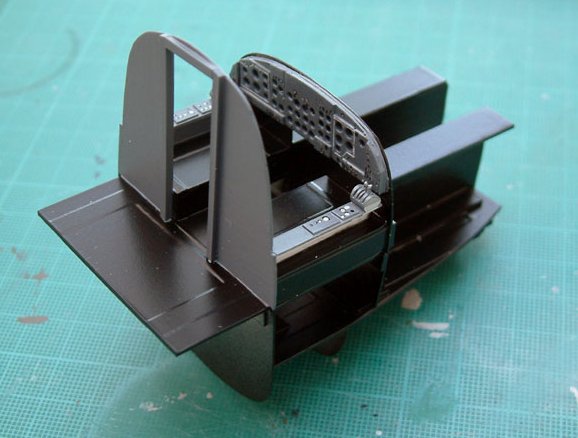
There is no kit cockpit and so
this has to be scratch built (using more vac backing sheet offcuts and plastic
card stock) - a google image search helped with this.
The main cockpit console was
scratch built using laminated plastic card sheets but the kit-supplied yokes
were used (hurrah!). The seats were scratch built using thick
plastic card and spare photo-etched bits.
The kit-supplied engine
exhausts do not look like the ones on an MR3 so the exhaust bodies were scratch
built and the white metal pipes were grafted onto these - only had to do this
eight times!!!
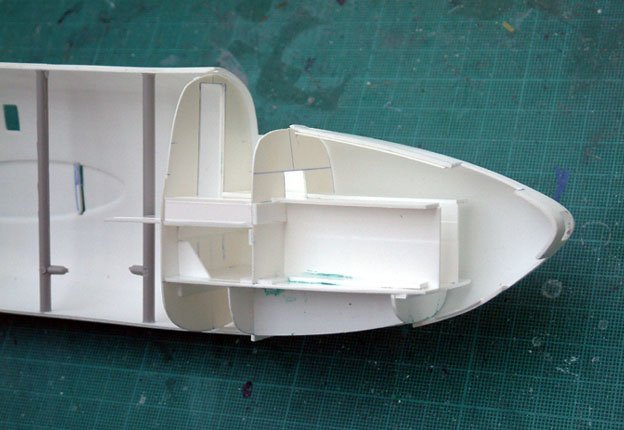
Once the cockpit was cemented
into one fusleage half, the other half was attached superglued, taped and left
overnight. The joint was then smeared with humbrol filler and then left
for another day. After sanding - no joint line (phew). Slots
were cut in the fuleage sides for two thick plastic main wing spars (not a kit
instruction requirement but vital in a model of this size). The cockpit
and tailcone transparencies were dipped in Johnson's Clear and once dry super
glued to the kit (the Clear does prevent white misting) - although the super
glue is applied to the joint using a pin point with the part taped in position.
Once the glue had set the clear part is masked and the joint filled with humbrol
filler. The filler having set, the joint is sanded (with the masking still
in place) to result in a smooth joint - the masking protects the clear part from
scratching during sanding. The masking was replaced and the whole model
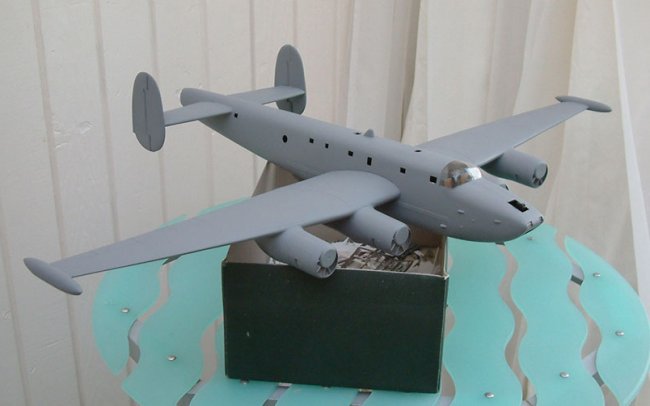
primed with Halfords grey spray primer.
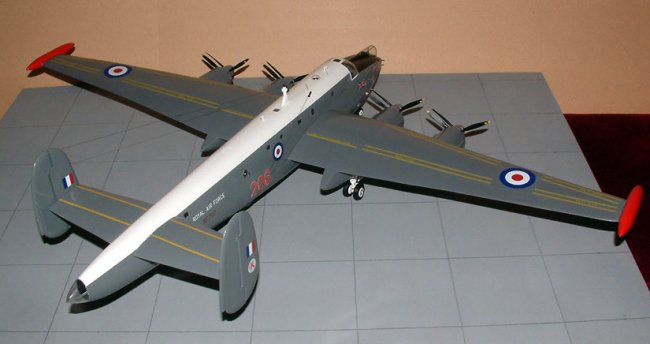
The top of the fuselage was
painted with Halfords white spray primer and sealed with a couple of coats of
Clear. Xtracolour dark sea grey was then brush applied to the rest of
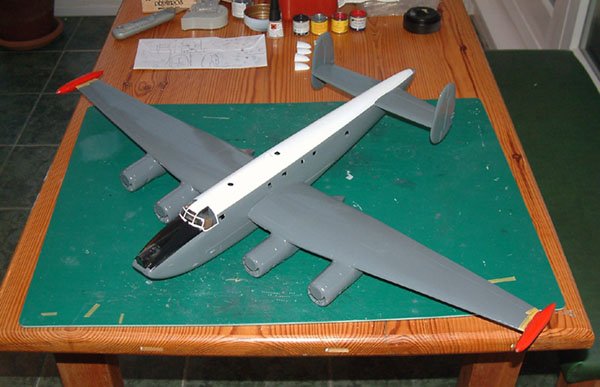
the kit. I used spitfire mainwheels for the nosewheels and true details
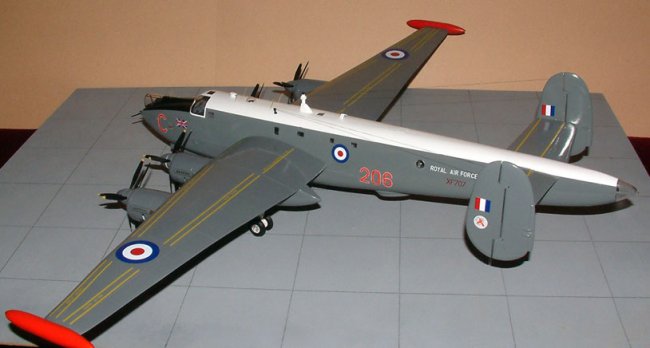
1:72 B52 wheels for the mains - with scratch built hub inserts. Xtradecal
roundels and Carpena white letter codes were used along with home-made decals
for the red serial and code inlays to the white decals (to give a red code with
a white outline). The octopus motif on the fins was scanned in and
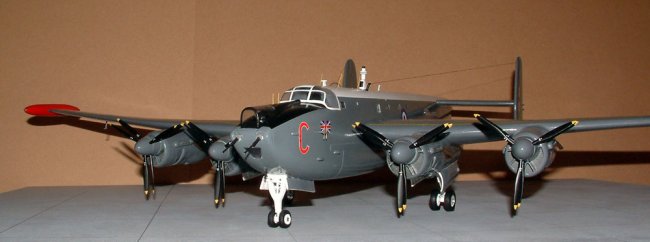
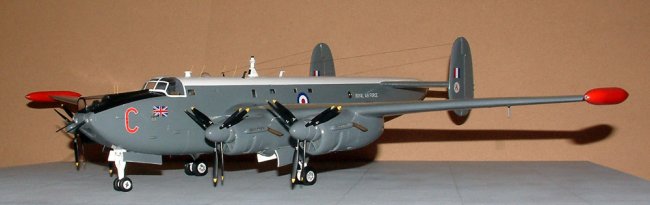
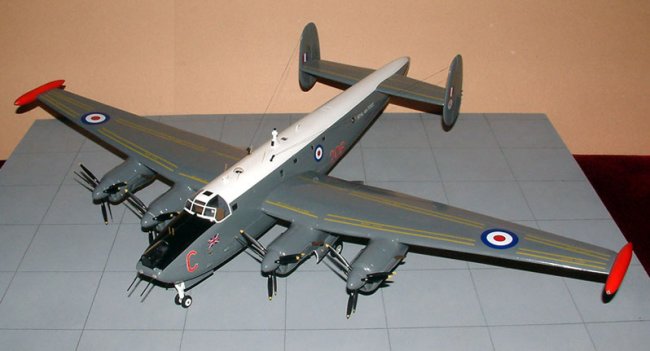
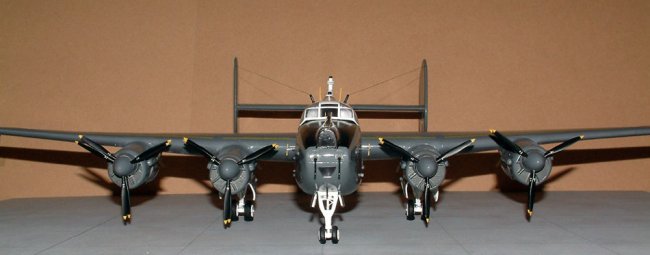
transferred to clear decal film. The finished model depicts a
Shackleton MR Mk 3 Phase 2 of 206 Squadron RAF based at St Mawgan in Cornwall
circa February 1965 - the month of my birth!!!
Darius
|