|
I
picked this kit up of eBay a few
months back. I can’t recall how
much I paid for it but it retails here in the UK for about £45 which is not
exactly cheap & puts it beyond the means of many.
Added to that, the airframe is largely a vacform at which many of us will
throw up our hands & run off to build a1/72 injection Canberra instead!
Several
variants could be built from this kit, given a little research & correct
decals. The fuselage halves are
provided with the short extension that featured on the early PR
variants to accommodate cameras & a little extra fuel.
Cockpit components are provided that could go towards a T
version
I
was having problems with a Hasegawa
FGR2 Phantom, trying to incorporate a resin cockpit & seamless
intakes when, taking a break, I took this kit from the stash & opened it up
for a quick look. In the box were:
-
Two
large white vacform sheets carrying the main fuselage halves & upper
& lower wings, so only six vacform components in total.
-
Two
clear vacformed acetate sheets, each carrying a cockpit canopy & two
bomb aimer’s blisters.
-
Injection
moulded front fuselage halves, wing tanks, tail planes, main wing & tail
plane spars, rudder, undercarriage doors, crew entry door, nose gear bay
& cockpit bulkheads
-
Resin
main wheels, jet intakes & jet pipes.
-
Innumerable
white metal components covering the interior, undercarriage, engine faces
etc.
-
Very
nice looking decal sheet.
|
Click on
images below to see larger images
|
|
|
 |

|
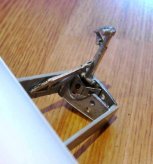
Before I knew it, I was busy
filing down the white metal cockpit components & assembling them within the
two halves of the front fuselage. The
ejection seats are particularly nice, being multi-part & include seat belt
& harness detail – very nice once painted.
You could elect to not bother painting & detailing the two rear crew
seats as they are virtually invisible but they must be fitted to provide
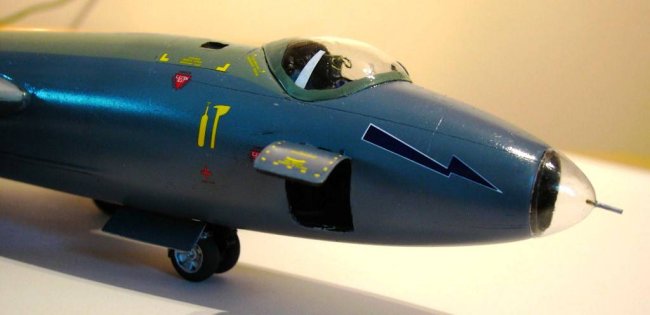
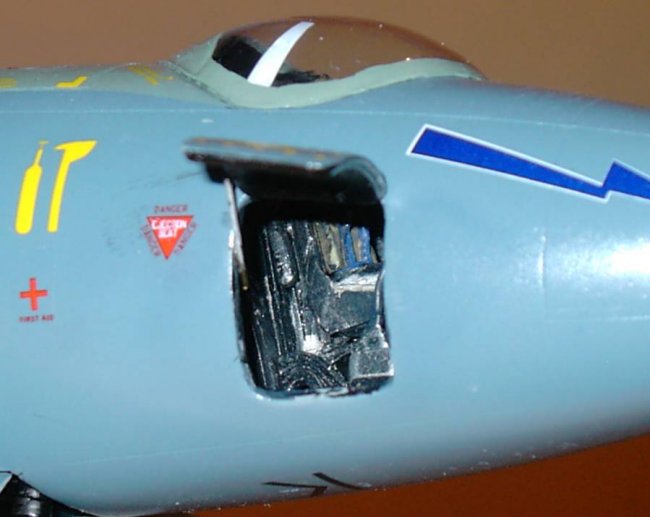
adequate nose weight! I painted
& added them as I intended providing the crew access door open.
There are small windows on
the Canberra B2, above the rear crew positions.
Aeroclub have not provided these (citing moulding difficulties)
& invite you to cut your own, which I did, providing the glazing with PVA
later. However, the plastic is very
thick here & I suspect an acceptable result would be obtained by simply
using black decals to represent them. A
similar window provided on the starboard side needs to be filled on this
variant. Being a 1950’s vintage
British jet, the entire cockpit is black with a little colour added by the
ejector seats & a few switches & knobs.
In short order, the halves of
the front fuselage were together, at which time (the FGR2 forgotten) I set to
cutting out the vacform components. I
ran a black marker pen around the parts before following the lines with a sharp
knife & breaking the parts away. These
were then rubbed down using a piece of medium wet & dry wrapped around a
sanding block (everyone has their own method here!).
With
this done, I was impatient to complete the fuselage. Aeroclub provide
some thin plastic strips that I used to reinforce the insides of the long upper
& lower fuselage joints (I could probably have done with thicker card; these
are major & very long joints). The
partial main wing spar, to which the u/c is later attached, must be passed
through a slot cut into each fuselage half at the wing root as must a similar
component for the tail planes. When
all this was set, I joined the two fuselage halves.
Attaching
the cockpit module revealed a problem that split the vacform main fuselage
halves. Probably I suspect my fault
rather than Aeroclub.
A little filler solved the problem but I was left with a worrying
“bulge” at the joint, not present on the real thing!
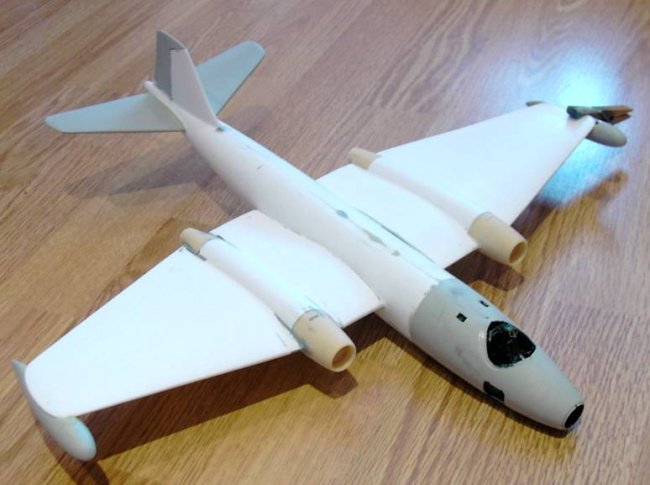
Now
to the wings. Aeroclub suggest attaching the wings before the resin intakes &
jet pipes but I didn’t fancy the inevitable filling & sanding of these
areas on a basically assembled 1/48 Canberra so I did all this before attaching
the wings. I also assembled &
attached the wing tip tanks, filling where necessary.
The
white metal undercarriage as previously stated assembles to the wing spar &
also includes some injection components to box in the bays – a very sturdy
assembly. All of this must be done
before attaching the wings. Wings
were attached as were the tail planes, with a little filler, PVA & CA glue
used to fill some small gaps (I have used more filler on certain mainstream
injection kits than this baby!).
|
Click on
images below to see larger images
|
|
|
 |

|
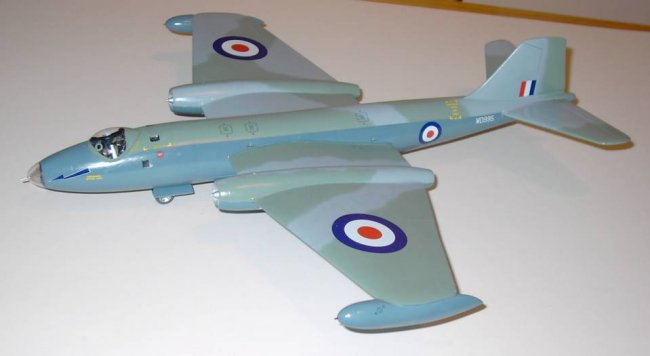
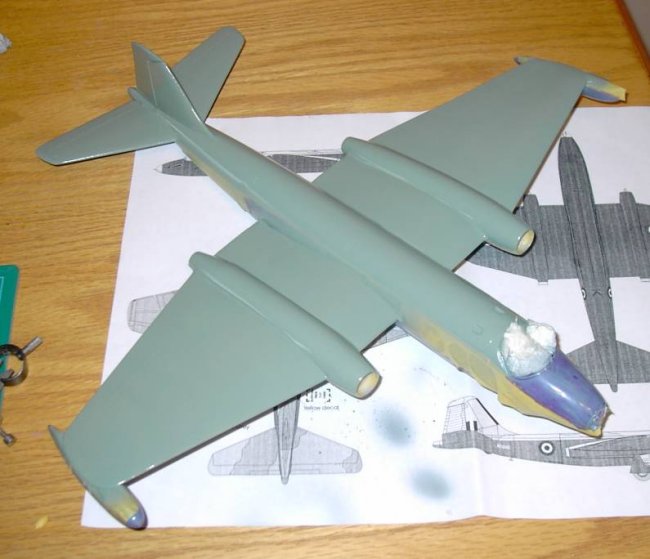
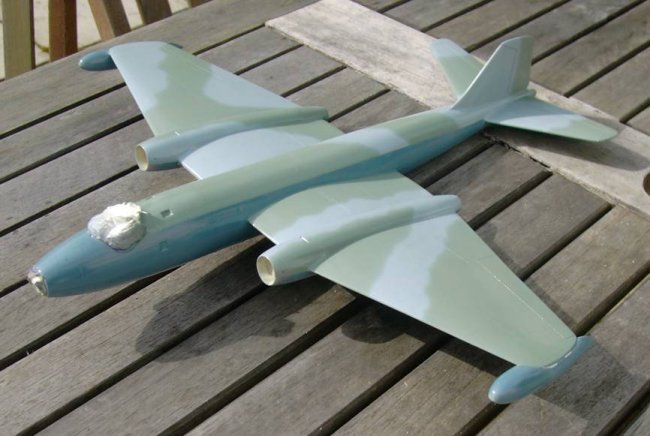
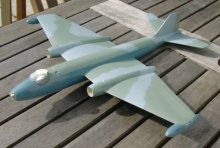
Everything
rubbed down to my satisfaction & off to the paint shop.
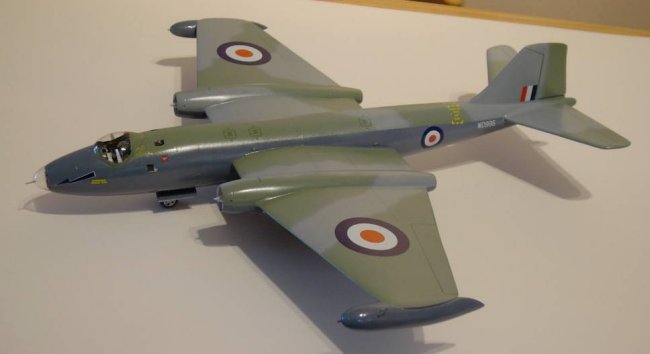
I had decided upon the third of three options in the kit – a B2 of 617
squadron in the unusual & relatively short lived scheme of Medium Sea Grey
& Light Slate Grey over PRU Blue, all available in the Xtracolour
enamels range. I never prime so I wasn’t surprised to find a couple of
areas that required additional filling &/or rubbing down & touching up!
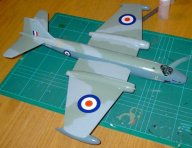
Now
to the decals, which are printed by Fantasy
Print Shop & very nice. No
problem selecting & positioning the main markings, but a little ambiguity
with some of the stencilling; most are provided in black (according to the
instructions, for use on the over all silver machine option) & yellow (for
use on the black/Medium, Sea Grey option).
No guidance as to which to use on the option I had selected.
In the end I went with the yellow. After
decaling, I shot an over all coat of Humbrol gloss varnish.
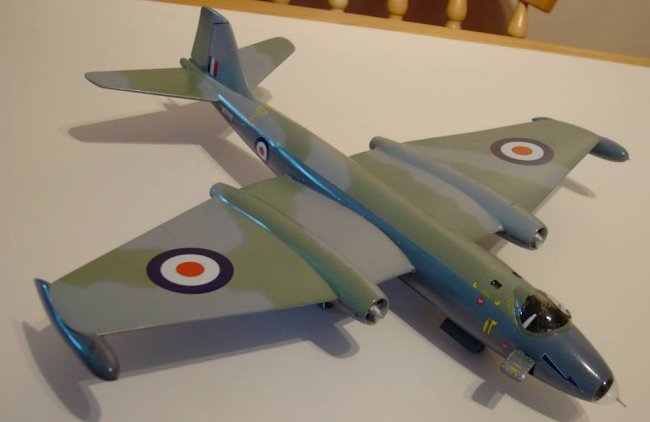
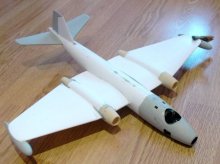
Final
details were the clear canopies, white metal engine faces & cones & nose
gear. A query posted on the
discussion board failed to totally “nail” the correct colour for the landing
gear. The instructions &
consensus here appeared to point to black bays & legs with silver wheels
which is the way I went & is hopefully correct for an early Canberra before
innumerable upgrades & re-paints! A
brass rod to support the open crew door, tube for the pitot & tiny
navigation lights for the tips of the wing tanks & the Canberra was
complete!
In
conclusion, a fantastic kit & not beyond the capabilities of any reasonably
confident modeller. I have a B(I)6
in the stash, which is basically similar, & Aeroclub are promising a
PR9 at some stage.
Graham
|
Click on
images below to see larger images
|
|

|

|
 |
 |
|