Tamiya
Kit # 61040 www.tamiyausa.com
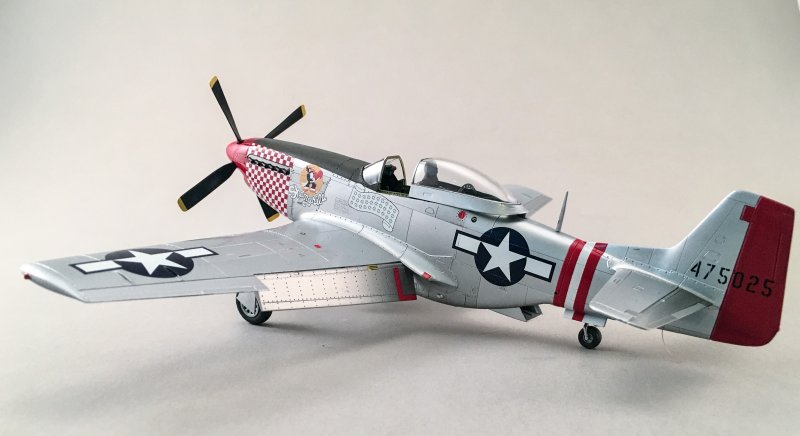
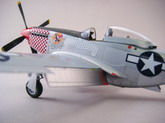
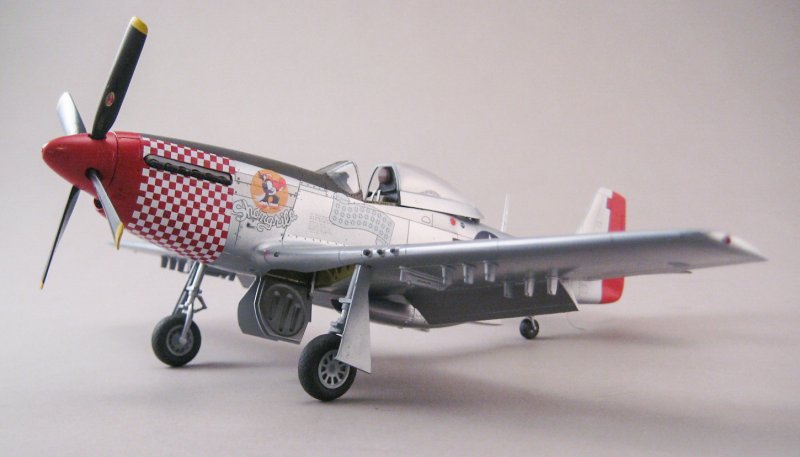
I’ve always liked the P-51D, who doesn’t? But until I recently I didn’t really have a subject aircraft. Then I received the Lifelike Decals with the markings for Don Gentile’s P-51 that he used during his stateside bond tour. I’ve always wanted to do that aircraft as Gentile is a childhood hero of mine. So that was all it took to motivate me to start this model. The choice of the Tamiya kit was a no-brainer, but which one? Gentile’s aircraft had zero launch rocket rails and uncuffed Hamilton Props so the only kit that has those options is the Tamiya F-51D. I unfortunately didn’t have that kit in my collection. So it was off to the internet, in particular
Hyperscale. Within a few minutes after posting I was lucky enough to have Don Fogal and Robert Wiaderny jump to help. Now I had two kits so why not build them both? I needed an actual 4th Fighter Group P-51D for my 4FG collection so again Lifelike came to the rescue with a really unique looking aircraft.
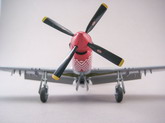
Even though it is a great kit out of the box I wanted to use some aftermarket stuff to update it some. The Aires cockpit was significantly better than the kit cockpit so I elected to use it. The Ultracast upgrades for the propeller, exhausts and flaps were essential in my opinion. The uncuffed props are significantly different shaped than the kit. Some Ultracast wheels were available so I used them on one of the planes just for variation.
|
Click on
images below to see larger images
|
|
|
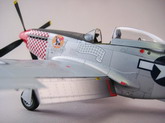
Construction starts in the cockpit. The Aires cockpit fit real well AFTER I cut the bottom portion of the sidewalls off. This made everything fit perfectly. I did have to sand the aft portion of the cockpit plug to allow the radiator and ducting to fit but it was nothing difficult.
The fuselage half fit well. The lower portion of the duct work needed a little bit of filler. I elected to use a .005 to fill the one portion because it was easier to fill that way. I did have to rescribe some panels because I sanded them too aggressively, but that was my fault.
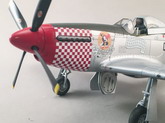
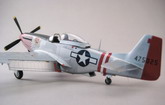
Because Gentile’s machine had the zero launch rocket stubs I had to open the holes in the wings. Don’t forget to open the drop tank rack holes while you’re in there. The wings fit perfectly together and the wing to fuselage fit was also perfect. This is a really well engineered kit. Okay I know it is Tamiya which are synonymous with perfect fit. I opted to use the Ultracast flaps which are very accurate and doesn’t have the unrealistic cutout that Tamiya molded on their part to allow you to put the flaps up. The fit of the Ultracast was perfect. The horizontal stabilizers fit perfectly and before you know it I was ready for paint.
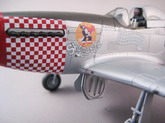
I primed both models with Alclad Grey Primer and Microfiller. This is perfect for the metallic paint. After fixing a few areas that needed touchup. I put laid down a base coat of Alclad Aluminum over everything. Then I masked over a lot of panels and shot White Aluminum around the panels and Duraluminum on the control surfaces. I used AK Dark Aluminum around the exhaust areas. Now that I had a natural metal finish airplane it was time to add some color. The fuselage band was masked off and the entire area was painted in Alclad White Primer and Microfiller. It works great and covers quickly and easily. Once dried the fuselage stripe was masked off, then the tail and the nose. The hardest part was getting the angle of the nose red area. I’d have to see how I did later when I decaled the checkers. The same would go when I added the olive drab anti-glare panel in front of the cockpit.
So while I was painting the second model I painted one side perfectly and was trying to turn it over in my hand while still holding my airbrush. The model slipped and my hand shook just enough to spill the Alclad Aluminum all over the second model. I cleaned it off as fast as I could while swearing for being such an idiot. It needed to be stripped and repainted. I elected to put it aside and finish it later. So now I was down to one model. At least it was the one I wanted to finish.
With all that unpleasantness behind me, I had no choice but finish off the one good model. I added a coat of Alclad Aqua Gloss to the entire model and let it dry overnight. The first decals I needed to apply was the checkers. If they were really bad off I could still repaint it and make it some other airplane. Before I cut the decal from the sheet I put a new #11 Xacto blade in my knife and using a straight edge carefully sliced the decal where the designed cuts were. What I wanted to do was to cut the carrier film where the decals would meet. This would ensure that they would settle down without any trouble, provided they were well made. I add the decals and I got pretty close with the checkers going down the side of the airplane. The Olive Drab was a ways off. I figured I’d let the decals settle down with Solvaset then I could very carefully mask over the decals and respray the colors. After waiting all night. I went back in an using Tamiya tape that I put on my palm two or three times to take some of the tack off I masked over the decal. Some touch up of the silver was done by repriming in grey so the red wouldn’t be visible and then the Alclad Aluminum was sprayed. For the top, I did the same thing for the olive drab. Now I carefully removed the masking tape and hoped for the best. Thank God it actually worked. No decals were pulled up. The decals worked perfectly and met beautifully on the bottom of the model. I did need to touch up a little bit of the white checkers here and there as I was not as cautious as I should have been when removing the carrier film. Now with that behind me the rest of the decals went down perfectly. I did need to touch up the American star on the upper surface with some Model Master Acrylic Insignia Blue but that is to be expected. All the decals and colors were now sealed with another coat of Aqua Gloss.
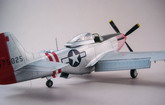
The only thing left to do was to apply some flat to the olive drab anti-glare panel. Small items were added like the pitot tube and antenna. Since the real aircraft appeared to be brand new no weathering was added to the model. The Ultracast exhausts and prop blades were added. Since this aircraft was fitted for the zero launch rocket rails it required a grounding strap on the tail. Some EZ Line was all that was need to make this little addition. Adding the clear red, green and yellow to the lights and the model was done.
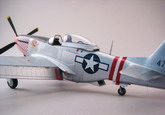
The only part of the model that gave me any problems was the canopy. The sliding portion of the canopy was a pain to put together. Tamiya released at least two different clear parts for this kit. The early one had the sprue attachment point on the clear glass and no matter what you did you can’t get rid of the blemish. Later Tamiya releases, around the 8th and 9th Air Force Aces release they moved the mounting stubs to the bottom which made the clear parts at least useable. I think if I had to do it again I would use a Monogram kit for the sliding portion at least. Vacuformed replacement is another option. I was happy how it turned out.
The great fit of kit was marred by the molding of the canopy. Tamiya should have engineered this kit better. The Aires interior fit well and was a marked improvement on the kit cockpit. The Eduard Steel seatbelts worked well too. The thinness of the steel makes them easy to form. The Ultracast accessories were significant improvements on the kit items. I think the flaps at the very least are essential if you are going to model your aircraft with the flaps extended, which appears to be a normal position. The exhaust are really nice and much easier than drilling them out yourself. The Unshrouded Hamilton Standard prop is the only way you can get there from here. If I hadn’t already cleaned up the wheels I would have used the Ultracast ones. The Lifelike Decals were some of the best decals I’ve used. I love their research and the quality of the decals. They fit perfectly and looked great.
I’ll get to that other Mustang soon. I just need to either strip it back down to bare plastic or sand and rescribe the panel lines that got hidden.
Overall I’m extremely happy with the final results. I’ve always wanted to do Gentile’s Stateside aircraft and thanks to Lifelike I finally added it to my collection. I’ll build his war mount, ‘Shangri-La’ with 30 victory markings shortly then I only need to do his T-33 that he died in to complete my collection.
Floyd S. Werner, Jr.
IPMS No.: 26266
|
Click on
images below to see larger images
|
|
|