|
The build of this kit started a few years ago as an email with a request concerning the availability of a kit of a Zeppelin Staaken. Piet, who contacted me, had collected during several years a large amount of pieces that had surfaced in Flanders; he had also specialised himself to investigate and try to research the history of the Zeppelin Staaken R.VI that was brought down during the early hours of April 21th, 1918, killing the 7 crew members.
While doing some research on the net about the Staaken, I found that an modeller in New-Zealand was nearly completing his Staaken and it was very helpful reading his comments, because he was warning me for some problems that were waiting for me! Especially putting the completed nacelles on the wing and how to put the Lozenge-decal in one piece on the big wings! (not easy but possible to do!)
Some history:
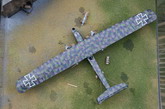
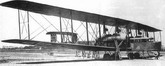
The Zeppelin Staaken R.VI was a four-engined German biplane bomber of WW I. The R.VI (R= Riesenflugzeug: giant aircraft) was reputedly the largest wooden aircraft to be produced in any quantity during WW I; its span nearly equalling that of the Boeing B-29 Superfortress of WW II. The 4 engines were placed in two nacelles in a tandem push-pull arrangement. It carried a crew of 7, in each nacelle it carried a mechanic who took care of the engines in flight and performing repairs and maintenance!! Can you imagine: 7-10 hours in between 2 roaring engines …without proper PPM’s??
Of 18 R.VI built in total , only 13 were commissioned and the planes were build in 3 different factories, explaining the small differences between the aircraft individually. That was an issue between Piet and myself, because he would like to have the model resemble as much as possible “his” R.34/16. It’s amazing how much information that man has about that plane and her crew!
|
Click on
images below to see larger images
|
|
|
R.34/16, that was the example for my model, belonged to Rfa (Riesenfluzeug-Abteilung) 501 that was first based at Ghent, then moved to Sint-Denijs-Westrem and finally arrived at Scheldewindeke. Rfa 501 conducted 11 raids on Great-Britain between September
1917 and May 1918; missions lasted up to 7 hours; R.34/16 was shot down by AA on April, 21th, 1918 while returning from a mission against a RAF base at St.-Omer in France and crashed in Belgium.
The model:
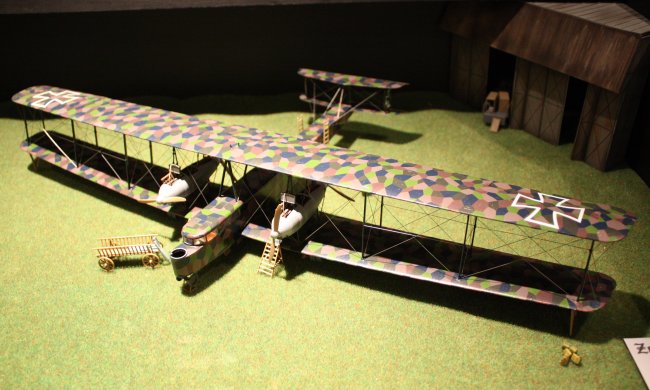
When I opened the box, it was packed with lots of parts and several A-4 sheets printed with the Lozenge-camouflage pattern. Good thing, imagine you have to paint or airbrush that pattern!
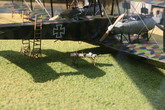
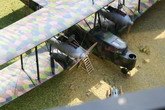
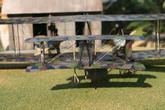
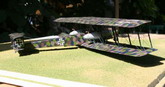
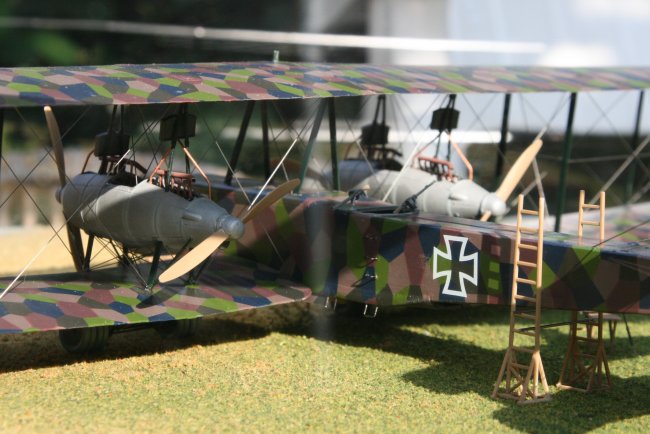
It was also very clear it would become a big model! I started with completing the 4 engines, each engine consists of 23 pieces and at the end I discovered that all the effort that I did on the engines, nearly nothing could be seen when the nacelles were completed! A tricky part is as one has to put the nacelles with their inverted V-struts on the lower wing; those V-struts had to be left loose otherwise one can’t position the upperwing correctly above and slightly behind the lower one!
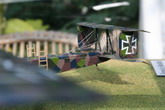
Because Piet was asking very urgently to create an as accurate possible copy of the original R.34/16, I had to re-arrange the Lozenge-decals. The Roden-kit had those decals provided for the wings and the aft-part of the fuselage; R.34/16 had its complete fuselage and wings covered with this camouflage pattern. But after some re-arranging the provided patterns, it was possible to give the model its present look.
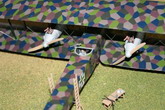
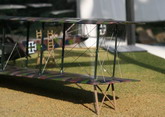
Next challenge was the rigging of the big bird; I have used piano steelwire, 0.3 and 0.15 mm. Not that easy to cut into the correct length but it has a certain stiffeness that helps to support the large wings. Best is to start from the fuselage outwards, after that it’s time to tackle the empenage, a challenge of its own! But after some (!) time , one can get some nice results!
Painting this model was rather easy, only the interior, the struts ad undercarriage needs some paint; the finished painting of the engines is hard to see after closing the nacelles! As a primer before you can put the decals on the model, Roden
advises to use a red-brown color. I had my model primed with gloss black, after drying and settling of the decals, it results in a darker finish of the Lozenge-camouflage, what I thought appeared right to me. I didn’t apply any weathering. A little extra I did was using some thread to duplicate the sandows on the undercarriage!
It’s not an easy kit to build, but a great challenge! So if you want to try it and have enough place to park it, provide yourself with sufficient time and go for it!
Enjoy the pictures.
Carl
Gootzen
|
Click on
images below to see larger images
|
|
|
|