|
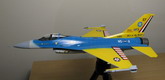
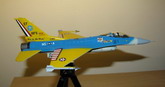
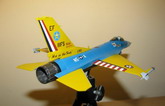
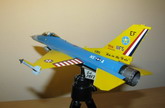
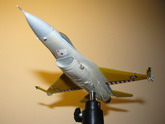
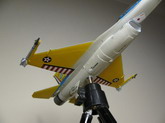
F-16C 111FS Texas ANG
WIP thread for this can be found HERE
I built this bird using the "white box" F-16C kit (B2), with decals from 2-in-1 111FS Texas ANG boxing.
What can I say about this build? Well, it's a typical Hasegawa 1/72 F-16C for those familiar with the kit. Lots of flash, with some fit issues in certain areas. Although I have to say that despite its age, it's still a reasonably good kit, at a very good value too. Overall fit is fairly decent, with the most problematic area being the engine nacelle. Another part that somehow didn't fit that well was the exhaust turbine. Maybe I made a mistake there or something (if I did, I still don't know what it was), since I don't remember having any problem at all with the 2-in-1 111FS Texas ANG boxing that the decals originally came in.
|
Click on
images below to see larger images
|
|
|
It wouldn't be my project if there were no rookie mistakes.... A few of the most annoying things that happened:
-
Forgetting to install the "bump" on the sides, near the radome. I tried installing one of them after the painting was done (and most of the decaling done), resulted in a minor disaster, requiring me to patch up the paint work. And because of the stage the plane was already in at that time, it was difficult to patch up properly without redoing most of the painting in the area, which was impossible to do without losing some of the decals. So, I ended up doing some really shoddy work to patch things up. It's not that obvious on the pics though.
-
The rear canopy was slightly cracked when I cut it off the sprue tree, despite my being very careful when I did it. The canopy on this kit seems to be much more brittle than the 2-in-1 boxing that the decals came in. Good thing that the crack was at the bottom, and it's not noticeable anymore after a dip in Pascoe's Long Life and painted up.
-
Tamiya masking tape left some ugly residue on the painted surface. I think I should've left the paint to cure longer before masking.
-
Accidentally scratched off a tiny bit of yellow paint with my finger nail on the vert stab after decaling, as I was holding the vert stab down. Touched up the paint with
a brush, because I could not be bothered masking and spraying since the scratch was quite small.
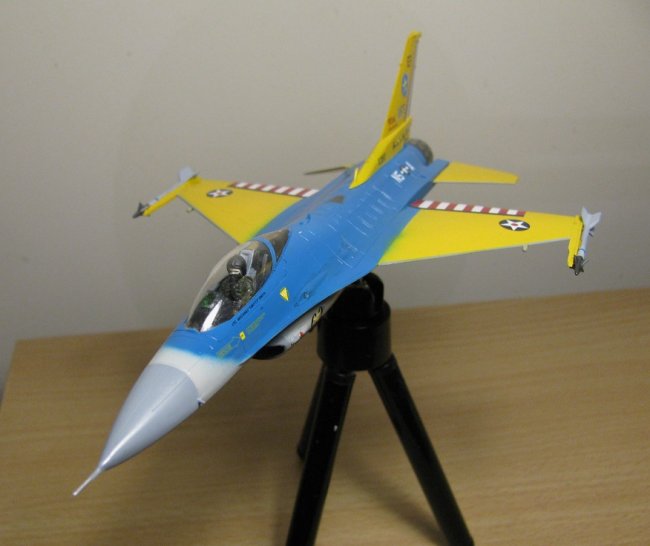
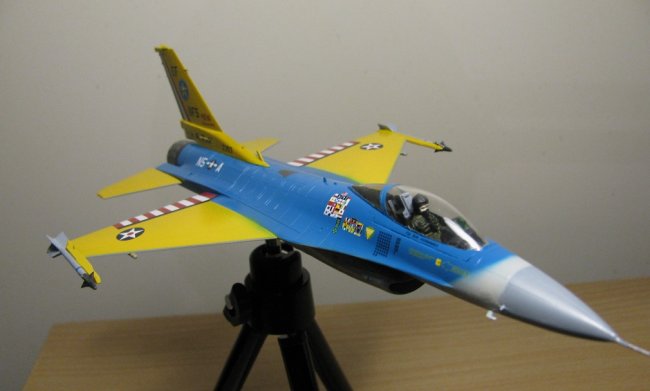
Here's the paint that I used for this project:
-
Radome: LifeColor FS36320 Dark Compass Ghost Grey, thinned with water + Windex mixture
-
Lower fuselage: Gunze Aqueous H315 FS16440, thinned with Tamiya X-20A acrylic thinner
-
Upper fuselage: Tamiya X-14 Sky Blue mixed with a few drops of Tamiya X-27 Clear Red, thinned with Tamiya X-20A acrylic thinner
-
Wings: Gunze Aqueous H329 Yellow FS13538 (Blue Angels Yellow), thinned with Tamiya X-20A acrylic thinner
-
Exhaust: Mr Metal Color Dark Iron mixed with Mr Metal Color Aluminum (2:1) for the petals, dry-brushed
-
Finishing coat: Gunze Aqueous Gloss Clear, thinned with Tamiya X-20A acrylic thinner
Hope you like it!
Michael
"Chewie" Choo
|
Click on
images below to see larger images
|
|
|
|
|
|