|
The
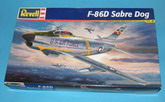
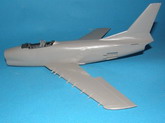
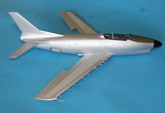
F-86D was an all-weather interceptor version of the basic F-86 Sabre day
fighter. Initially designated the F-95, it was re-designated in order to make it
more palatable to the US Congress Budget Committee (It being easier to sell a
“modification” of an existing aircraft in inventory than a new design. Both
sides in the Cold War were plagued by this phenomenon). The “Dog Sabre” was
equipped with a radar and autopilot system which was quite sophisticated for its
day, and enabled the pilot to do the previously impossible job of flying the
aircraft at the same time as operating the radar to track the target. The radar
autopilot computed a “Lead collision approach” which flew the Sabre on a
course which would ensure that the rocket armament would hit the target. Rocket
launch was completely automatic, and occurred precisely at the optimally
computed point in the approach.
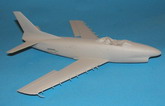
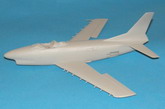
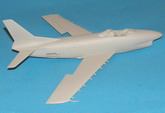
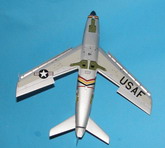
The
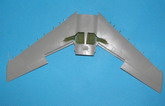
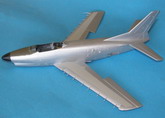
model is Revell USA's boxing of the late model F-86D, distinguished by its
parabrake housing at the base of the vertical stab. In contrast to the
Promodeler kit, the tow tractor is not included. The quality of the parts rivals
anything from Japan or China; panel lines are very nicely engraved and the level
of detail is excellent right out of the box. Aftermarket use for this kit is
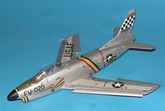
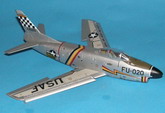
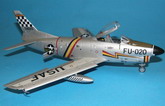
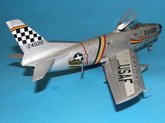
really unnecessary, apart perhaps from a set of seat belts. Markings are
provided for two very colourful aircraft from the age when Western Air Forces
reigned supreme and tactical camouflage was not considered necessary. The box
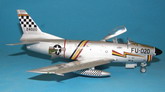
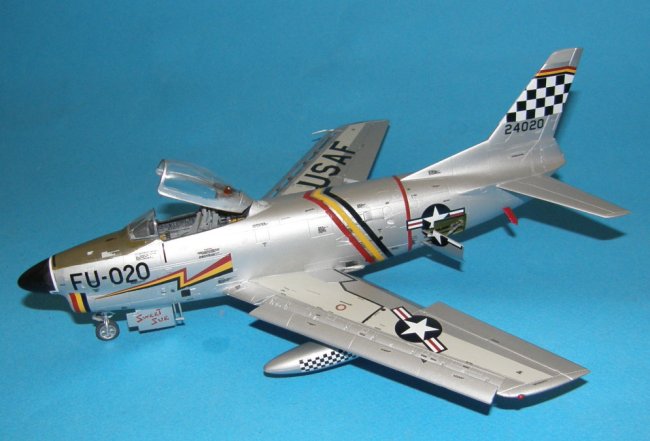
top aircraft is the mount of Col. M.J. Quirk, CO of the 512th Fighter
Interceptor Squadron based in Burtonwood, England during 1958. The markings I
chose were for “Sweet Sue”, an aircraft of the 51st Fighter
Interceptor Wing based on Formosa during 1955.
|
Click on
images below to see larger images
|
|
|
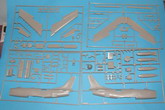
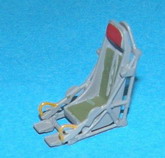
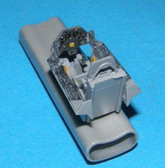
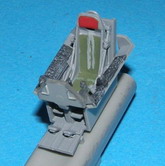
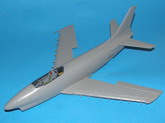
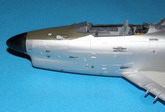
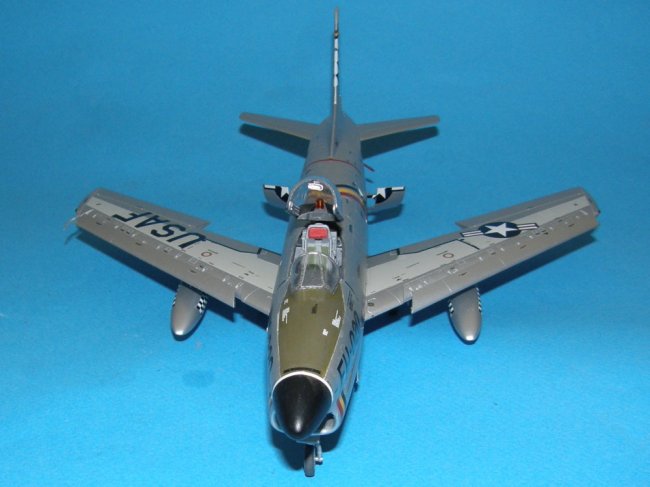
I built the
model straight out of the box, modifying only the ejection seat firing
levers, which Revellogram moulded in the “fired” position. The firing
grips should angle down to the front corners of the seat. Snipping out the
vertical strut and gluing the firing handles bent downwards was the work
of a few seconds. The rest of the cockpit was built as-is, even though the
instrument panel is not completely accurate for this version. I won't tell
anyone if you won't. In any event the differences are not huge and the
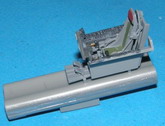
finished cockpit looks convincing. I chose to leave the radar shield out
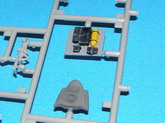
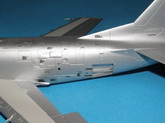
for this build so the radar scope may be seen. Revellogram doesn't neglect
the small details. There are some black boxes and a pressurized tank
visible behind the cockpit, which are included on a shelf which must be
fitted before the fuselage halves are closed.
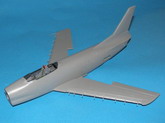
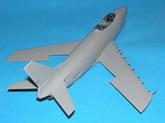
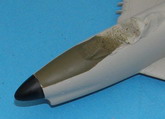
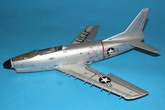
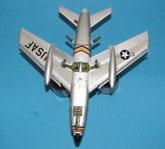
The fit was
very good, apart from the nose/radome join to the fuselage which needed a
bit of sanding to cure the mismatch. Before gluing on the nose, I filled
the radome with lead shot secured in place by superglue. I used Testors
Light Gull Grey as a primer, which also doubled as the colour of the
inspar area. Once that was dry, I masked and painted the anti-glare panel
olive drab, then brushed Humbrol 85 satin black onto the radome. The brush
streaks can be made to look a bit like streaks from rain with a bit of
practise. Once dry, the nose, cockpit, inspars and wheel wells were masked
for painting the overall silver finish.
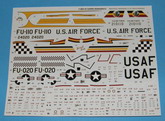
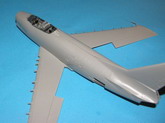
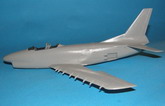
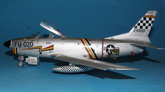
The finish is
Testors rattle can silver, given a slight buffing with SNJ powder when it
was not quite dry. I find that this best reproduces a weathered aluminium
finish which shows that the subject has been used, and isn't a showroom
piece fresh from polishing. Once I removed all the masking, I could set
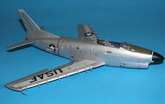
about the eye-crossing task of placing all the dozens of stencil decals.
When most companies sell aircraft, they include the operating and
maintenance manuals in the sale. North American apparently decided to save
paper by painting the manuals' text right onto the airframe. The stencils
took 4 sessions, one for each surface of the aircraft; left, right, top
and bottom. By contrast, the main markings of the colour scheme took only
two, and that's only because I wanted to let the decals on one side of the
aircraft dry before going on to the other. I had to use Solvaset to get
the fuselage stripes to conform to the NACA intakes on the fuselage sides.
This caused a bit of bother when the red stripe on the left side got a bit
crinkled and out of position. I carefully prodded it back into place, but
it didn't dry completely straight.
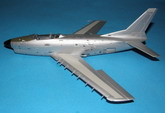
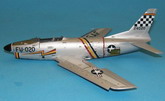
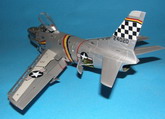
When the
decals were dry, I finished final assembly of the landing gear, navigation
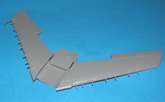
lights, speed brakes, drop tanks and canopy. Even though the flaps were
usually up on parked Sabres, I chose to leave them down for a bit of
variety. I had forgotten to install the landing light transparency behind
the intake, so I made a replacement from a punched disk of tinfoil which I
rounded over the end of a paintbrush. I filled the opening with Microscale
Krystal Klear and dropped in the light so it fit flush with the edges. I
used more Krystal Klear to form the lens. Once it was dry, the model was
finished.
Jessica Cooper
|
Click on
images below to see larger images
|
|
|
|
|
|