|
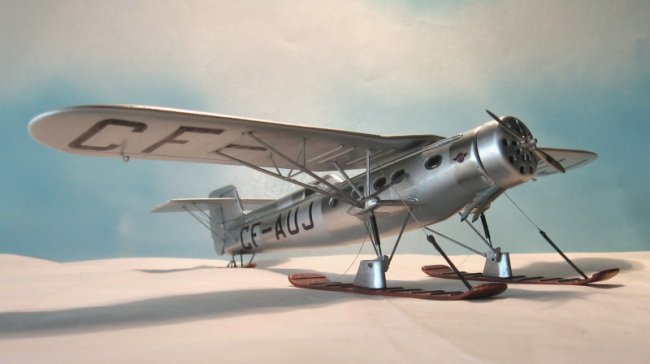
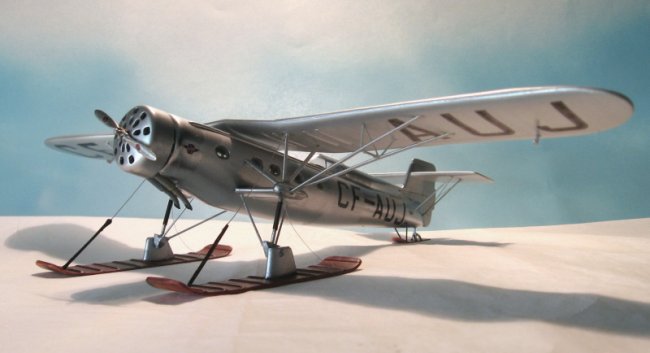
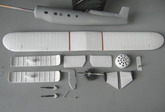
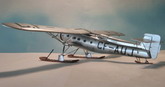
The somewhat strange lines of the Fairchild Super 71 bush seem to suggest
an exercise on making a fuselage out of beer cans. The whole appearance is
further enhanced by the shinny finish and the presence of a pair of floats/skis
that any bush plane deserving its worth should be able to wear. It was a
development of -some say an "invelopment- and shared many components with
the "normal" Fairchild 71 of which a kit (a companion on the display
case?) can be purchased from Khee Kha Art Products of Snowy Alaska, may be a
subject of a future article.
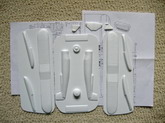
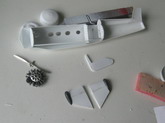
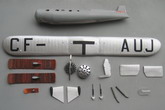
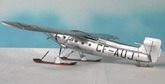
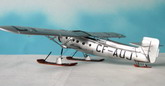
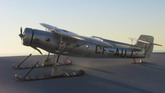
The Execuform vacuformed kit is a simple approach to the matter,
providing the basic shapes, a plan, resin parts that make for the stub wings
where struts attach and a vacuformed clear canopy. As usual you will have to get
the engine, prop, decals and detail bits by yourself. In the photos you can see
the Aeroclub (please, come back!!!) engine, the scratched interior and home-made
decals.
On the Net you can find enough information to build up a reference file
so you could add to the model as much detail as you wish. Since you are already
at your computer reading this, if you feel curious you can do an Internet search
for the type, and the Wikipedia entry will inform you of mostly everything you
need to know, sparing me from useless repetition and in the process provoking
some of your neurons to fire up thus exercising your brain. You’re welcome.
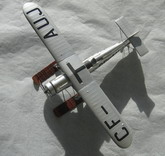
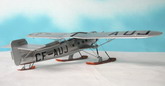
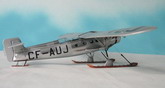
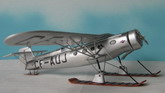
The Super 71 that has been restored and is exhibited at a museum shows
servo tabs on the rudder. I wasn’t able to find anything like that on the
photos I have of the original machine; but again, I was able to find about a
dozen images, all not great in quality. In the museum the external sections of
the wing are separated by a gap, in the original a metal strip fairing covered
that gap. There was a time when the Super 71 was on skis.
Since I have been posting here numerous articles
dealing with the building of vacuformed models, all there is to be said has been
already said, so I’ll keep this one short, but there are a few points to be
considered nevertheless.
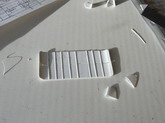
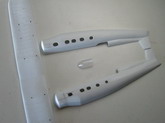
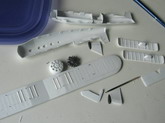
The wings are molded as entire sections, upper and lower. The wing has an
inverted gull dihedral which is portrayed in the kit parts. The wing halves, in
order to have that dihedral, have been located in the backing sheet on a
pedestal. It is advisable to mark and cut the wings from the “inside”, the
other side of the backing sheet, not the side where you usually cut –see
images- since the dividing line is more visible on that side. Be very careful
with the slips of the cutter, since there is almost no guide line. Do not hurt
yourself. Cut a tad further out from the actual dividing line; that will give
you some slack to refine and sand later on.
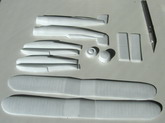
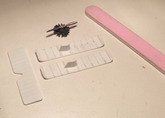
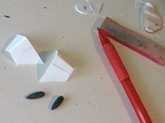
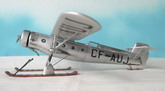
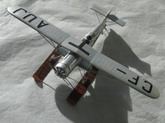
There are two front cowl parts, one depicts the more usual
“cover-all” cowl, and the other represents one that looks more like a NACA
cowl and accompanied in the original an engine shield. Study your reference
material, I haven’t heard of anybody being hurt while doing that. The original
stub wings were partially corrugated, so I decided to scratch them instead of
using the resin ones provided. For that I made a pattern and joined part plain
styrene sheet and part “corrugated” styrene sheet. The teardrop tips were
made from long forgotten kit bombs, I am always happy finding other uses for
them.
Click on
images below to see larger images
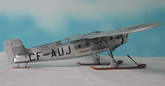
The
polished metal surfaces (fuselage) and the silver doped, fabric-covered
flying surfaces should be painted accordingly to differentiate them.
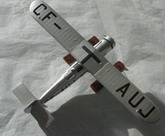
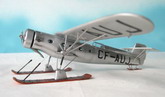
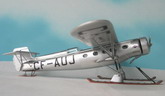
I
went for the ski version (although it is not depicted or catered-for in
the kit) for several reasons:
a) Because I have a tendency to depart from the standards
b) It requires a bit less struts (so they are limited to only 28 :-)
c) It adds a color note (wood) to the otherwise overall metal finish
d) It makes the display of the model easier (no water, no dolly)
e) When I am pretending to fly the model in the house I no longer have to
take off and land in the sink or bathtub, but can use the freezer instead.
I
would like to thank another vacuformed kit maker, Lars Opland of Khee-Kha
Art Products, for his help with data about the original plane.
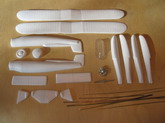
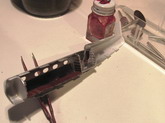
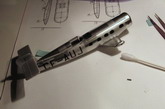
While waiting for some parts to dry I worked on the decals and got them
ready to be home-printed. A new stabilizer was made from scratch in order
to be able to show the ribbing of the original. Same for the rudder.
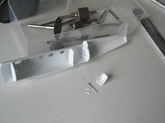
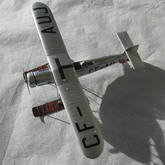
For
the abundant struts on this model brass “Strutz” were used, and a very
big “thank you” goes to Andrew N. of the lands of Nottingham, since
-due to the shutdown of the Aeroclub Internet store- without his help no
“Strutz” would be now among my scratchbuilding supplies.
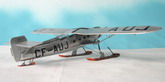
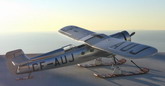
The Super 71 was used mostly as a cargo plane, so I depicted the interior
with bulkheads, cockpit and floor. Why bother with that if no doors were left
open? Well, why bother at all anyway, since the model will be in a landfill in
some years anyway? Just because.
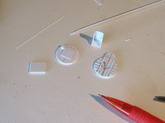
A few battens –gas tank area reinforcements- were added to the lower
wing, as well as gas caps on the upper wing. Aileron cable leads and balances
were fabricated too. There were two ducts that run parallel on the upper
fuselage from behind the engine to the canopy; those were also represented on
the model. Exhausts were made from styrene tube and solder.
A little bit laborious but worth every hour of dedication.
As the song goes, it never rains in Southern California -and much less
snows- but we live in hope.
Gabriel Stern
Click on
images below to see larger images
|