|
Hello
again, fellow modelers and readers.
This
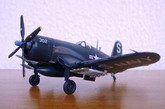
time I’ll share with you some of my experience building a 1/72 Italeri Vought
Corsair F4U-4B, along with some pictures of the finished model. The Corsair
needs no introduction, it has been one of modelers’ favorite aircraft. Korean
War Corsairs have received less attention by both modelers and kit manufacturers
than their WWII counterparts, even though they made an enormous contribution,
mainly in the ground attack role.
Italeri
is almost surely the only mainstream manufacturer that has offered Korean War
Corsairs in 1/72 scale, namely the F4U-4B and the F4U-5. According to some
reviews I’ve read on the Internet, the F4U-4B kit is very inaccurate, with
wrong wings, propeller and rocket pylons, among other issues. Unfortunately, as
one of the Murphy’s laws surely would state, you’ll read a serious review of
a kit more likely after you’ve started building it, and this was my case!
Apart
from its inaccuracies, the kit has an overall good fit and a sufficient level of
exterior detail. Regarding the fit, the more problematic area is the joint
between the lower wing half – which includes a section of the lower fuselage
– and the remainder of the fuselage. Another problematic area was the main
wing. Surely the manufacturer molded the lower wing together with a section of
the fuselage in order to get the correct complex dihedral of the wing. However,
despite all the care I put while assembling the main wing and the tail, I ended
with a bit asymmetrical dihedral, and I wasn’t capable to fix it later.
Click on
images below to see larger images
Italeri’s
kits painting directions almost always have mistakes, and this kit’s painting
directions were not an exception. Zinc chromate was indicated instead of
Interior Green for the interior, regrettably I knew about the mistake after the
fuselage was closed. For the fuselage Blue Angel Blue FS15050 instead of Dark
Sea Blue FS15042 was suggested. This time I didn’t follow the directions, so I
painted the airframe with Humbrol 181 Dark Sea Blue lightened a bit with Hu 47
to get a scale effect. Italeri also suggested Zinc chromate for the inner
undercarriage doors and for the undercarriage legs, but after some research on
the colors of these parts, I decided to paint these also with Dark Sea Blue. The
tip of the rudder and the propeller hub were painted with a mix of Hu 14 and Hu
47.
There
is currently a strong trend among modelers of highlighting the panel lines of
dark painted models with white. Panel lines are visible in real objects because
there’s a shadow inside each joint, sometimes there’s also grime in the
joint. As both shadows and grime are dark, I prefer, for the sake of realism,
highlighting panel lines with a dark wash, even if the remainder of the model is
also dark. I applied the wash after all the decals were applied and sealed, in
this way the panel lines that run under the decals were also highlighted. As I
wanted a not so shiny finish on my Corsair, I sealed the weathering (which also
included some paint chipping) with a coat of satin clear.
At
this point it’s good to remark that another issue were the manufacturer made
mistakes in this kit were the decals. Italeri’s decals are often regarded as
very good. That’s true when it comes to quality of materials and register, but
it’s questionable when it regards to accuracy of size, colors and design. In
the case of this Corsair, it seems to me that the national insignias for the
fuselage sides were undersized, and their blue was wrong (it would have been
better to provide just the white star and the white and red stripes, as often
other kit manufacturers do for U.S. insignias of aircraft painted Dark Sea Blue
overall.)
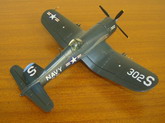
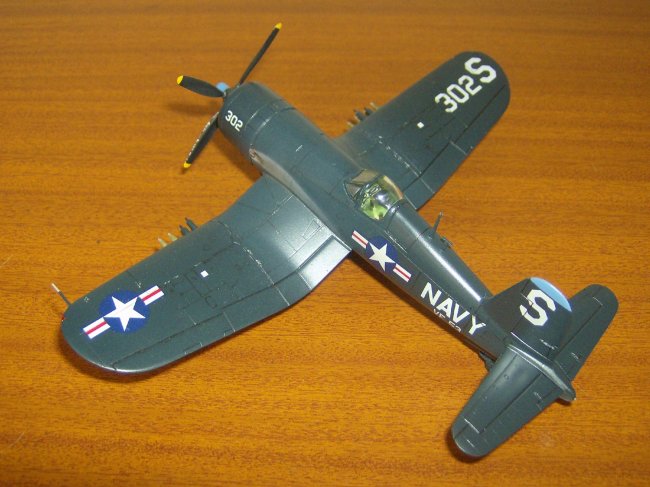
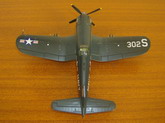
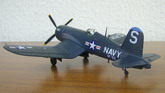
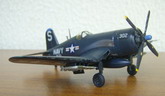
I
chose to model my Corsair as “
302”
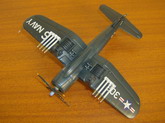
of Navy squadron VF-53 Blue Knights, because I like the big “S” on both
sides of the tail and over the right wing (“S” is the first letter of
Sucre
, after all…) and I also like the medium blue accents. Well, when I went to
apply the decals I found that the “
302”
numerals intended for both sides of the cowling were oversized (in fact, they
were the same size that of the numerals that go over the right wing,) so I had
to use the numerals originally intended for the main undercarriage doors, which
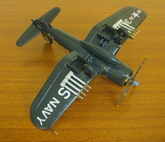
in turn were too big for these doors. Another annoying mistake, and one I could
notice only after the decals were applied, was that the serial number that go
beneath the horizontal stabilizers displayed the word “Marines” instead of
the word “Navy” (!) I overpainted the word with dark sea blue to partially
amend the mistake.
After
sealing the weathering, the model was ready for final assembly. First I
assembled the main undercarriage legs (a tricky assembly, by the way) and glued
these and the tail leg into their locating holes. Next I glued the undercarriage
doors, and it was time to attach the drop tank and the ordnance. The kit
provides ten rockets with their pylons (which are wrongly shaped, as I
previously mentioned.) However, the F4U-4B only carried eight rockets, so I
didn’t used the inner pair. The kit’s instructions also suggest to attach
the underbelly drop tank and two bombs, but the references I read on the
Internet indicate that this combination was never used, so I used just the drop
tank and left the bombs for a Skyraider I’m planning to build later.
Nevertheless, the aircraft is “bomb ready” because it has the bomb supports
already attached. I replaced the kit’s cannons with tiny sections of
hypodermic needles, and I also deepened and widened the recesses for the
cannons, using photos of the real aircraft as a guide.
When
the ordnance assembly was completed, I glued a length of black hair to simulate
the antenna, and then I began to struggle with one of the more difficult stages
of the project: painting the exhaust stains. It was only after the third attempt
that I was satisfied (although not completely) with the result. After the stains
were painted, I painted and glued the exhaust stacks and then brushed a mix of
brown and black pastel powder over the area of the stains just behind the
stacks, and the model was finally finished.
I’m
quite satisfied with my F4U-4B, my only Korean War aircraft model so far. I hope
you’ve enjoyed both the story and the model. I also hope some day seeing a
good and accurate Korean War Corsair kit with folding wings being released in
1/72 scale.
Greetings
from Caracas, Venezuela.
Orlando
Sucre Rosales
Click on
images below to see larger images
|
|