|
Percival Pembroke
History.
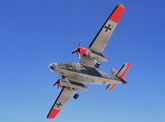
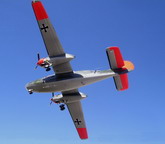
The military version of the civil Percival Princess was sold abroad in fairly large numbers for training, aerial survey, and communication duties following an intensive sale campaign. At the time the then West Germany was among the overseas countries to receive the Pembroke which received 33 CMk54s. These were used for training purposes as well as communication work. Germany was also the largest overseas operator of the Pembroke in military role in fact in due course and unlike most other countries it has camouflaged it’s aircraft in Nato standard grey and green with day-glow areas in its training and utility roles.
Click on
images below to see larger images
Make: Airmodel Kit No 168
Scale: 1/72
Price: 9.5 Euro
Notes: Vac-form kit, basic parts, no undercarriage, propellers or decals.
The Kit
One of the most prolific of vacuum manufacturers is the German firm of Airmodel. Apart from being one of the Pioneers in this field it used to have a very comprehensive list of complete aircraft kits and conversion kits to its credit. Airmodel has since deviated into producing prolific resin kits in addition to several of the earlier vac-form kits. One of the earlier releases and which is still available is the Percival Pembroke. Although not a straight forward kit to make and therefore represents something of a challenge even to experienced modellers it comes at a very reasonable price and with a little alteration and detailing it can be turned into a Pembroke up to the standard of nowadays.
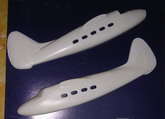
By current standard the kit is somewhat basic, lacking parts for the undercarriage and propellers. These have to be found in the ‘Spares Box’ or otherwise manufactured from scratch. The kit comes on a single sheet of white acetate, which carries the two fuselage halves, 4 main plane parts, 4 tail plane parts and 4 engine nacelle halves. The cockpit, nose clear part and set of side windows for the fuselage comes in thick clear acetate. The instruction sheet depicts an exploded view indicating how the 18 parts kit go together and also suggest four colour schemes which include two German machines, one being silver overall finish and the other in camouflaged form. A clear sketch of the undercarriage and propeller gives indication of their size and shape so that one can make his own.
Construction.
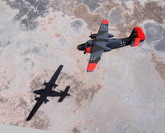
The Airmodel Pembroke was the first of its type to appear on the market in kit form and being a popular aircraft in European skies it must have been the attraction to many. I have built three Airmodel Pembroke kits, one of which was converted to a Sea Prince which had clipped shorter wings, while the other two were made into a C Mk 54. The Sea Prince were based at Hal Far for a good number of years where they served as a navigation and signals training 750 squadron, for Royal Navy new recruits. My second Pembroke was built as all silver with day-glow areas, a type in service with the German Navy and my more recently built one was made as a C Mk54, camouflaged and with day-glow areas again a German Navy machine.
Just like any vac form kit, the parts are scribed around with a sharp Exacto blade and broken away from the sheet in the normal way. The next stage is the rubbing down, removing the excess plastic in doing so. This is done on a piece of wet and dry paper secured to a board. The cabin windows moulded on fuselage halves are drilled and filed out to shape. I did not use the clear thick plastic windows provided but left them open until a later stage to glaze them with Kristal Kleer.
The engine nacelles are cut and shaped, a 9-cylinder radial engine front that was scratch built from a plastic disc with stretch sprue cut to lengths to form the 9 cylinders. Wheel well roofs was also added to provide base for the undercarriage oleos. The interior of fuselage is built using spare plastic from the kit carrier sheet. Front and rear bulkheads, cabin floor, instrument panel, all measured and cut, inserted and glued. These strengthened the whole fuselage structure. Also added seats and crew figures all from spares. Interior was painted light grey. Nose weight also added to a closed nose compartment. The tail fin and rudder were of the wrong shape and what I did was I drew the correct tail outline on a thin plastic card and inserted it in between the tail unit so that putty is added and faired at the periphery where it showed increase in area. Fuselage was closed and cemented using locating tabs to align the two halves. When the tail area was attended to, surface detail in form of straight, horizontal parallel lines were scribed on the rudder. These were repeated on the elevators and ailerons. Cockpit interior painted and crew inserted on their seats. Cockpit canopy was cut and trimmed to fit. The nose Perspex incorporating a part of the forward nose area was fitted. This component came from a spare nose that came with the Special Hobby kit and replaced the vac for kit one, as it was too narrow. Again this was faired using Plasto putty. The engine nacelles were too small at the rear and were each built up with plastic card and faired with putty so that the shape conforms to the profile appearing on the issue of Aviation News. To provide a rigid wing to fuselage joint a wing spar made by cutting a section from plastic sheet aprox 85mmx 5mm depth. Slots cut in wing shoulder at their thicker spot and the spar is pushed through and glued at right angles to the fuselage. The spar now serves to locate port and starboard wings, which were then glued to the fuselage making sure there is correct alignment. Port and starboard tail-planes also added and the engine nacelles, with reshaped rear, are cemented in place. The undercarriage that was made out of sprue of correct thickness and wheels added etc was stuck in place in the nacelles and nose area. Only small wheel well doors for all three undercarriage legs remain open, doors being made from thin plastic card. Propeller blades were cut from plastic card and the hub was shaped from a thick sprue using a file and these were assembled to form two 3-bladed propellers.
Colour and markings
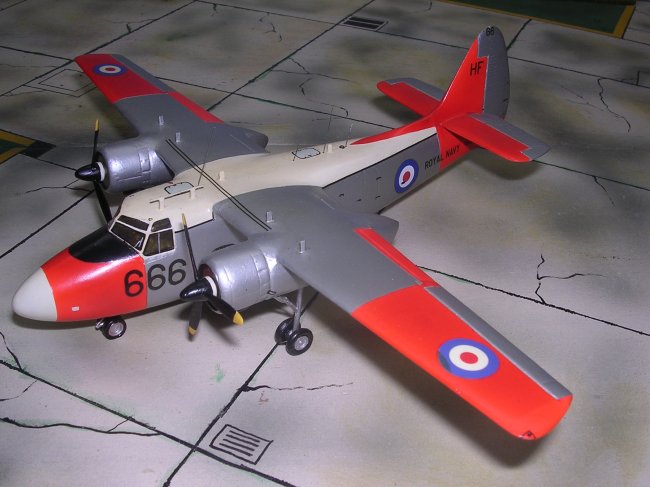
Three Airmodel Pembroke kits were built over time. One was completed as a Sea Prince SWM735 with code 666 on the forward fuselage and HF base letters indicating it was a 750 Squadron based at Hal-Far, Malta. Sea Princes were a very common sight in Malta, sometimes flying in a formation of 6 aircraft, other times in pairs or single. In 1964-65 I have logged several landing at Hal-Luqa airfield:
13.11.64 Sea Prince WM738 ‘674’ HF
11.12.64 Sea Prince WP320 ‘669’ HF
13.2.65 Sea Prince WF120 ‘665’ HF
13.2.65 Sea Prince WF118 ‘667’ HF
12.4.65 Sea Prince WM735 ‘666’HF
31.5.65 Sea Prince WP320 ‘669’ HF
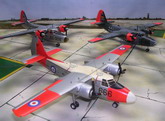
The type were painted in white top of fuselage and the rest silver with day-glow areas at wing tips main planes, and tail planes, nose area and fin and aft fuselage. There were two types. A different version with a small thimble nose front was overall silver with old style yellow trainer bands to wings and aft fuselage. I opted for the other
color scheme. Decals came from an assortment of ‘Model Decal’ sheets.
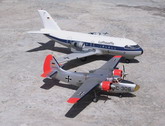
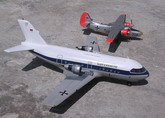
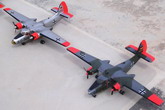
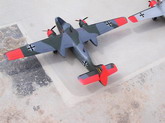
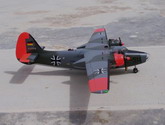
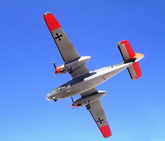
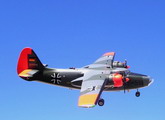
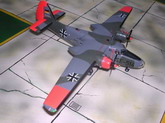
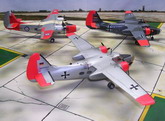
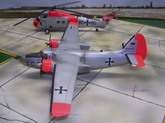
The other two kits built as Pembroke CMk54 of German Navy, one being silver overall with day-glow areas as depicted in an early
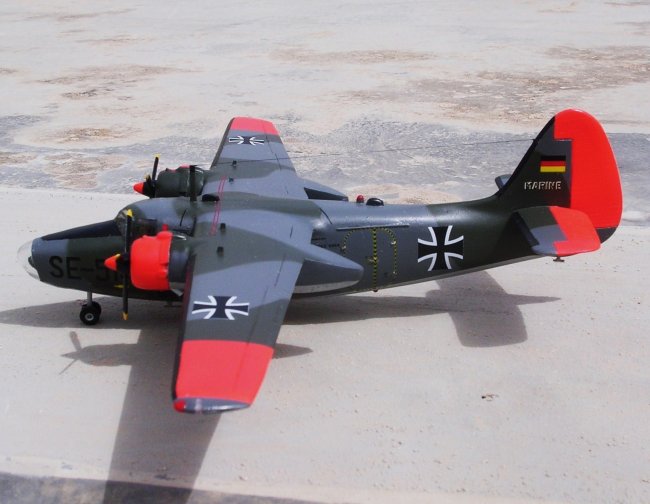
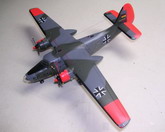
color scheme and the other was in Nato dark grey and dark green upper and silver grey under surfaces. XA1004Dark Sea Grey and XA1004 Dark Green, Xtracrylic brand, were used for the camouflage version. I have on two occasions spotted German Navy Pembrokes landing at Hal-Luqa and these were:
29.6.65 Pembroke Mk 54 BF-562
7.2.66 Pembroke Mk 54 AS-551.
Decals for SE-514 were acquired from the spares in Escadron kit.
The kit was given a coat of Future and finally airbrushed in semi gloss Model Master lacquer.
In the end Kristal Kleer glazed the fuselage side windows.
Conclusion
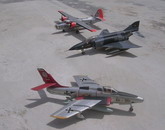
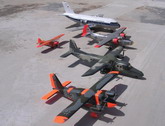
Three Pembroke kits completed as indicated above will now join the other two, a Belgian and another in RAF 60 Sq. that I made earlier. This completes a chapter giving a tribute to a long time type that was based and visited Malta.
Ref: Aviation News Vol5 No16
Carmel
J Attard
Click on
images below to see larger images
|
|