|
The Kit: IMAM Ro-43
Scale1/72 scale
Make: AM-146 from Airmodel of Germany
Cost: 12Euro
Type: Vacform kit with resin detail parts and no decals.
The Kit
The Airmodel kit of the Ro-43 was the first of its type to appear at the scale of 1/72 and goes back to over 20 years since when it was released. Recently however it was reworked to include resin parts. In doing so Airmodel has simplified the task of building the otherwise a vacform kit since all the intricate parts as seats, struts, propeller, engine and cowling, exhaust pipes, were all made in resin.
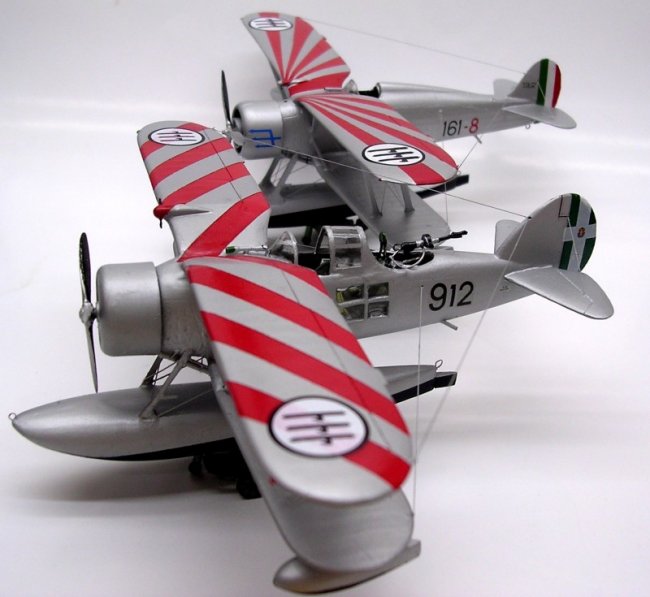
The Ro-43 was a 2-seat Italian Navy floatplane of the 30s. It had a single, centrally positioned float and two other mini floats under the mainplanes. At its time of service it was a common to spot the Italian floatplane flying over many areas of the Mediterranean Sea. It was the time when the Italian dictator, Benito Mussolini, used to boast about and referring to the Mediterranean Sea as “il Mare Nostrum” meaning ‘Our Sea.’ However, this was only to his manner of thinking if not a regrettable statement. The only time that my ancestors in Malta were able to witnesses the Ro-43 on board ships, in our shore was when the Italian fleet surrendered. This happened during the early stages of the war and the large heavy cruisers were herded into St.Paul’s Bay in the north of the island of Malta under the guns and escort of the British Navy to await their eventual fate.
Click on
images below to see larger images
The Kit
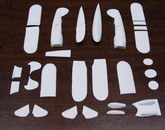
The kit comes in vacform moulded white plastic, soft and reasonably thick and with a minimum of surface detail. No decals are included it is suggested in the instruction sheet that these can be acquired from Micro
Scale/Superscale sheet 72-57. There are 28 vacform plastic pieces to form the fuselage halves, wing parts and tailplane obtions since two different tail fin and rudder designs are included. There are also thirty tree resin parts and three clear acetate parts. The three-page double-sided instruction sheet printed in black and white reveals four side views with different marking scheme to select from and which are basically in overall silver but with high visibility red stripe diagonal markings over the main planes. Also depicted is an enlarged drawing of the crest of Savoia and another of the fuselage fasces. There is also an enlarged four view drawing of the beaching trolley as well as a 1/72-scale drawing repeated to the kit scale of 1/72. This was very helpful to enable scratch build the trolley from the backing surplus plastic that comes with the kit. Other details shown are the instrument panel, a section drawing of the fuselage to assist with placing the crew seats at the correct place, drawing and photo of the aft gunner position. On the same page there is a 3-view drawing of the Ro-43 with folded wings for those interested to build their kit in this format and a three view drawing of the aircraft itself with the wings in the proper order.
Construction
The kit is small in size and possibly ideal for those who never made a vacform kit. Being soft plastic it was easy to produce the razor sharp trailing edges by scraping with an exacto knife and then rescribeing the ailerons and elevator outlines. Rather thick clear acetate provided the cockpit two piece canopies and careful cutting produced the desired shapes of canopy front and rear parts. Like any vacform kit there obviously are no locating pins but guide lugs inside of the joint line were added from scrap plastic card. The upper gull wing also comes in several pieces, but this was no hard task to produce a complete set, which conforms to the scale plans provided. The lower wing was inverted gull and again scale plans are referred to when it comes to fix these in position. Attaching both wings to the fuselage also leaves a gap at the edge that needs to be faired over with putty. It was noted at this stage that the clear Perspex window intended to fit to the side fuselage were rather small for the opening provided. I found best to ignore these completely and go about it by fixing a cross form of plastic piece and fill the 4 square empty spaces with Kristal Kleer at a later stage.
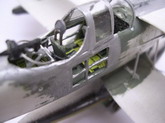
The kit struts are supplied in resin. These were discarded as these were mismatched at the joint. I used Contrail struts, the type available at Roll Models. In the end I added detail, which was accessible to the cockpit and aft of cabin, gunner area. This detail was added to cockpit floor and around the resin seats. The resin cowling complete with engine detail was carefully aligned with the fuselage and secured with a drop of Super glue. The prop was left till the final end. The final stage was applying rigging, which was conducted in the normal way using invisible nylon thread passed through predrilled tiny holes.
Painting and decaling
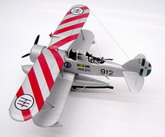
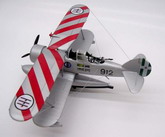
The painted job should not deter anyone from doing a neat model. The way to go about it was first to mask the cockpit canopy area and airbrush the wings in semi matt white. The wing was then given two coats of bright red finish from the Model Master selection. After allowing this to dry I masked the diagonal stripes with the correct width of masking tape. Incidentally there were variations of diagonal designs and some were narrower and more frequent while others were broader and less frequent. Correct reference is highly recommended to end up with an authentically finished model. The lower half of the floats were airbrushed in matt black to simulate anti corrosion bitumen paint familiar with all Italian flying boats as it was an effective way to protect the alum alloy construction of the floatplanes from sea water corrosion. The floats were then masked.
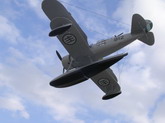
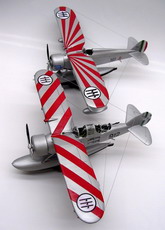
The kit was finally airbrushed in a shade of silver to simulate anodized aluminium since it operated over the Mediterranean waters. I found best to mix silver with a few drops of white and double the drops of clear satin varnish. These were thinned down with white spirit and airbrushed using XF fine Badger spray nozzle. I used markings for the kit from various sources found in my spares decal box. The Ro-43 scale model was finally given a coat of clear satin varnish and displayed on the beaching trolley.
Conclusion
For once more, this was a vacform kit I enjoyed building and here I must say that this was not quite a straightforward job that I am more familiar with when making biplanes and certainly it is not one that can be recommended for the novice
modeller. While this is a kit that can demand a great deal of care and attention, the result is very worthwhile, both as a replica of an aircraft which had a firm place in aviation history and as a model in its own right and it is recommended for modelers with an interest in this period of early in the war years.
Carmel J. Attard
Click on
images below to see larger images
|
|