|
Look
up “Wyvern” on the web or an encyclopaedia & you’ll see that it is a
mythical beast, similar to a dragon variously stated as being capable or
incapable of breathing fire but with two legs & a barbed, poisonous tail.
In heraldry, it is used to denote war, conquest & pestilence.
If you find yourself in standing next to one in the pub, don’t spill
his pint!
If
you thing that describes a funny looking creature then Westland’s Wyvern is an
apt appellation. Development began
in 1944 of a new carrier borne torpedo strike fighter for the Fleet Air Arm,
using a Rolls Royce Eagle piston engine.
Initial interest in the design was also shown by the RAF for use as a
long-range escort fighter but this didn’t develop.
The first production batch of 20 Wyvern TF1’s was soon reduced to 10 as
RR were directed to stop development of piston engines in favour of jet
turbines. Of this 10, only seven
were completed.
Concurrent
with the TF1 was the TF2, intended from the start to have a turbo-prop
powerplant & prototypes were ordered with the RR Clyde & Armstrong
Siddeley Python. The
duplication of effort in designing & testing versions with different power
plants resulted in too many delays & when in 1947, RR ceased
development of the Clyde, the Python became, by default, the power
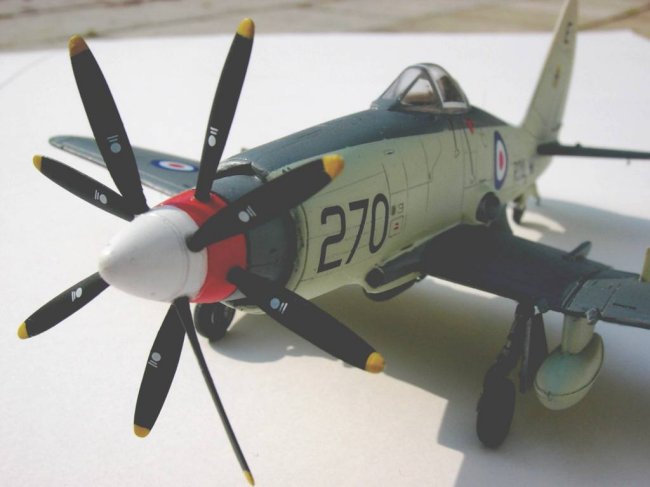
plant of choice. The Python
was bigger than the Clyde & it was this that resulted in the
Wyvern’s “humped back” appearance (the engine was below the cockpit).
The Python drove a pair of contra-rotating four bladed props &
jet exhausts were situated amidships above the wing roots.
|
Click on
images below to see larger images
|
|
|

|
|
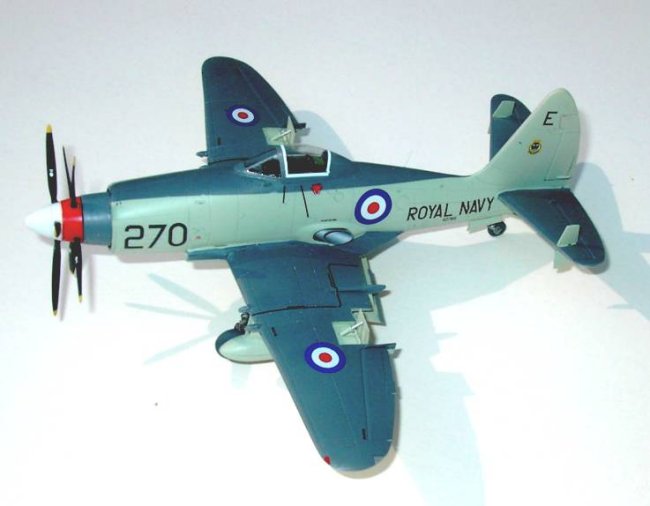
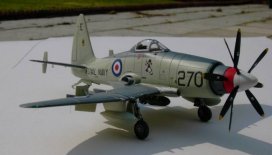
The
definitive service version was the Wyvern S4 with the “S” for “strike”.
Although always capable of carrying a torpedo, experience during WW2 had
led to the belief that no aircraft could hope to get within torpedo dropping
range of any major modern enemy warship. Accordingly,
the “torpedo fighter” became extinct in the FAA after the Blackburn
Firebrand. Reckoned to be a
handful on or near the carrier deck, the Wyvern was however thought to be an
excellent aircraft to fly & capable of packing a tremendous punch with 4 x
20mm cannon, bombs, rockets & mines. Only
four FAA units received Wyverns starting in May 1953 with 813NAS, then 827NAS.
In 1955, both units were disbanded & two more (830 & 831 NAS)
were commissioned in their places. It
was 830 NAS that took the Wyvern to war in the Suez where it performed well
although a couple were lost to flak with their pilots ejecting safely.
Curiously, 813 NAS was
reformed in 1956 & operated the Wyvern until it was phased out in 1958.
Enough
of history; what do you get in the box (actually bags).
The answer is a lot! Although
this is my first resin aircraft model, I have quite a lot of resin kit
experience from building AFV kits from the likes of Accurate Armour.
The parts are cream resin with the exception of a pair of vac form
canopies & undercarriage legs that were cast in black & what seemed to
be a different type of resin. I was worried about their ability to support the weight of
the finished model but this proved groundless.
Surface detail is beautifully done with recessed lines & much detail
is molded in place so you need care to avoid damaging it.
After cleaning up the major components & separating various other
pieces from their casting blocks, I got going.
Cockpit
& fuselage:
Four
part cockpit including rudder pedals, control stick and reasonable
representation of the seat to which I added only a pair of firing handles from
fuse wire. The “tub” includes
the decking behind the seat. The
whole installs into the fuselage halves along with the tail wheel well &
engine cowling after which the fuselage halves can be joined.
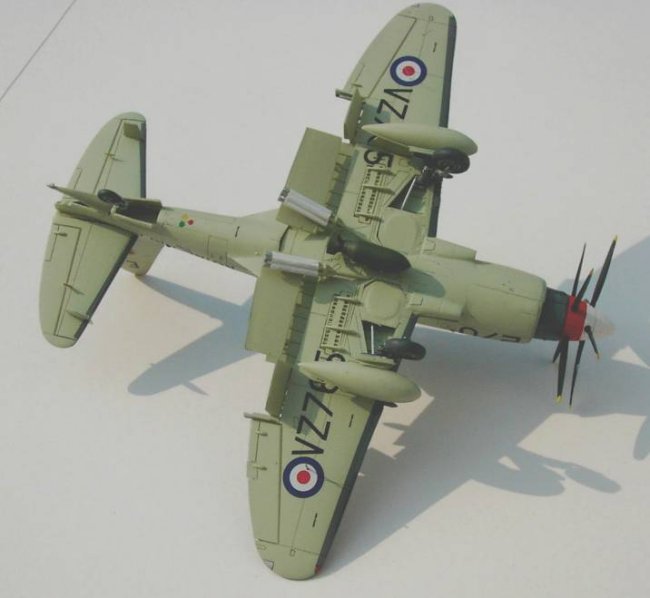
Main
wing:
One
piece, cast complete with the oil cooler intakes, flap guides, wheel wells etc
to which only a part described as the “jet pipe stop” (it didn’t, see
below!) has to be added. The wing
attaches beneath the fuselage & this was the only area of trouble for me.
I had to fit a plastic “spacer” inside the fuselage to widen it &
achieve a good fit. This is a very
“busy” area of both the real thing & the kit so filling & sanding
isn’t really an option. I got the
best possible fit & ran liquid CA glue along the joint.
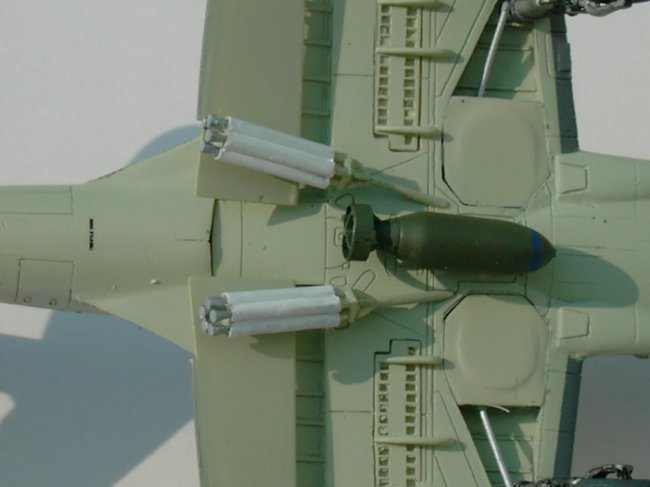
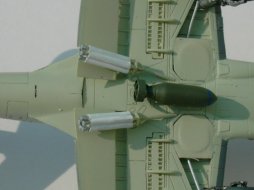
I attached the 90 gallon drop tanks, centre stores rack & the dive
brakes at this stage. The latter
could be installed deployed if desired.
Tail:
The
tailplanes were attached but I omitted the four finlets at this stage to avoid
breaking them off later!
Canopy:
Nicely
formed but quite a bit of trial fitting needed to get a reasonable fit.
When I was satisfied, it received two dips in Kleer, followed by
masking & attaching with CA glue with white glue run around the join &
smoothed with a wet finger & paper tissue.
Several applications needed before I was satisfied.
|
Click on
images below to see larger images
|
|
|

|
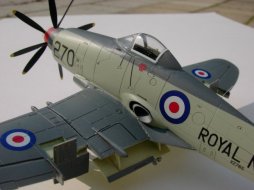
Painting:
I
had a problem with three tins of Xtracolour Extra Dark Sea Grey (EDSG).
None of them did anything but put a dirty grey “glaze” on the resin.
Eventually, I used Dark Sea Grey (DSG), which covered well, followed by a
“mist” of EDSG over the top to darken it slightly.
Then masking (complicated around the wing roots) & Xtracolour
sky. Inevitably, some touching-up
was required after removing the masking & this proved troublesome as EDSG
proved too dark, with DSG being too light!
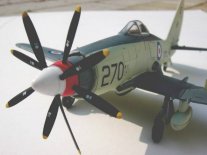
The
spinners are red/white.
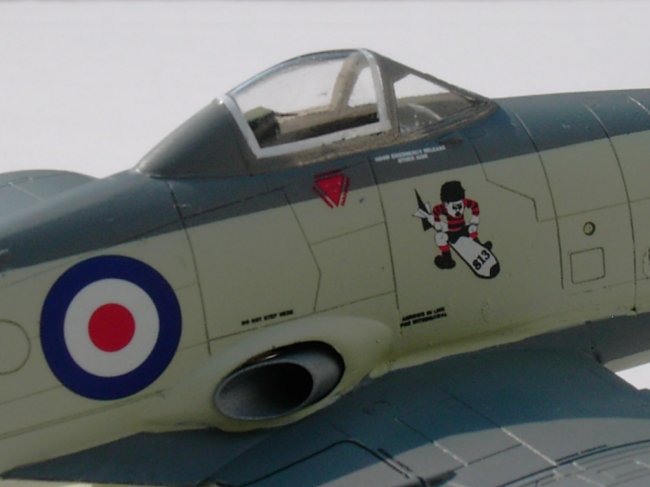
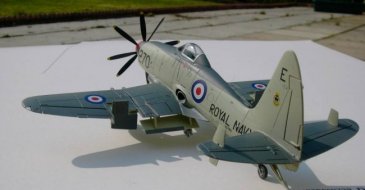
Decaling:
Three
options provided from a mixture of the above mentioned units, including of
course a Suez striped 830 NAS machine. I
opted for the 813 NAS machine with a bomb riding “Dennis the Menace” painted
below the cockpit to starboard. Fantastic
quality, thin & perfect in register & colour.
Beware though as they aren’t that “sticky” & I was lucky not to
loose some whilst rinsing off the residue, having allowed what I thought was
plenty of drying time! Clumsiness
cost me one of the nose codes but after a bit of a panic, I located an old Modeldecal
sheet of RAF/RN letters & numbers in my loft; the “0” was a different
font so I removed the “good” code from the model to make them both match.
I added the prominent white seal around the canopy from white decal
sheet.
Final
Details:
Still
to be added now were:
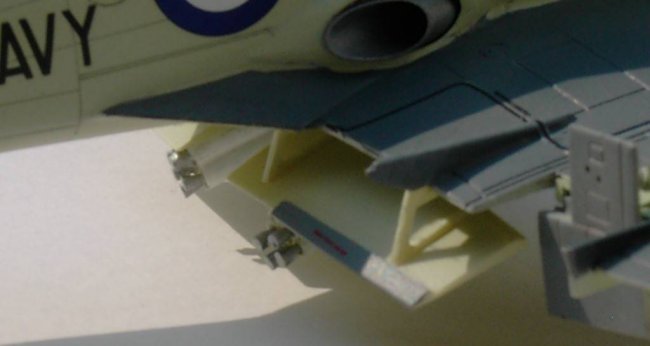
- Dive
brakes, deployed (the actuating jacks needed to be shortened)
- Fowler
flaps, deployed
- RATOG
equipment.
- Undercarriage
- Tail
hook deployed.
- Rockets:
a full complement of 16 are included but if you can get them all off
their casting blocks in one piece you’re doing very well!
In addition, they were the only parts of the kit that showed any
evidence or warping & this too reduced the number available for use.
When the drop tanks were carried, so could only three rockets per wing (a
single & a double mount) & I managed to “salvage” enough to use
but, having painted them, I eventually decided against adding them.
- Bomb
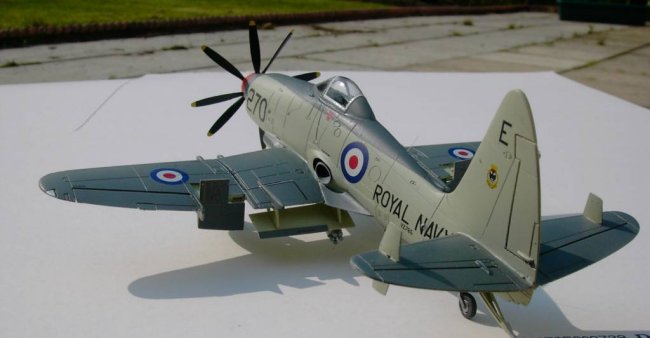
Conclusion:
A
truly stunning model straight out of the box; the amount of detail provided by Czechmaster
in this 1/72 scale kit exceeds that provided by many manufacturers in larger
scales. The unusual subject has
been well researched & a sensible break-down of components provides a kit
that even I couldn’t screw up. Don’t
be put off by the fact that it’s resin. They
are actually in some respects easier than injection moulded models – not least
because, as they assemble with CA glue, the seams are ready for treatment minutes
after they have been glued so assembly proceeds at quite a pace.
I have just received their Supermarine Swift & although
I haven’t “broken the seals” yet, it looks just as good.
I’m awaiting their Scimitar & Vampires.
I’m normally a 1/48 modeller but I’d happily settle for a small
“sub-collection” of these 1/72 Czechmaster kits of subjects that are
never likely to appear in 1/48 apart from vacforms, talking of which the Dynavector
Wyvern in my stash seems to be calling me….winking at me with those “come
on” jet pipes…gotta go!
References:
“Westland
Wyvern TF Mks 1, 2, T Mk.3, S4” published by 4+ Publications
Graham
|
Click on
images below to see larger images
|
|
|
|
|