|
The kits have been around now for 10 years and I have had them in my loft all
this time. Several times I have taken them out and tried to make a start but the
warpage on the fuselage halves has made me put them back unstarted, until now.
The kit comes in a nice soft grey plastic and all the parts
are nicely detailed with engraved panel lines and recessed rivet detail, the
surface of the moulds have not been polished as in most kits these days so there
is a sandblasted look on the kit parts but a bit of fine sanding during
construction soon takes care of that.
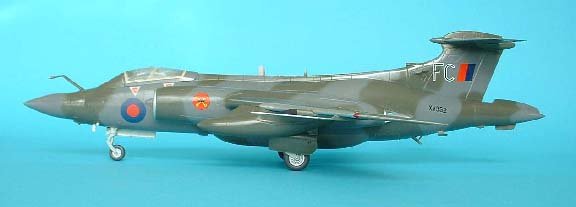
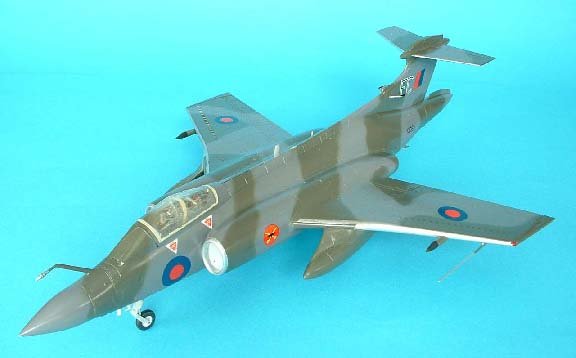
The RAF S2B
came out first and was followed by the Navy machine and to this there have been
a few improved parts namely the underwing tanks. The RAF tanks came as three
separate parts, bottom of the tank and two top halves with pylons attached but
the Navy ones have top and bottom of the tank plus the pylons halves as separate
items, a vast improvement.
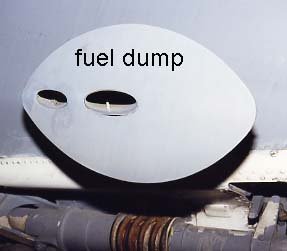
Stores in the RAF kit are, for European ops, tanks and Sea
Eagle missiles and for the Gulf theatre, AN/ALQ 101 jamming pod, AN/ALQ 23E pave
spike, laser designator pod plus an AIM 9L sidewinder.
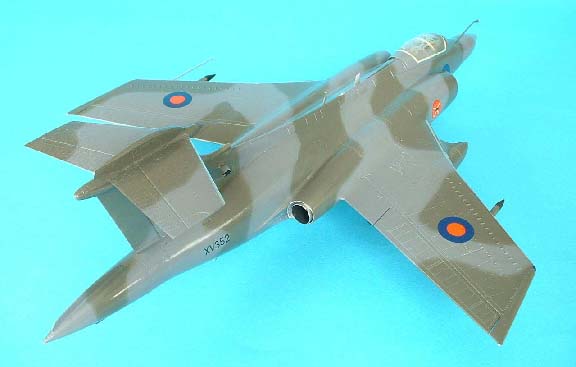
Stores on the Navy kit are wing tanks for UK ops and the
extended tanks for the South African air force plus bombs and rocket pods.
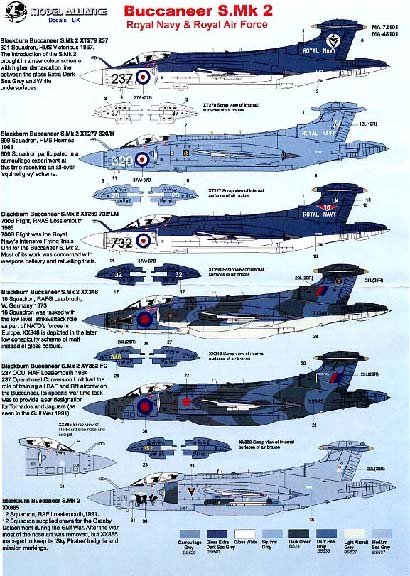
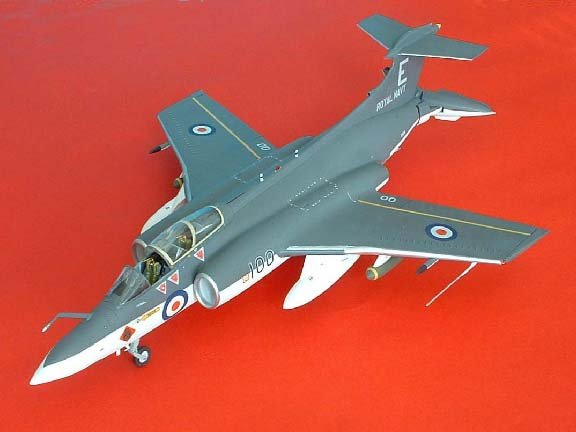
Each kit comes with a huge decal sheet; The S2B Air Force set
has markings for a wrap around green /grey scheme for #12 and #208 Sqdns plus a
Lossiemouth machine based in the Gulf at Muharraq in the overall “desert
pink” scheme, “Sky Pirates” being the machine in question.
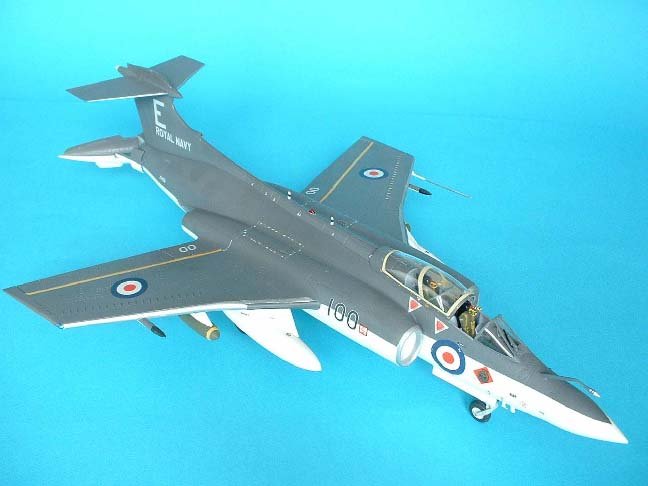
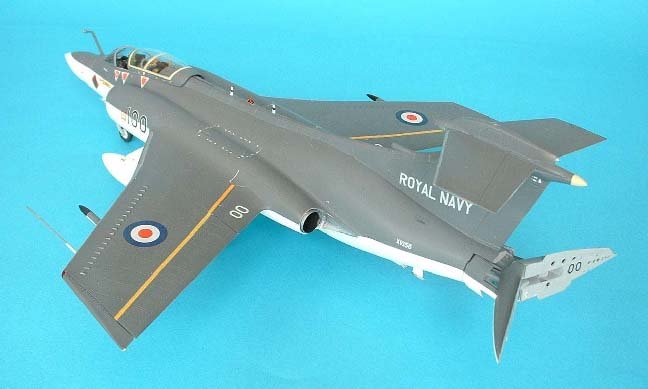
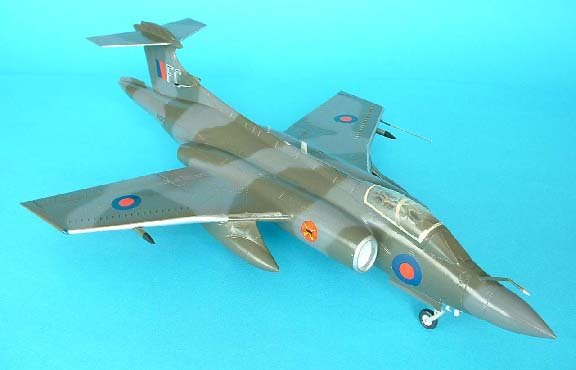
The Navy set is for two #809 Sqdn aircraft one in 1970
overall grey with red/white/blue roundels and a later 1976 version with red/blue
roundels. 800 Sqdn is also represented with a 1966 grey over white scheme and
“A” type roundels, which I chose to make, not forgetting the South African
machine with grey over silver finish.
The instructions are in a booklet form and are quite
easy to follow with no confusing bits and clear camouflage patterns.
My
construction notes.
Usually construction begins in the cockpit but
because of the warped halves of the fuselage were so bad in both kits
(they were not distorted longitudinally but the bottom half was wider than
the top half) I started by cementing the bomb bays to one side of the big
hole in the lower fuselage half, this was clamped with clothes pegs
overnight and the following day was clamped and cemented to the other side
of the hole as well. These were left for two days to harden off while the
other assemblies were started and cleaned up.
The seats are a little Spartan but I dressed them up with straps from foil
and masking tape with tiny bits of wire, if you don’t care for that then there are two fine seats available from “Neomega resins” which are a delight and will make all the difference to your model |
|
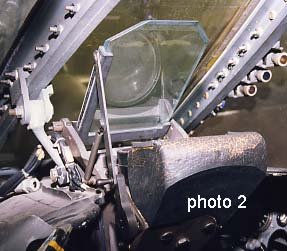
The HUD part 85 looks too
small to me, in fact it looks 1:72nd scale (photo2)so
as the base was already cemented in, I cut the clear top glass off and made a
new one from 15thou clear plastic sheet slightly larger.
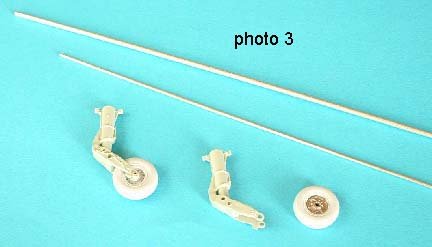
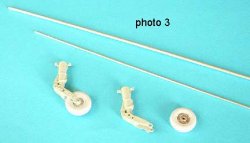
One thing
I didn’t like was the wheel to U/C leg arrangement (I can see the
reasons behind that fit) so I took note of the position of the wheel in
relation to the leg then with some aluminium tubing I made an axle and a
“wheel bearing”. (photo3)The
original “axles” were cut off the end of each fork which was then
drilled out to the new axle diameter and the wheel was drilled to match
the new bearing, later when the legs were complete and painted the
assembled wheels were mounted making it so much easier to paint both
Items.
|
Click on
image below to see larger image
|
 |
|
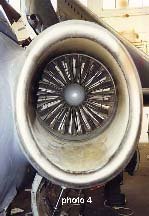
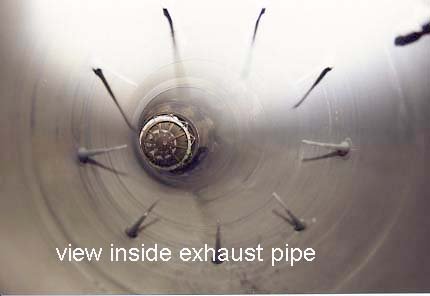
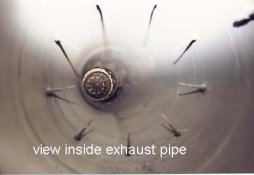
| The
intakes, parts 35, were painted white and the fan steel, and before
placing in the fairings, part 21/22 the leading edge rings were painted
silver, this ensures a neat line between the colours (photo4) |
|
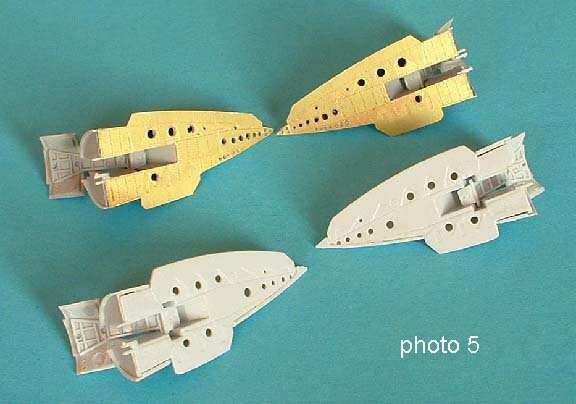
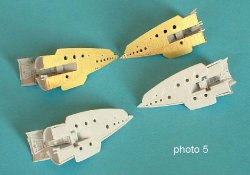
| Airfix have made a good representation of those distinctive Bucc’ air brakes but if you want to display them deployed
they can be improved upon with the Airwaves PE set # AC48072. Firstly you need to assemble parts 31/33 and32/34 then trim off the upper and lower strakes level with the outer shell then the PE parts can be added and these
are spot on with all the holes and dimples where they should be. (photo5) |
Click on
image below to see larger image
|
 |
|
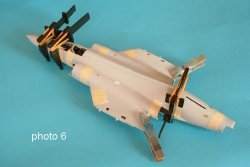
| The next job I tackled was the fuselage halves, The cockpit bath tub was cemented into the top half carefully aligning the
moulded ribs, I added the seats and second windscreen later when all the cleaning up was done. I had read Jonathan Mocks article in Scale models Magazine (Jan 96) and I used his method to line up all the joints. Starting at the leading edge of one wing root, along the front fuselage side then back along the other side to the other wing root Taping with half inch masking tape as I went. Then along the rear of a wing and along to the tail and back up the other side also, again taping and clamping as I went,
(photo 6). This was the only way to bring the top and bottom together and this must be left for at least one day to harden. |
Click on
image below to see larger image
|
 |
|
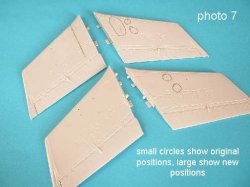
| In the
mean time the outer wing panels can be assembled bearing in mind the
different wingtips for the Gulf war version in the RAF kit and from
Jonathon’s review I learned that the navy pylons needed moving inboard,
the centre line should be 14mm from the wing fold line and the holes for
the inboard pylons/tank should be 6 mm inboard of the same line. (photo
7) |
Click on
image below to see larger image
|
 |
|
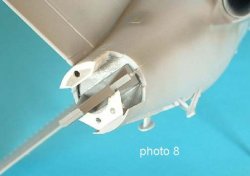
Once the
fuselage was cleaned up I added part 12 and 25 and built up some of the
internal structure around the airbrake mechanism (photo
8) then I added the wings, intakes and
exhaust assemblies. Again the joints needed cleaning up and a little
filler added here and there on the wing joint, mine were both assembled in
the flying position but parts are provided for the alternative folded
position.
|
Click on
image below to see larger image
|
 |
|
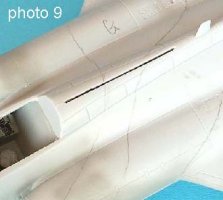
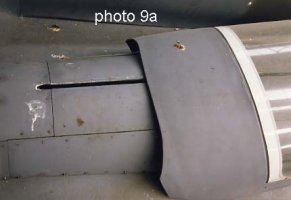
Just behind the cockpit on
the spine is a long slot that the canopy guide runs in, I have cut this into the
fuselage by drilling a line of tiny holes and joining them up with a scalpel
then inserting a fine saw blade to continue the line, once cut a nail file was
used to clean up the edges (photo 9).
Don’t cut this before assembly as you might break something while under
stress.
|
Click on
images below to see larger images
|
 |
 |
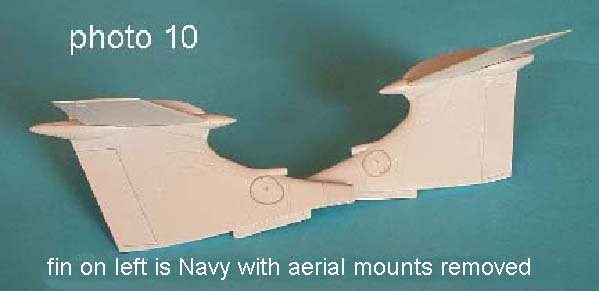
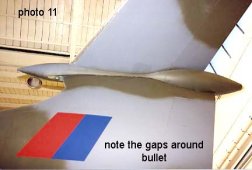
There is a
difference between the fins on the two versions; the Navy fin has no aerials
fitted so you can fill the holes and sand off the base plates (photo
10), the RWR fairing on the rear end of the bullet
needs modification for the option “B” but cut away the tip gradually until
you get a good match in diameter. Attach the tailplanes which are a good fit,
this is better than the real aircraft which has great gaps around the bullet/fin
join (photo 11). Check
the fin and tailplanes are all square on the fuselage while the cement sets and
leave to harden overnight.
|
Click on
images below to see larger images
|
 |
 |
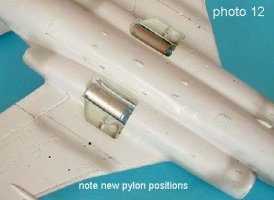
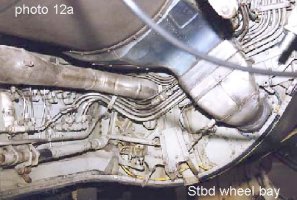
I
decided to close the airbrakes on the RAF plane and so before assembling the
linkages etc. I cut the strakes from the top and bottom as they are rather thick
and when all was assembled I added only one of each back to the centre join line
My next job was painting the wheel bays (photo 12)
and door interiors and when complete the doors were placed on a blob of Blutack
and pressed down in position to mask the area.
|
Click on
images below to see larger images
|
 |
 |
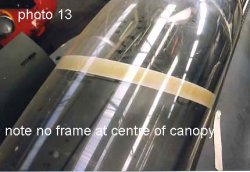
| I dealt
with the canopy at this time also; you will note that Airfix has moulded a
frame line across the centre of the canopy which does not exist on the
real thing (photo 13),
in fact there is a metal bridge on the inside in that position with a
packing of some sort to protect the Perspex, I simulated this by painting
the inside of the canopy along those frame lines and then the outer
surface can be sanded to remove them before polishing back to a clear
finish. Both the windshield and canopy were now masked up, the screen was
cemented on but the canopy was tacked on with PVA glue to leave it movable
later. |
Click on
image below to see larger image
|
 |
|
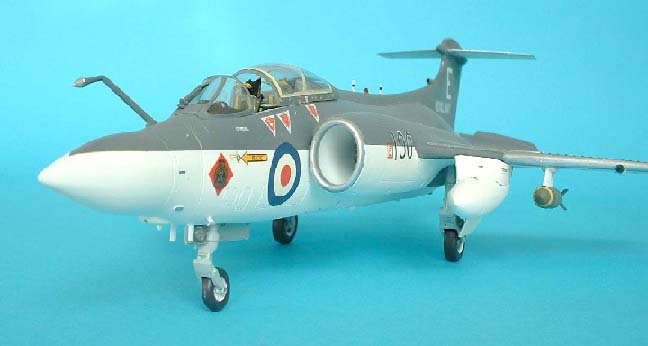
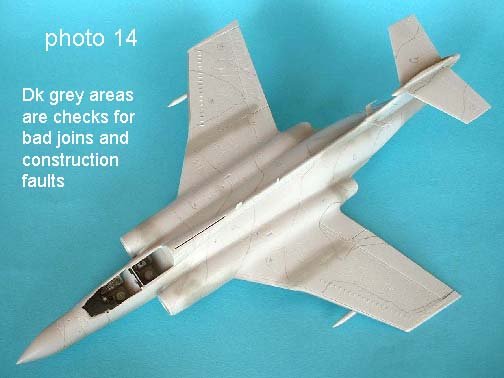
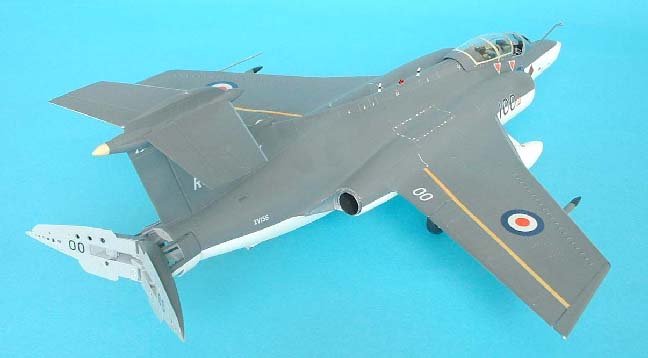
Painting and decals
Before painting some Dk grey paint was sprayed on all the
joints to make sure the surfaces were good and any imperfections were treated.
On the Navy version I sprayed
Humbrol Hu130 white, and then masked that to spray the Hu123 extra dark sea grey.
On the Air Force version I used
Humbrol Hu164 Dk sea grey, then Hu163 Dk green sprayed on freehand, the
demarcations here are very soft, on the real plane I inspected, so I covered
this model as close as I could to the original.
A couple of coats of
Johnson’s KLEAR (Future) were sprayed on and left for a day before starting
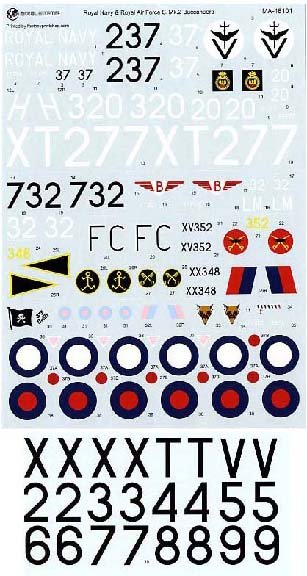
the decal placement. This went fine for my Navy machine but the decals for the
RAF model just broke up in the water leaving me desperate but fate smiled on me
again at the Southern Expo where Model Alliance decals came to my rescue with a
sheet for several Bucc’s, sheet # MA 48101, this gives the various emblems
needed but I still have no walkways etc. but I have a request in with Airfix.
|
Click on
images below to see larger images
|
 |
 |
Another coat of
Klear then a final flatting coat, a mix of 3 parts Klear with 1 part Tamiya flat
base. Now all the tiny details like Nav lights etc can be painted on and all the
masking removed. The canopy on my model was now removed and the seats along with
the back seat screen were added. The Blu Tack was removed from the wheel bays
and the under carriage was cemented in place and if you remembered to put your
nose weight in then it will stand level, if not well….
My Navy model had it’s airbrakes mounted up now, it isn’t too difficult
but care and some patience is needed to get it all level and opened evenly.
Pitot tube pylons and tanks
are now positioned and small aerials added where needed and there you have it a
large scale Buccaneer.
Ted
Drop by Ted's Website to
see more of his models. Ted
Taylor's Modelworks
|
Click on
images below to see larger images
|
 |
 |
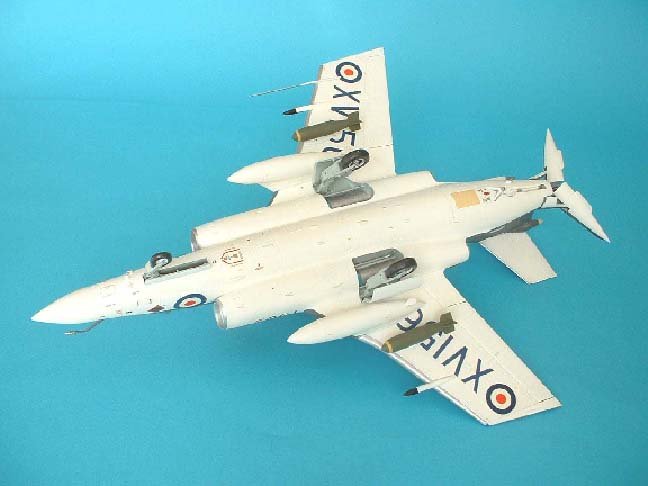
Still awaiting new
decals for RAF model
(note canopy is still masked up)
|
|