|
Kit:
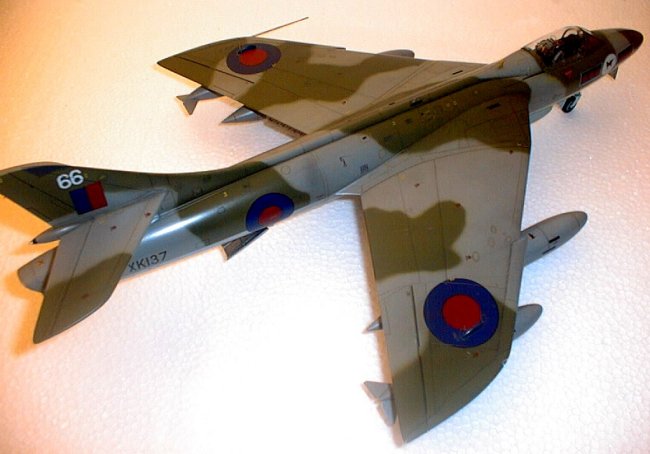
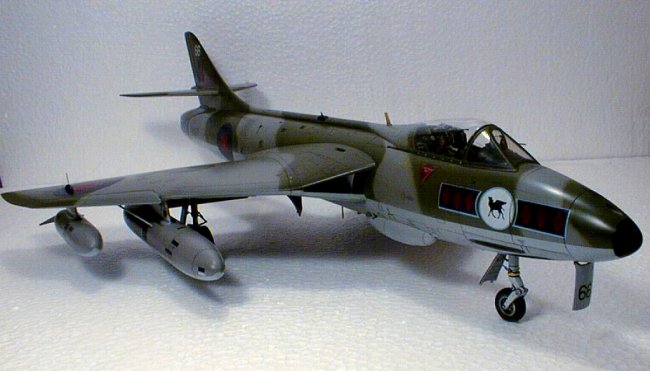
The Hawker Hunter FGA 9 by
Revell is in my opinion a fine kit.
Some of the high lights are:
- Recessed
panel lines
- Recessed
rivet detail
- Separate
flaps
- Very
little, if any flash
- Excellent
fit
- Can
build one of two versions
- Pro
modeler decal sheet (sheet as large as the box!)
- Well
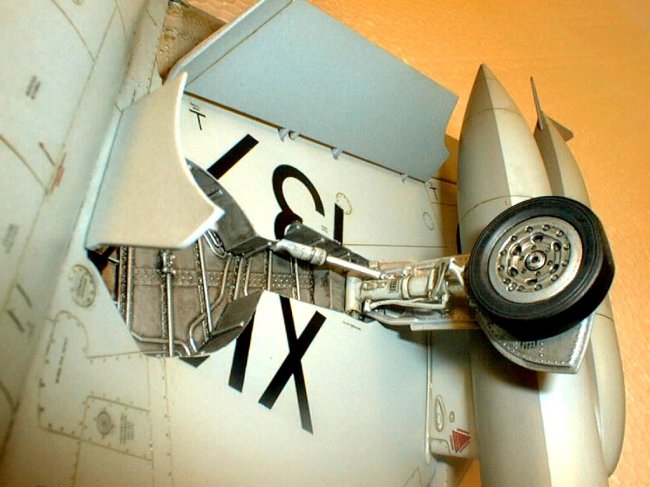
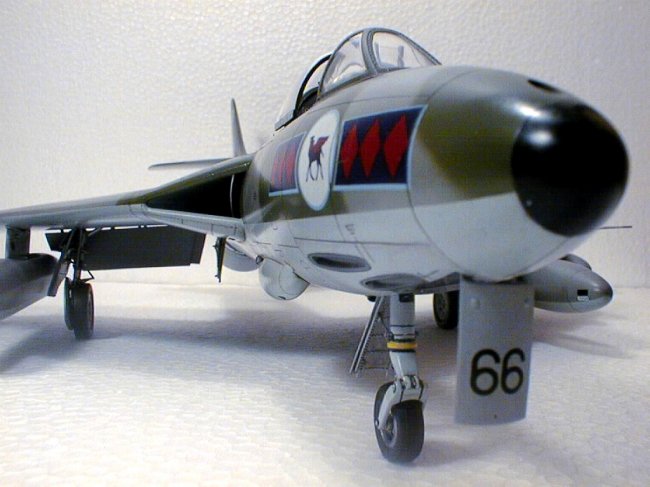
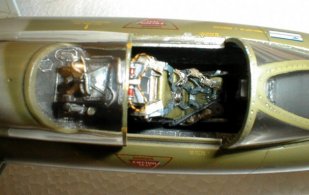
detailed landing gear bays and cockpit
Construction:
The model was built mostly
straight from the box with the exception of a few modifications to the
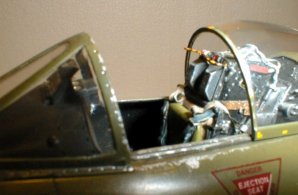
navigation lights and wing tip whip antennas. Also, the ejection seat was
replaced with one from Paragon Details. This
seat has loads of detail and was a blast to paint.
|
Click on images below to
see larger images |
 |
 |
Construction of the kit was
pretty straightforward with no big problems.
The only problem I did encounter was the vertical stabilizer was slightly
bent to one side. This was carefully massaged back to an acceptable position
with diligent use on a hair dryer. All
the basic modeling techniques were used with no major surgery required and I
didn’t even have to break out the putty for the wing root joints or anywhere
else for that matter.
I built up the kit in
sub-assemblies for painting and decaling purposes, fuselage wings and tail
plane, drop tanks with their pylons, landing gear etc. then assembled everything
together.
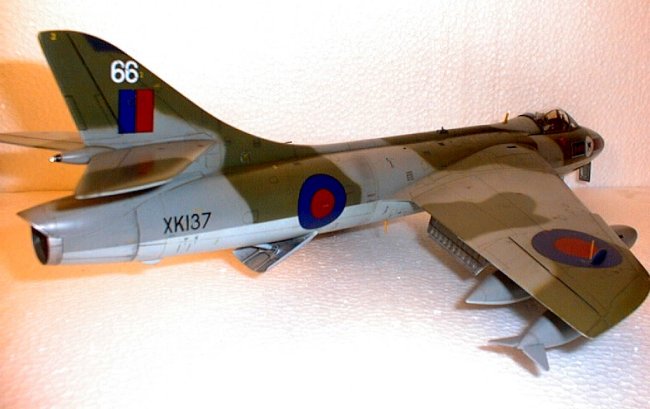
Painting:
I painted the entire model with
Polly Scale acrylic paints. Firstly
the model was prepped for paint and shot with flat aluminum.
This was my primer coat. Next
the bottom of the model was shot with light gray.
I then masked off the bottom and proceeded to shoot the camouflage
colors. When all sub-assemblies
were finished I clear coated (Future) the entire model to prepare for decals.
Three solid nights of decaling later (about a billion stencils) it was
time for weathering.
Weathering:
To accentuate the panel lines I
used two different colors of wash, one for the areas covered in green and one
for the areas covered in gray (top and bottom).
I used artist watercolors diluted with water and a few drops of dish
soap. I flowed these on, and once
dry, wiped the excess off with a dry cotton swap leaving the wash in the panel
lines. Once I was satisfied with
the panel lines I gave the model a light coat of clear flat to seal in the
watercolor and allow me to weather with some pastel chalks.
Once the pastel chalk work was complete I picked out some areas with flat
aluminum to represent wear and tear.
The next step was to tone everything down a notch to try and achieve that
ever controversial “scale effect” I did this by giving the whole model a
misting of thinned out gray, then followed up with a final coat of semi-gloss to
get that satin finish.
The sleek lines of the Hunter
and the quality of the Revell kit made this model a pleasure to build. If
you like 1/32 scale and Hawker Hunters…. build it!
Dan
|
Click on images below to
see larger images |
 |
 |
|