|
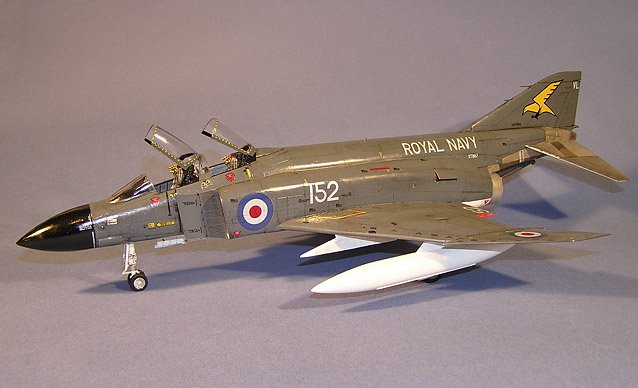
This is a Royal Navy
Phantom FG. Mk 1 completed in the markings of 767 Naval Air Squadron, RNAS
Yeovilton c.1970.
BACKGROUND
Cancellation of the
Hawker P.1154 led to the procurement of the F-4K for the Royal Navy.
This was a modified version of the Phantom to include Rolls-Royce Spey
engines, and other UK built components. To enable operation from RN
aircraft carriers, the Phantom also had an extendable nose gear leg for catapult launches,
and a 180 degree folding nose cone to enable the aircraft to fit on deck lifts.
767 NAS was
commissioned in 1969 as the Operational Conversion Unit (OCU) operating from
RNAS Yeovilton in Somerset, England. It was then disbanded again in 1972. The
front line squadron, 892 NAS operated from HMS Ark Royal until its disbandment
in 1978.
THE KIT
The series of 1/48
Phantom kits by Hasegawa has been well documented and so a detailed
discussion will not be repeated. Suffice to say that they build up into very
attractive, detailed models and there are plenty of after-market accessories for
people wanting that little bit extra. British Phantoms can be built with either
the FG.1 or FGR.2 kits and as this was going to be a RN example, I started with
the former.
|
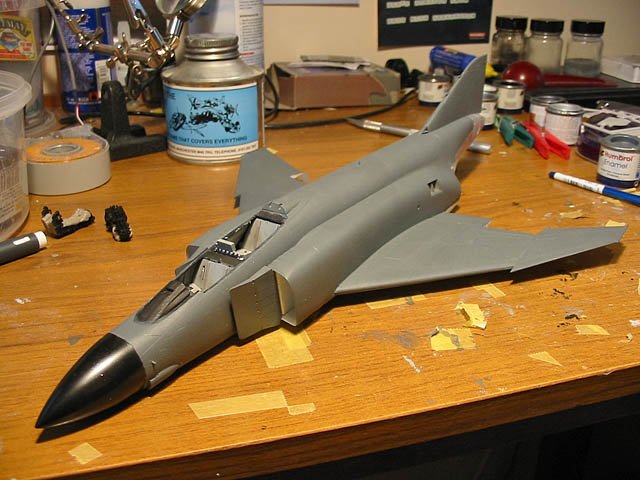
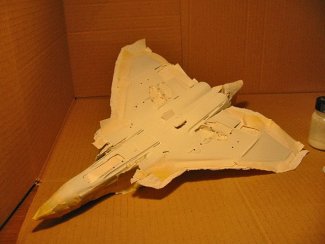
CONSTRUCTION
Starting with the
cockpit, the construction is relatively smooth. The kit cockpit was used,
painting the base colour first and then white over the details that would
eventually be painted black. Once black has been applied over the white, a
sharp blade was used to scrape over the raised detail, thus revealing the
white underneath. |
Click on
image below to see larger image
|

|
|
Whilst working on
the major steps of construction, one should pay close attention to getting the
correct alignment of the engine intake pieces and the main fuselage (can be done
by making additional alignment tabs), and filling any gaps left after mating the
fuselage and wing construction. To keep the gap filling neat and tidy, I used
masked off the gap before applying humbrol filler. Once dry, I then wiped
the excess away with a cotton bud dipped in nail varnish remover.
PAINTING
The paint scheme
that (nearly) all RN Phantoms were seen in was extra dark sea grey upper
surfaces and white lower surfaces. Humbrol 123 and 130 were used for
this, experimenting with a basic airbrush.
|
Click on
images below to see larger images
|
 |
 |
Once the white was
applied, I found that it had managed to seep through my kitchen towel masking.
Two more coats of EDSG then had to be applied to the upper surfaces. Lesson
learned!
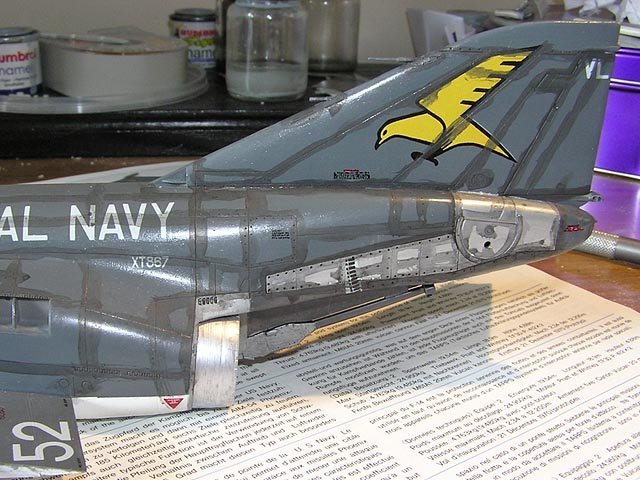
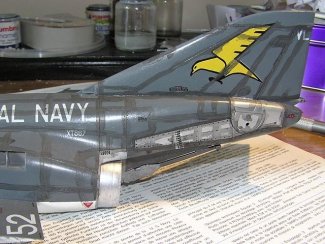
DECALS
I used the 1/48 F-4K
sheet produced by Almark Decals for this scheme which were kindly given to me by
a member of IPMS Avon (I have since bought another copy of this sheet). The
sheet has several options for RN Phantoms. As previously mentioned, my chosen
subject was a 767 NAS example, XT867. The decals require care in application
as when they are wet, a white residue lifts off the paper. To ensure a clean
finish, I first attempted to rinse off the residue from under the decal by half
sliding it off the paper and wiping it gently with a wet finger. This
seemed to work well and with a coat of Klear/Future under and over the
decal a good result was achieved.
|
Click on
images below to see larger images
|
 |
 |
Another area of note
during the decal phase was the application of the large serial numbers on the
lower surfaces of the wings (This is perhaps one of my favourite aspects of RN
Phantoms). I had to dry fit the main undercarriage doors in order to
apply the serial number decals. Once the decal had dried, I sliced it along the
line of the doors with a sharp blade.
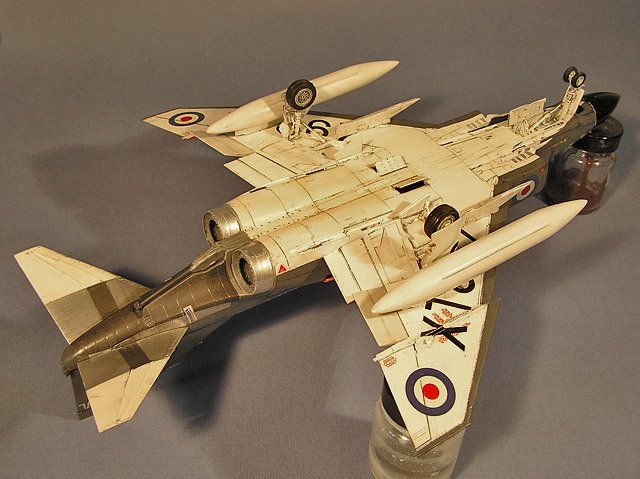
WEATHERING
The weathering was
done using the chalk pastel wash method, a description of which is in the tools
'n' tips section of ARC. I concentrate on one area of the model at a time -
applying the wash and wiping away the excess.
|
Click on
images below to see larger images
|
 |
 |
CONCLUSIONS
This was a very
enjoyable project from start to finish. After being inspired by a visit to the
Fleet Air Arm Museum at Yeovilton, the very place this aircraft operated from, I
knew I had to have a RN Phantom on my shelf. The kit, whilst not being an
absolute "shake and bake" goes together nicely. The Almark decals were
very good value for money, and with some care they can produce excellent
results. I added a pair of Verlinden seats which, while not being strictly
accurate, add provide extra level of detail to the cockpit. Having just
bought the Revell re-boxing of this kit, I am planning to do the 56 Sqn
"Firebirds" as my next British Phantom.
Phil
|