1/72 Hasegawa Me-262A

Gallery Article by Eric Bade on Sept 20 2003


This 
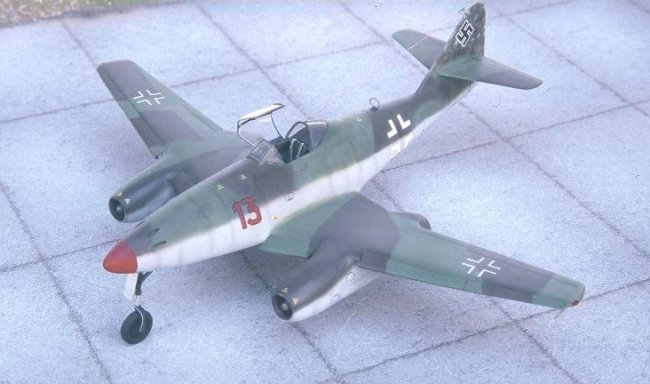
kit is an old build, but with new paint. I built the model 2 or 3 years ago using my then new Aztec airbrush and Aeromaster enamel paints. At the time I was quite satisfied with the end result which was one of my first attempts with an airbrush and the first at Luftwaffe camos. Time passing, I felt my Me262 was no longer up to my current standards, so I decided to salvage it, retain some parts (resin cockpit and slats – Cooper details) for my new project.

One of my friends thought it was a pity to destroy this kit which was, according to him, quite well built, and I should better repaint it instead. I decided to follow his piece of advice, after all my first aim was to practice on German camouflages (I am not a specialist there). 


Click on images below to see larger images

Construction  
First thing to do was to remove paint. I was not looking for a like new paint free surface. What I wanted was a smooth surface. I used fine grain wet sandpaper and proceeded with a gentle and careful sanding all over the kit. Decals and paint were sanded flush or lost in the process.  

Painting and decaling  
My aircraft was to represent Heinz Bär "red 13" aircraft which was available from a Superscale decal sheet. I used several sources to determine painting on this plane which actually is a standard camouflaged RLM76/81/82 machine. I found my inspiration from the book "Luftwaffe Fighter Aircraft in Profile" by C. Sundin and C. Bergström. An excellent publication with amazing and very inspiring artwork. 

All paints are Gunze acrylic. 

I made my RLM76 with a mix of 1 part of RLM65 to 3 parts of white. Result is a very light bluish grey. 

RLM 82 is taken from the series 400 Gunze colors. 

RLM83 Braun Violet comes from the same series of paint but I found color was very close to an Olive drab. I added some drops of "Mahogany brown" just to have it closer to get a browner shade. I am not saying Gunze is wrong about this shade. I think there must have been several variations of the same color, but my references show a browner and darker color. 

The 
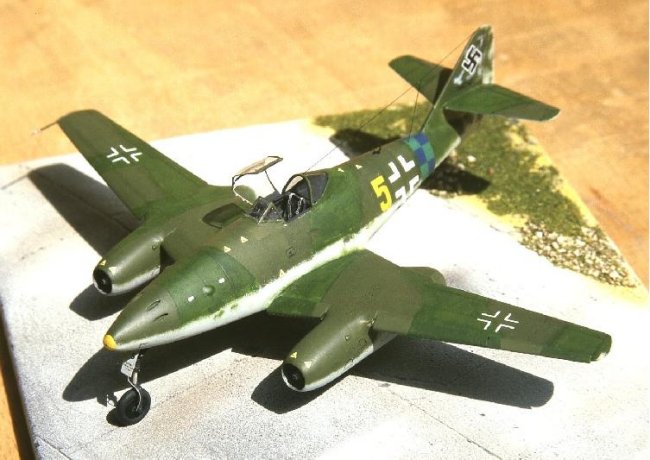
chosen paint removing technique imposed me another adaptation. The fact that I did not actually remove paint from the kit, but sanded it smooth instead, left me with an overall plain surface. Nearly all panel lines recesses were lost. I therefore could not enhance them with a wash, as I normally do!!. I tried a new (to me) technique, airbrushing diluted "translucent smoke" color over would be panel lines. The same technique was used as a measure of weathering, staining main colors.

Repainting this kit was an interesting experience :

  • I revamped a kit

  • I learned some new techniques.

  • I am quite satisfied with end result

Eric Bade

Click on images below to see larger images


Photos and text © by Eric Bade