|
The F-15, in all its
guises, has long been my favourite aircraft. I had hankered after the large
Tamiya offering for some time, having built a few in 1/72nd and 1/48th, but I
always found the cost to be a bit off-putting. As luck would have it I stumbled
across a model at half price so couldn't afford not to buy it! I was very
impressed with the detail at this scale and realised why Tamiya and other
manufacturers have to charge so much for models of this calibre.
I decided that to try and do justice to the model I would use aftermarket
detailing sets and improve the already excellent kit by some super-detailing.
Inspired by models on ARC and F-15E.com and using the wealth of reference
material on these sites I set about the task of creating a mini-Mudhen.
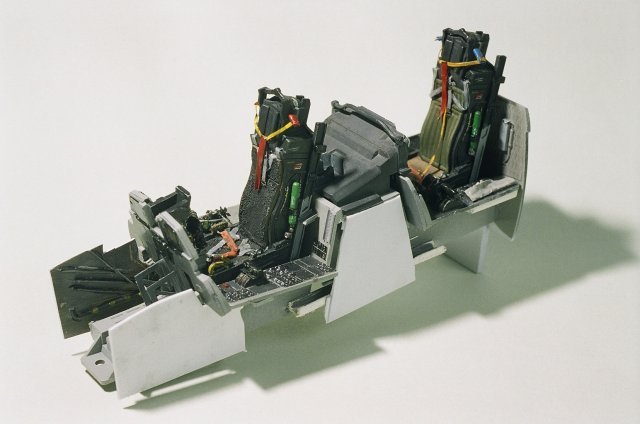
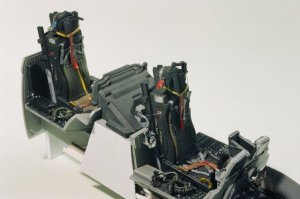
| The place to
start for me was definitely the cockpit. I poured over every possible
photo I could an decided to create a sheepskin effect for one of the seats
as I saw that on the sites and thought it would add a little interest and
realism. This was achieved by coating the seat cushions and backrest with
a thin coat of filler and then teasing the texture out with the bristles
of an old toothbrush. Seat straps were added from the Eduard F-15E cockpit
detail set, RBF tags were adapted from the kit ones and from Verlinden. |
Click on
image below to see larger image
|
|
|
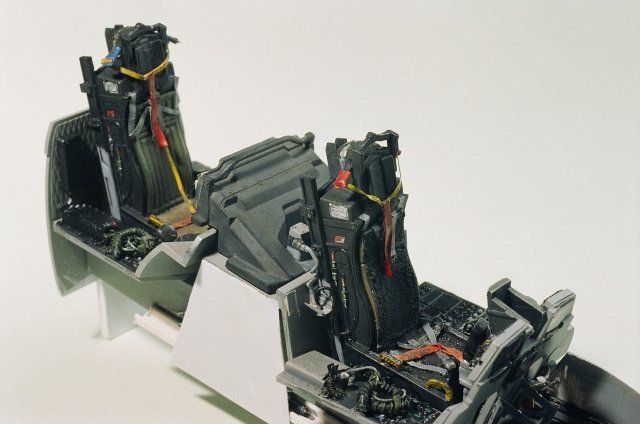
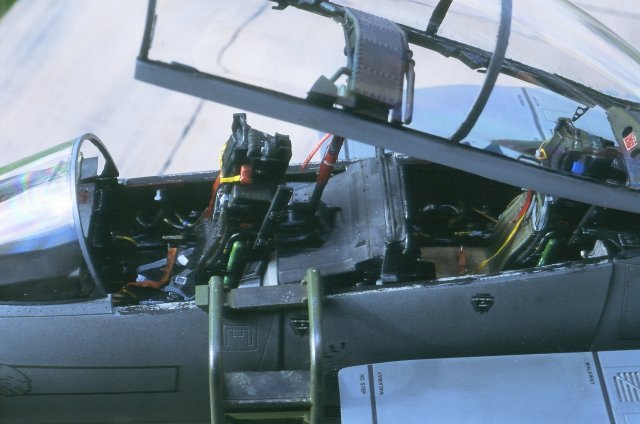
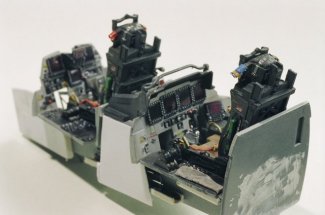
For the coiled up
oxygen hoses I wound fine wire around thicker wire and added cable from even
more wire, secured by strips of lead foil. The map lights were coiled wire again
and the throttle quadrants were beefed up using "Greenstuff" available
from Gamesworkshop stores. For the instruments I filled each dial with white
paint, drizzled black ink into them (which left the details showing) and then
finished them off with some Klear. The CRT screens were cut from film negatives
and aligned slightly closer to the front of the panels before being washed with
blue and brown inks to give the impression of slightly smeared t.v screens. To
finish the cockpit area I cut out the sidewalls and added pipes and hoses for
effect before assembling it, added the available switches from the Eduard set
and detailed the sidewalls of the fuselage. I also spent quite some effort
detailing the nose wheel undercarriage leg before I completed the nose section.
|
Click on
images below to see larger images
|

|
|
For the HUD I had been very
impressed by the models of Douglas Chan and Massa Narita on F-15E.com but
decided to go a slightly different way. From the pictures in the Lock-on book
the HUD seemed to have a pinkish tinge so I opted for that. I mixed some Citadel
Magenta ink with Johnsons Klear, dipped the kit part in it and let it dry. I was
very pleased with the effect and I think the colour is about right.
I had decided that my Eagle would be modelled to appear as if it was on static
at an airshow and so the covers were modelled over the ejection seat pitot tubes
and the decals were left off the CRT displays as they would be switched off. The
front section was assembled and the instrument shrouds added to complete the
nose.
I was staggered by the size of the model and decided to build up sub-sections
first and then complete the kit by assembling the sub-sections together. If
anyone can suggest an easy method of dealing with such large models I'd be
interested to hear them.
Now I'll talk about the main
undercarriage and the intake ducts/jet exhausts.
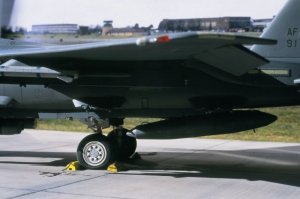
From the many reference photos on ARC and F-15E.com along with my own pics
and the Verlinden Lock-On book I wanted to add a more detail to the main
gear legs, wheel bays and gear doors. The Eduard F-15C detail set gave me
some details but I added the rest from scratch. Brake pipes were added
from wire, chrome paper for the oleo strut and various plastic rod for
other details. I hollowed out the kits rubber tyres to allow the side
walls to bulge and scratch built a set of wheel chocks to represent some
that I'd seen at RAF Waddington in 2002/3. |
Click on
image below to see larger image
|
|
|
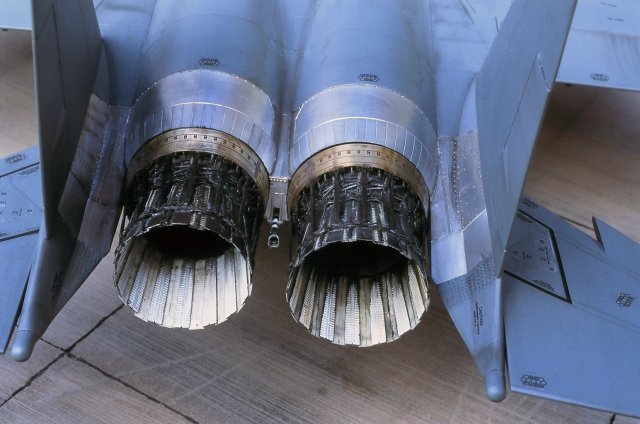
For the jet intakes
I followed the kit instructions, but for the jet pipes I had bought a pair of
etched metal aftermarket parts from Mr. Parkin at Flightpath. The kit exhausts
are very good, but the Flightpath set takes it to another level. These etched
metal sets are models in their own right, very intricate, delicate and minutely
detailed. I painted the components first and then slowly and carefully assembled
them using super glue. Mr Parkin stresses that these kits are not for beginners
and patience is required which I can whole heartedly agree with, but the end
results are well worth the effort and very pleasing. Incidentally, these metal
exhausts don't bounce very well as I found to my expense when I caught one and
knocked it off my modelling table! You know the sound an eggshell makes when it
breaks...........if the port motor looks less tidy than the starboard one, you
know why.
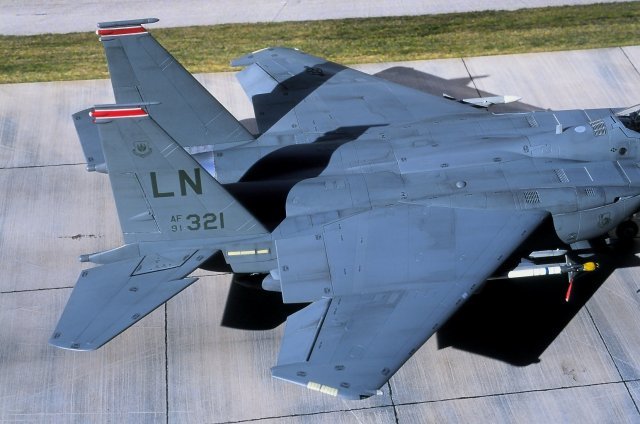
| My model was to
appear as if it had been parked up at an airshow and weaponry would be
kept to a minimum but I spent some time painting the pylons and rails as
the kit items are very well detailed, I drilled out various holes and
added cabling inside the CFT rails and weathered the targeting pods. The
only weapons on the aircraft are one AIM-120 and one AIM-9 on the wing
pylons both from Flightpath, and a pair of scratch built travel pods on
the rear most CFT mounting points. RBF tags were added, again from
Verlinden, and the undercarriage legs weathered using artists pastels to
represent brake dust. |
Click on
image below to see larger image
|
 |
|
AIM 120 |
|
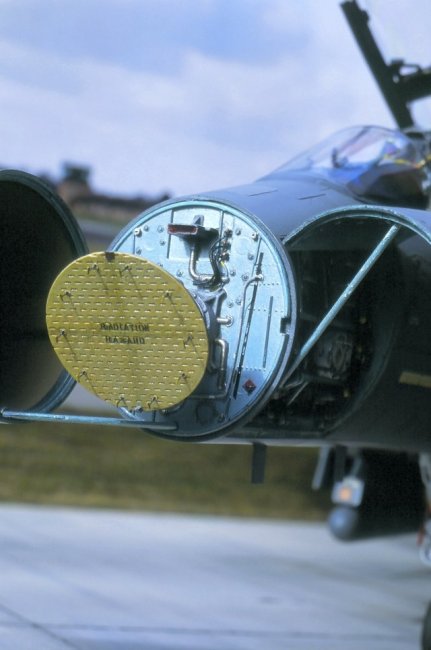
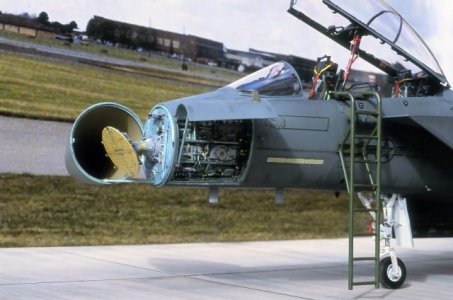
I now turned my
attention to the avionics bay and radar. Although the panels would be displayed
in the closed position on the finished model I decided to add a bit of detail
for the fun of it! I used lead wire for additional cabling in the avionics bay
and detailed the radar dish with parts from the Eduard F-15C set. The metallic
green colour was mixed using Citadel acrylic colours available from
Gamesworkshop stores. I also detailed the gatling gun and bay but haven't had
the door open on that to this day!!
|
Click on
images below to see larger images
|
 |
 |
So far I have the
nose section assembled, the main undercarriage detailed and fitted and the jet
intakes and exhausts built and painted. I thought it was time to turn my
attention to the main bulk of the fuselage. The kit parts were joined and the
resulting gaps filled and sanded as best possible. The F-15E style two piece
rear formation lights from the Flightpath exhaust set were added in place of the
kit items and scratch built exhausts made at the rear of the CFTs. These replace
the heavily moulded kit items. The bare metal panels under the fuselage were
hand painted using a mix of Humbrol metalcote shiny aluminium and a drop of
metalcote steel. The exhaust behind the cockpit was painted with the same colour
after it had had its louvres opened up a bit.
|
Click on
images below to see larger images
|
 |
 |
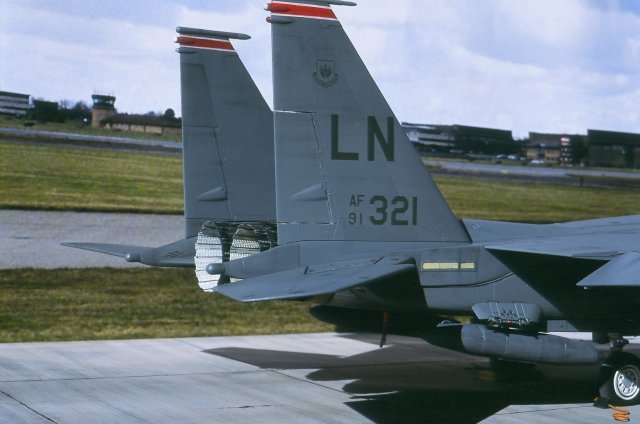
| The wings were
assembled, tail fins added and stabilators affixed. I painted each of
these items individually before fitting them as I was using Tamiya spray
cans (I don't own an airbrush). I applied the markings from Eagle Strike
for a Lakenheath bird and although it wasn't the serial number of the
aircraft I'd seen it would represent those I'd viewed at the RAF
Waddington airshows. (As an aside, this particular aircraft was on
static at the Royal International Air Tattoo, held at RAF Fairfird, U.K.
It was in the markings of the 492nd FS in 2004) |
Click on
image below to see larger image
|
 |
|
I chose to use
Tamiya's AS10 Ocean grey spray paint as I think the colour more closely
represents the true colour than their TS48 Gunship grey which is a little dark.
I also added the seal between the CFT and the airframe from Evergreen strip and
fitted the auxiliary air intakes from the Cutting Edge upgrade set. These had to
be slightly modified to give a more accurate looking profile.
The U.K. based aircraft seem to suffer from the weather more than U.S based
birds seem to. I therefore applied some weathering using artists pastels to the
more heavily travelled/weathered areas. A matt varnish from Gamesworkshop was
sprayed all over to seal in the paint taking care to avoid the bare metal
panels. Great care must be taken as the metallic finish is easily upset by
masking fluids or varnishes.
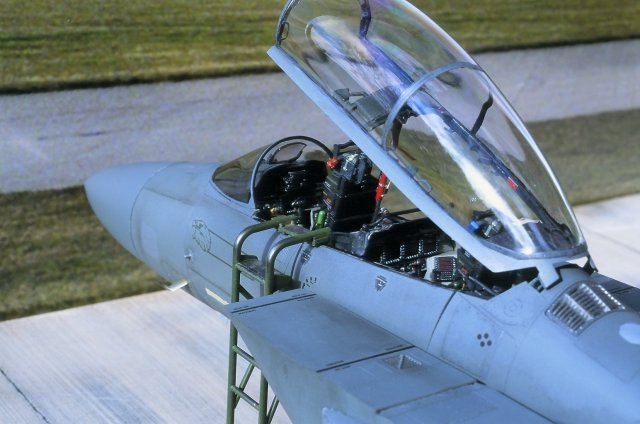
Probably the final task for me was the canopy. I had not been looking forward to
tackling this and was quite daunted. The main canopy of this model was already
detached from the sprue when I opened the box and as I began sanding the mold
line a small crack became apparent. A telephone call to The Hobby Company,
Tamiyas distributor in the UK, and one week later a new clear sprue arrived. My
thanks go to them for their prompt and efficient service. I took great care of
this canopy and finally got it smooth, dipped it in Klear and let it dry. I
added a small amount if brown and black ink to the Klear which gives the canopy
a very subtle tinted look similar to the full sized aircraft. After adding
the remainder of the Eduard detail set to the canopy I tweaked the stay and rams
a little, painted the boarding ladder and she was nearly complete.
|
Click on
images below to see larger images
|
 |
 |
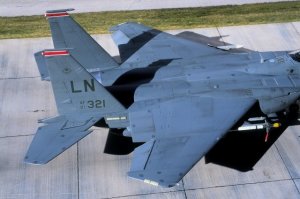
The photos were
taken outside in natural light, in front of a picture I took of the RAF
Waddington horizon, to give the model an appropriate back drop. I am very
impressed by the models of Peter Dron amongst others and wanted to replicate
that kind of realism. Please let me know what you think. The base is MDF, dusted
with pastels and scored using coarse grade sandpaper to simulate a concrete
apron. The caulking is merely thick paint and oil spots and spills were added
using inks.
I very much hope you like my MUDHEN. Thank-you for taking the time to view it,
any comments, good or bad, are always welcome.
Guy
|
|